The images below are various collections which don't obviously fit in the main categories. The subject matter varies widely, with no real connection between each collection.
There are some gear reviews here too. These are mainly for the benefit of my students who are beginning to extend their kit beyond the camera, lenses and tripod. To that end, the kit shown below will mainly be at the budget end of the scale.
I've covered macro attachments and extensions, the Moza Air 2 gimbal, telephoto extenders and neutral density (ND) filters. More reviews will be added periodically.
Click the thumbnails below for expanded galleries.
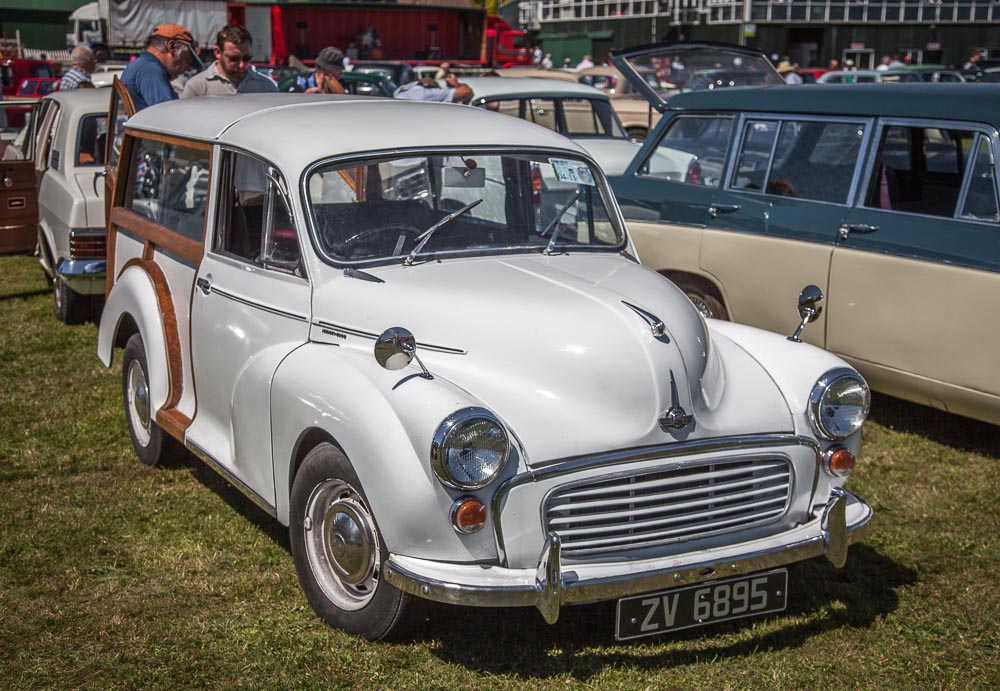
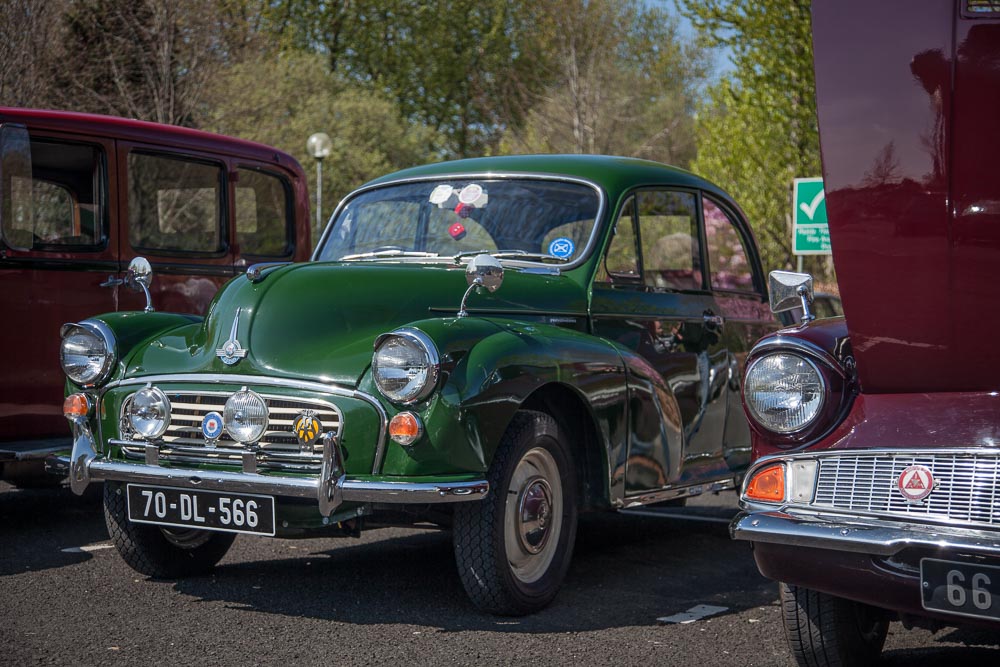
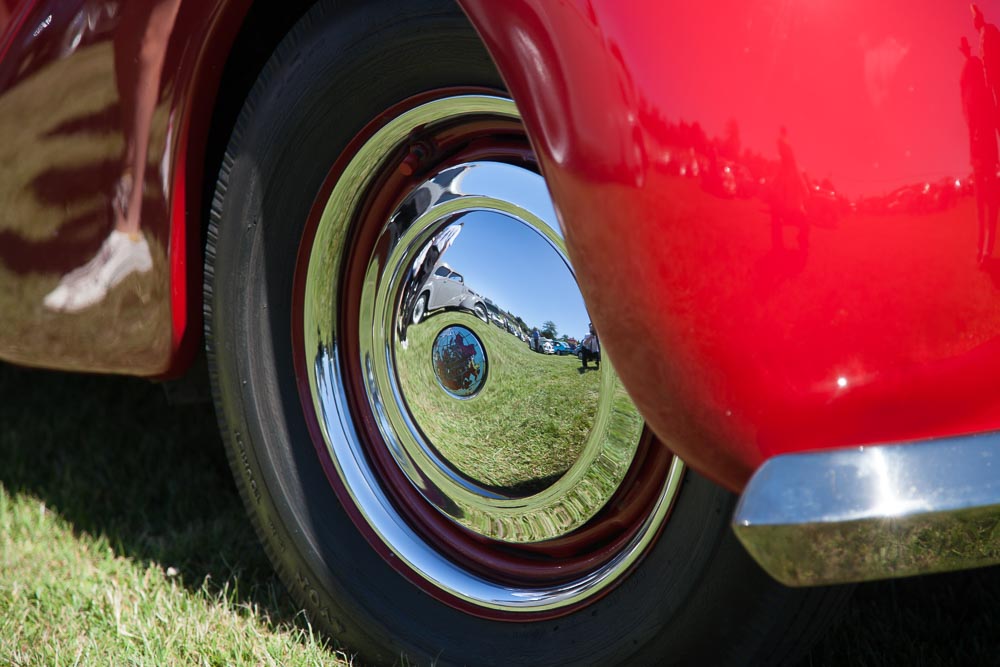
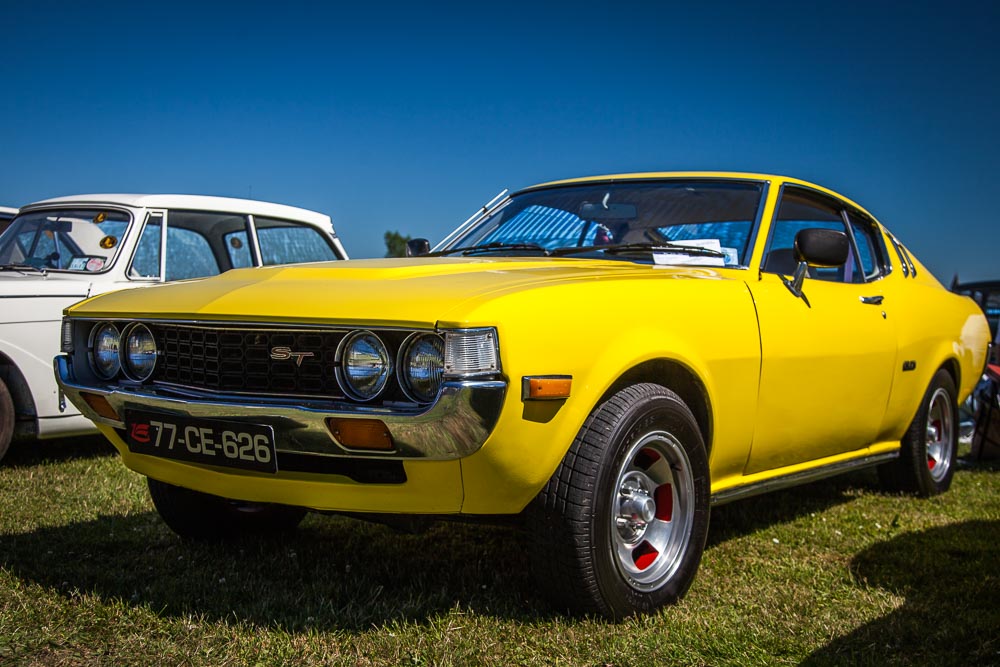
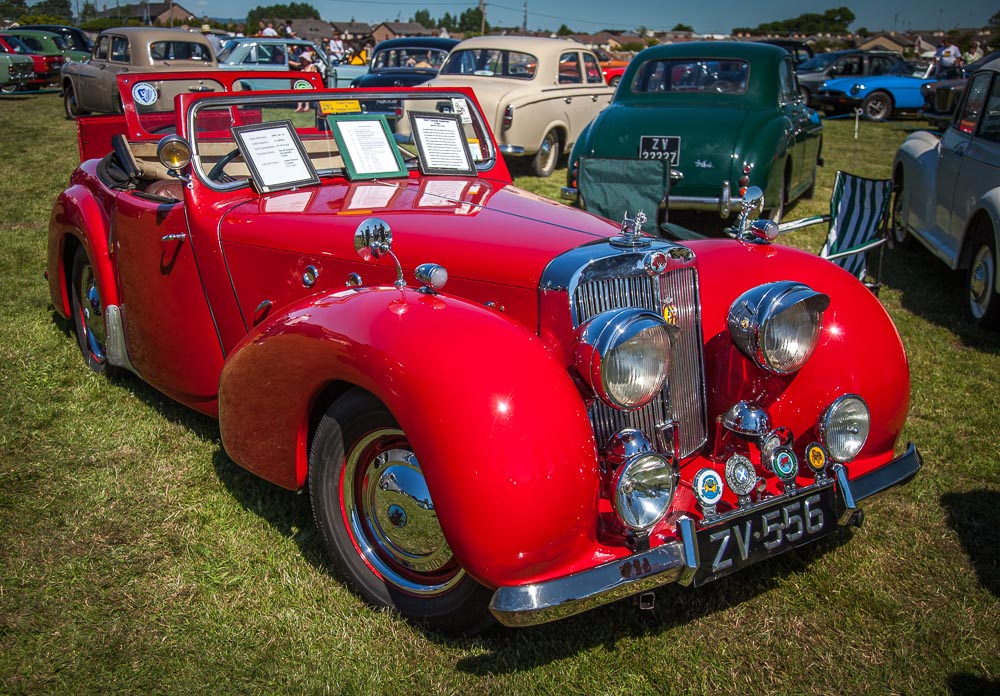
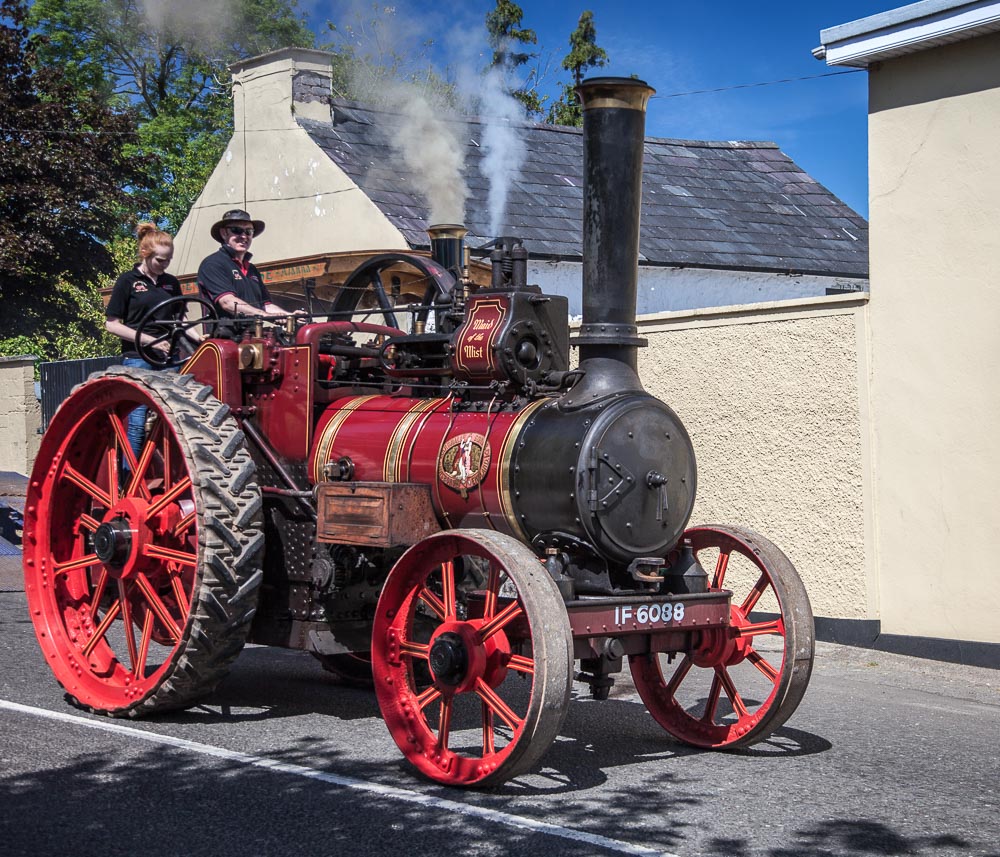
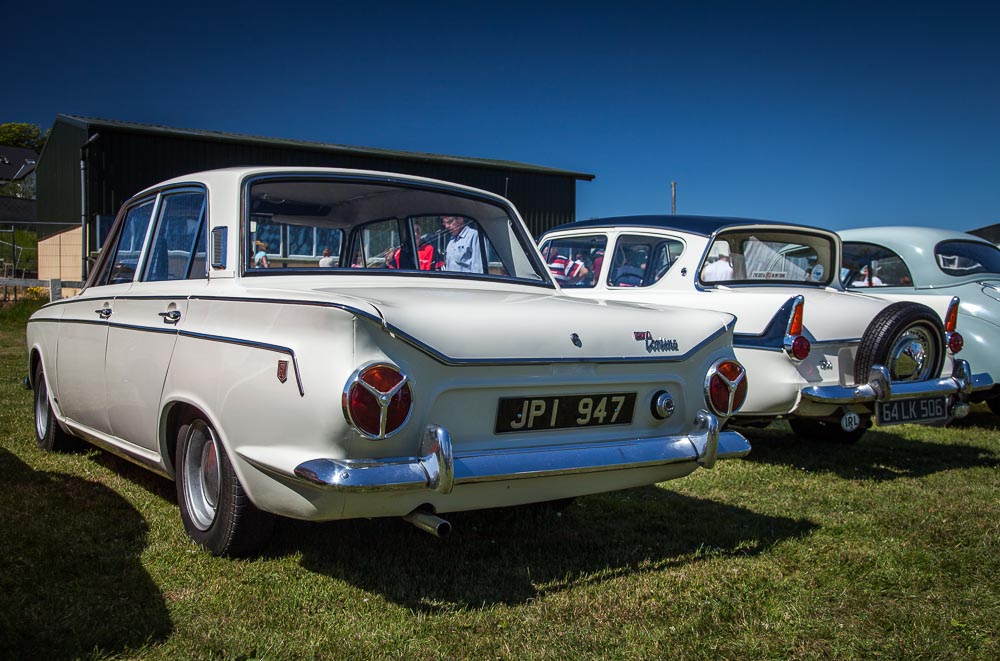
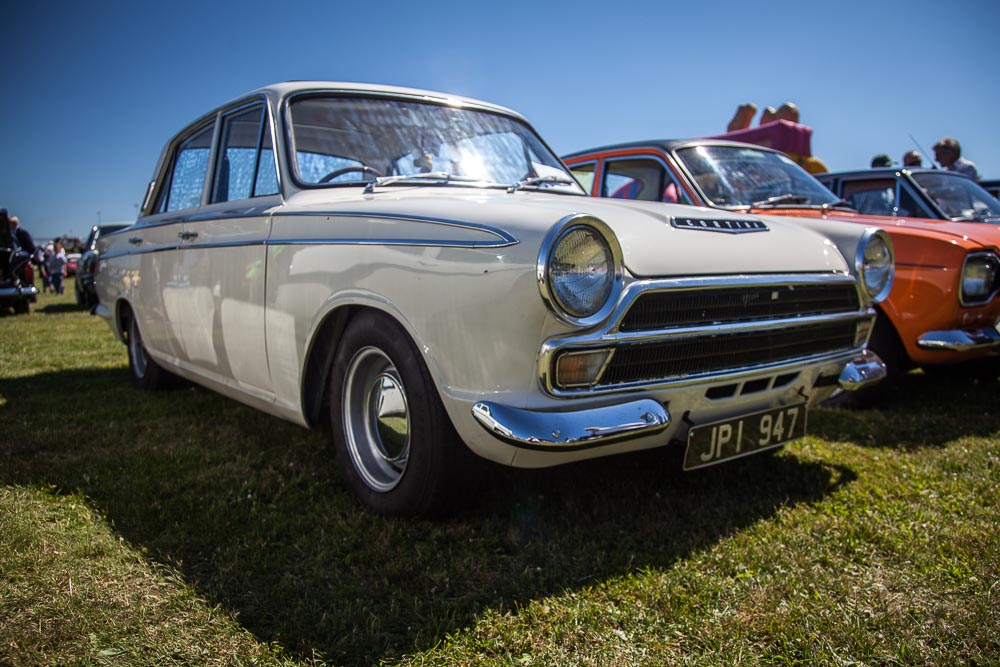
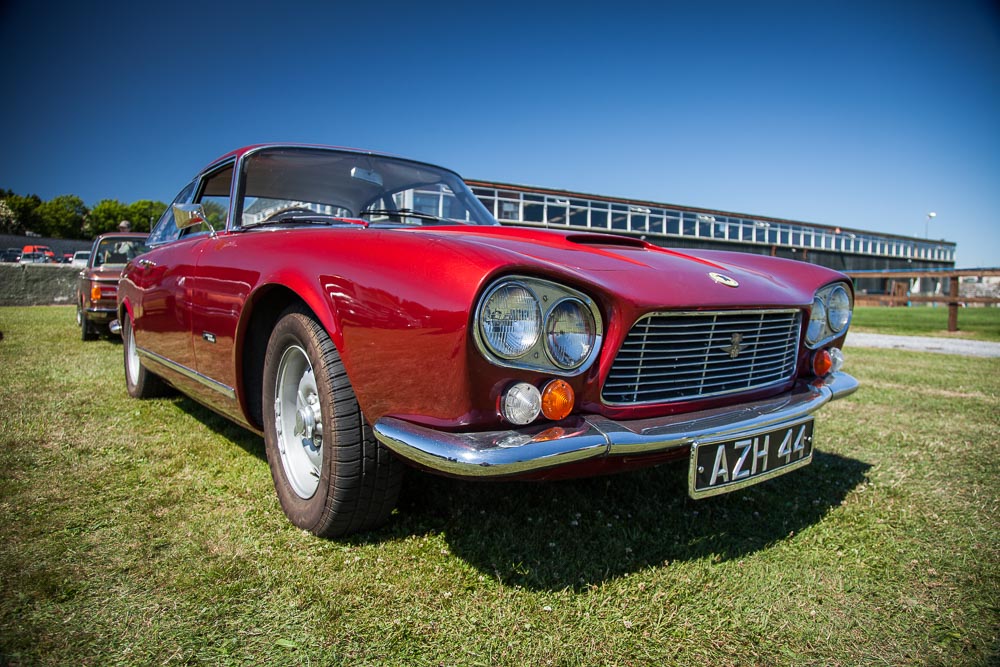
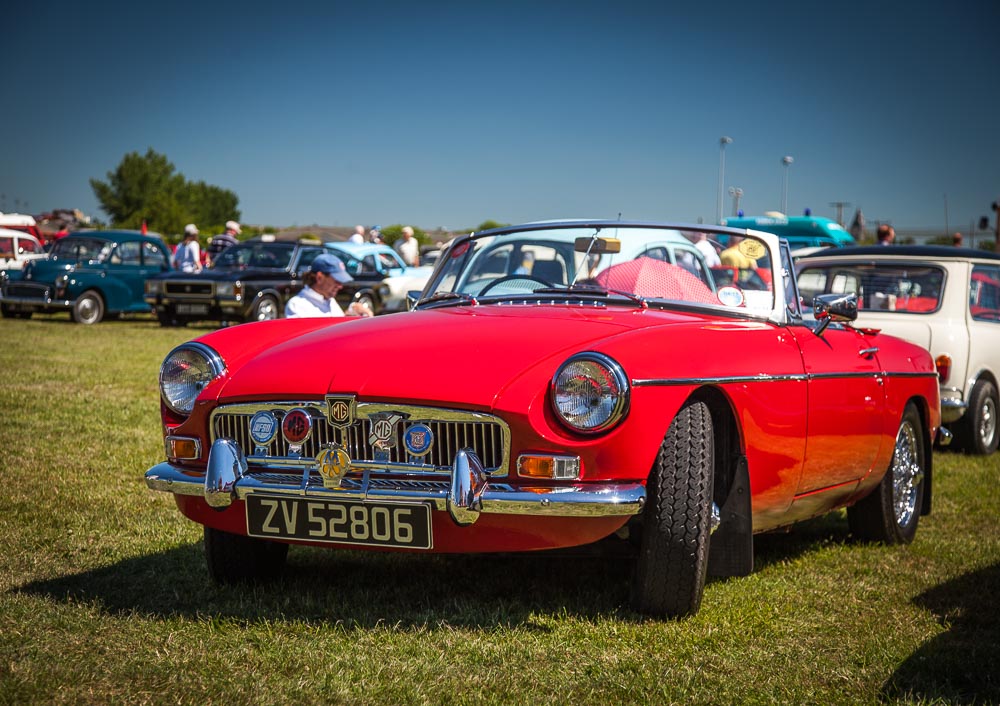
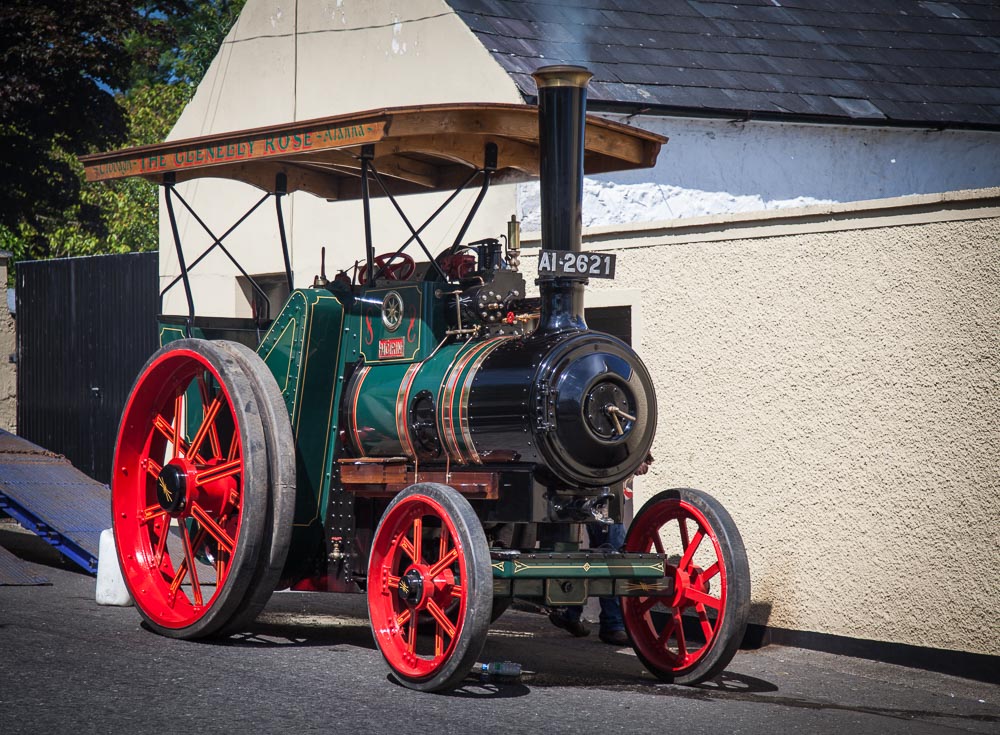
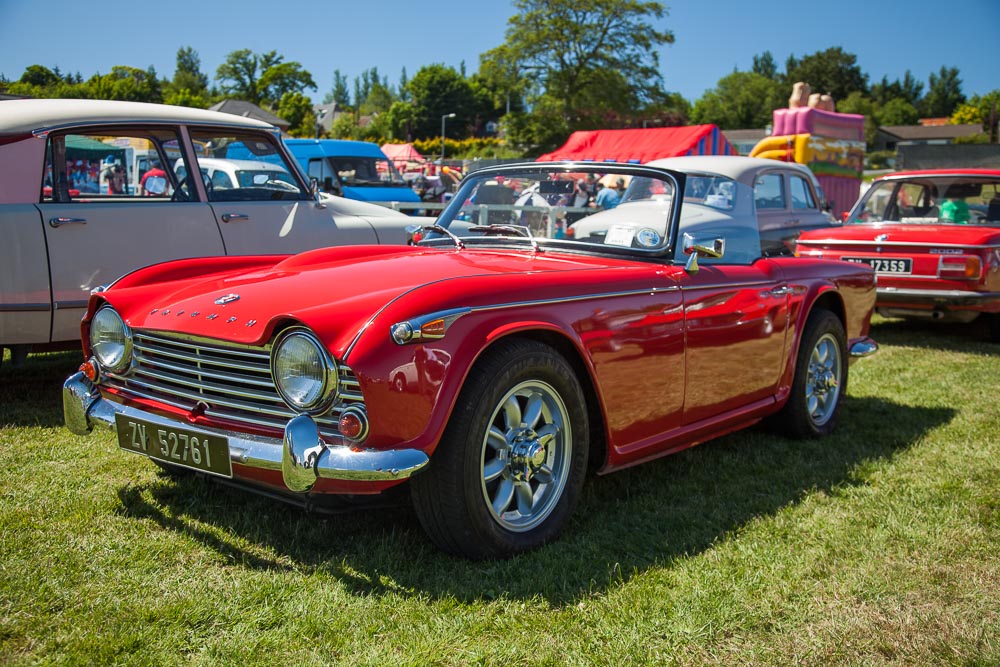
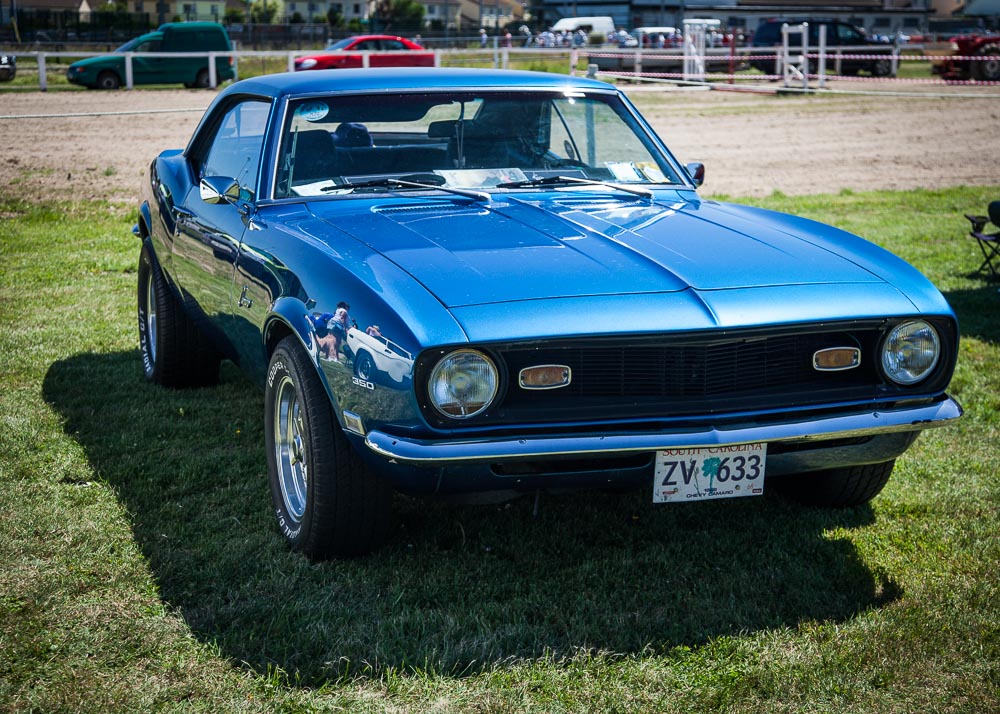
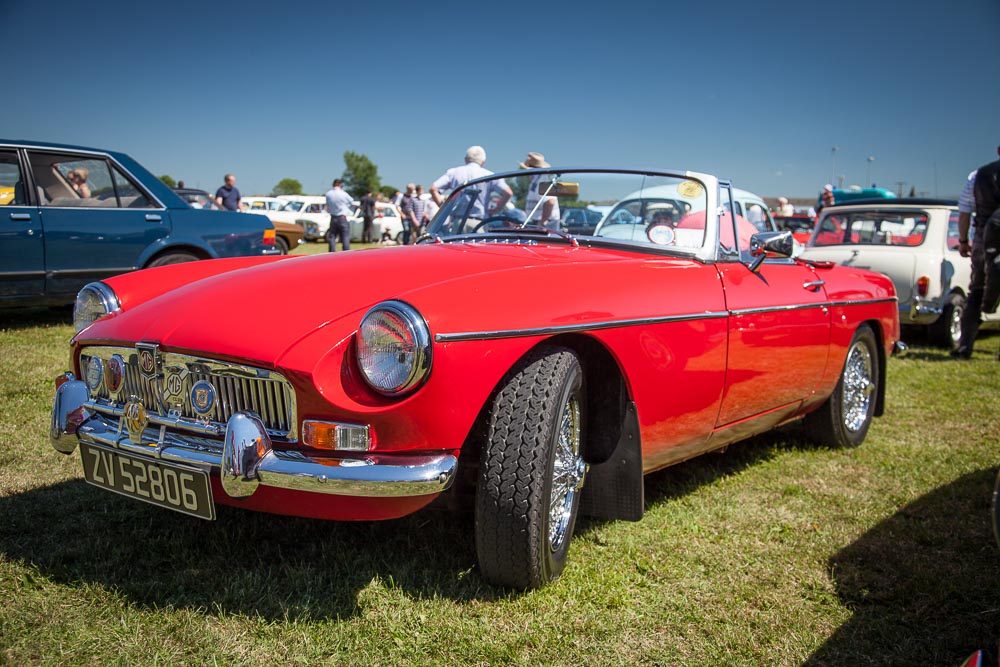
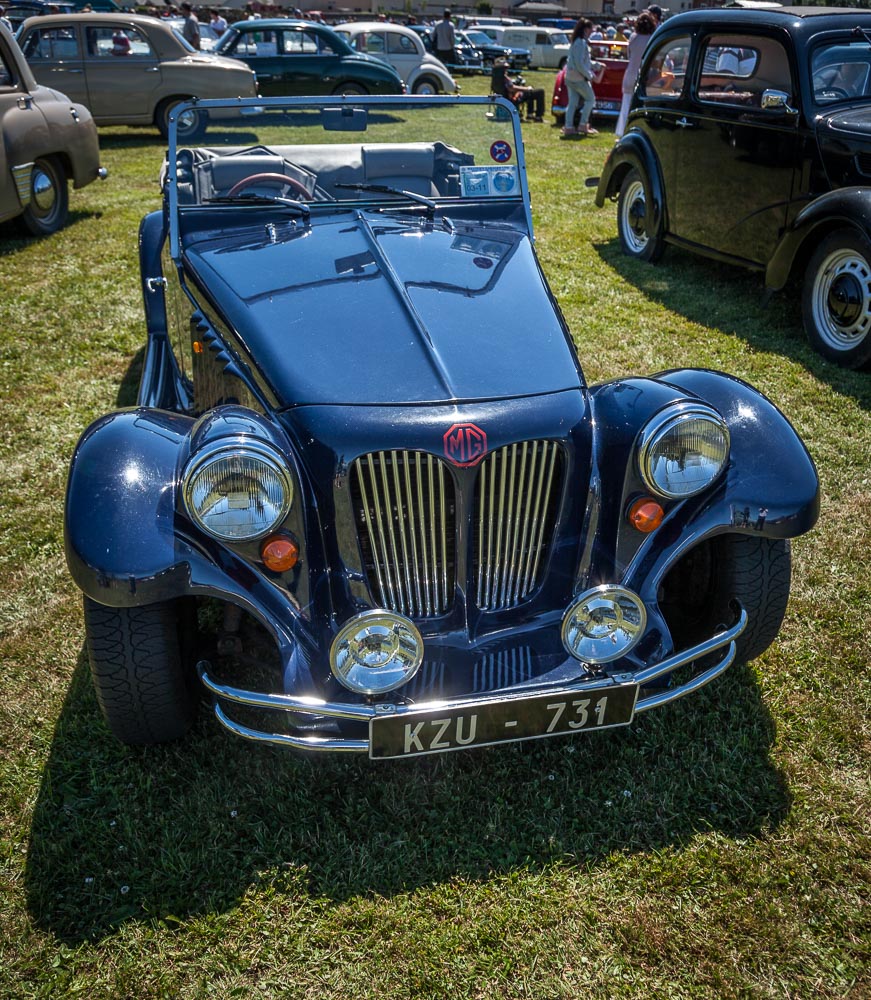
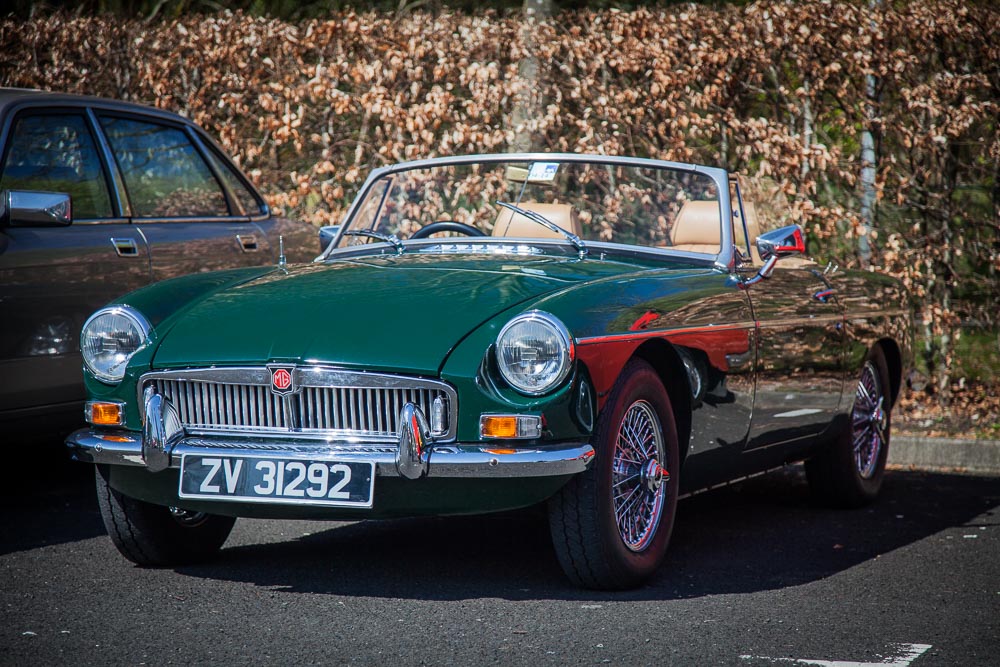
Vintage & Classic Cars
A collection of classic and vintage cars as well as a few steam tractors, taken at various show days around Ireland.
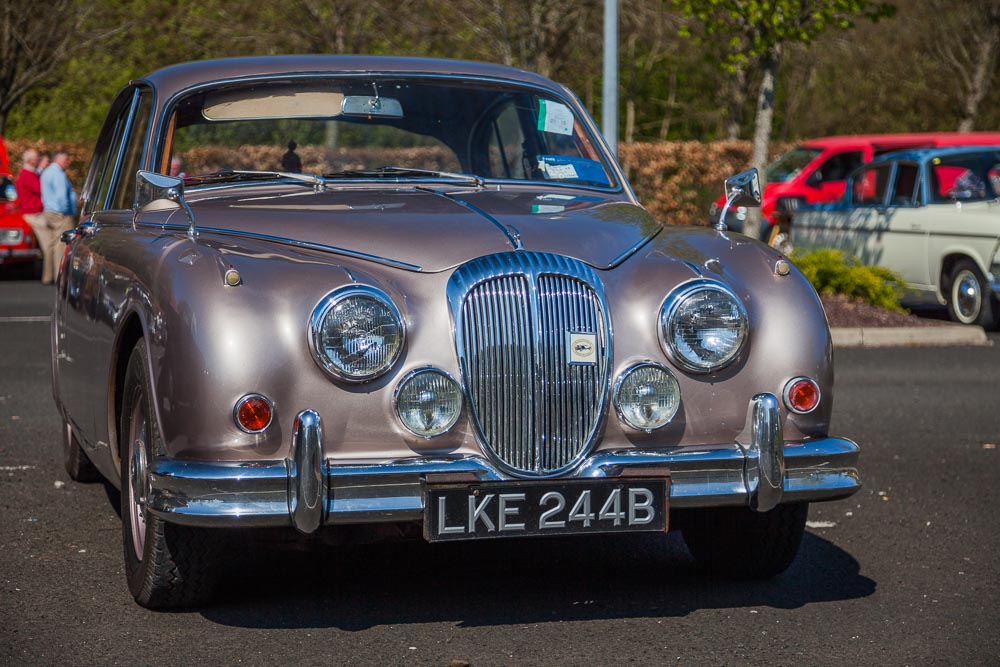
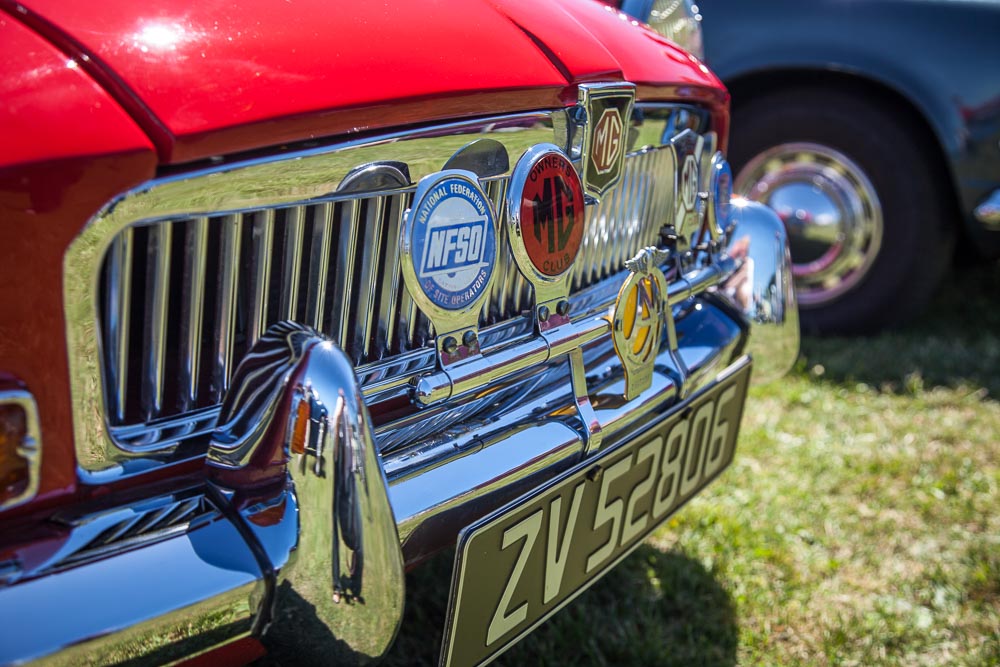
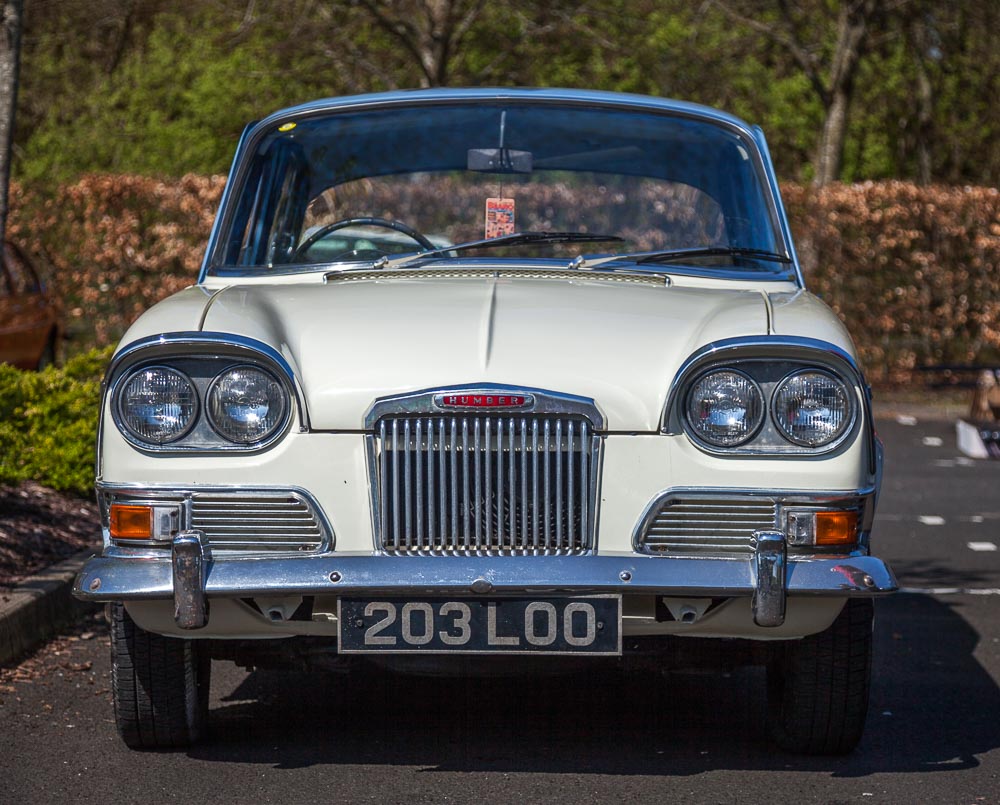
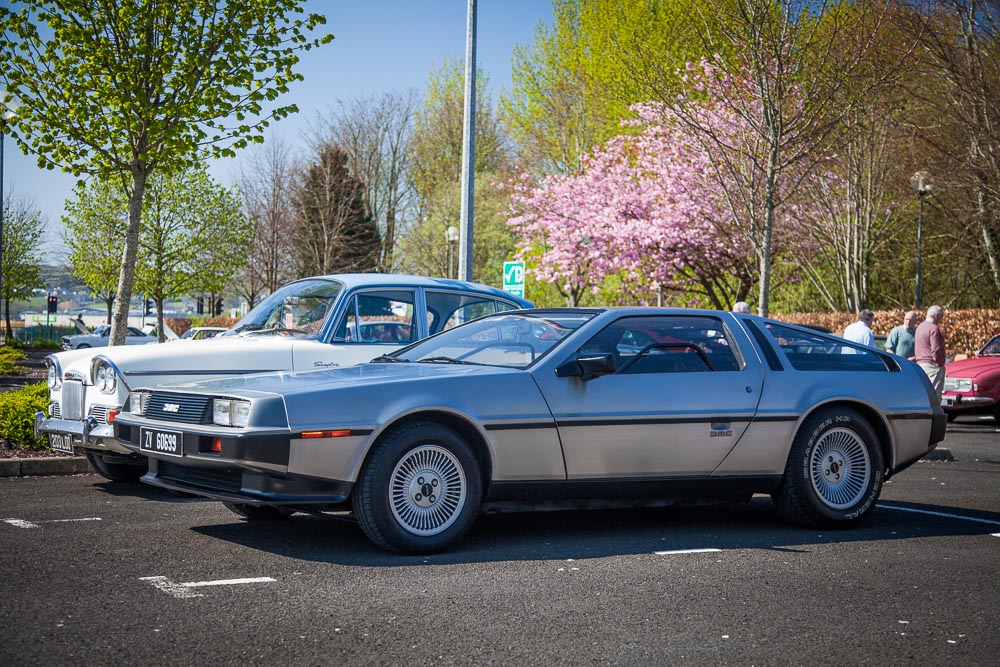
The cars tend to be mainly British in origin (MG, Ford UK, Jaguar and Triumph most frequently) although some American, German and Italian models crop up from time to time. Some of these cars are surprisingly rare. Image 10 features a Gordon Keeble, of which only ninety-nine were made.
If anyone ever wants to buy me a nice present, I'll have the Jaguar Mk II in image 17. It's still a beautiful car 60 years on.
From a photographic point of view, using a Polarising Filter with shots like these is a must. They are best known for deepening blue skies, but they also cut out most of the reflections and intensify the colours. They are really useful when shooting around water too. Be aware that they block about a stop of light, so are not suitable for use with fast moving subjects.
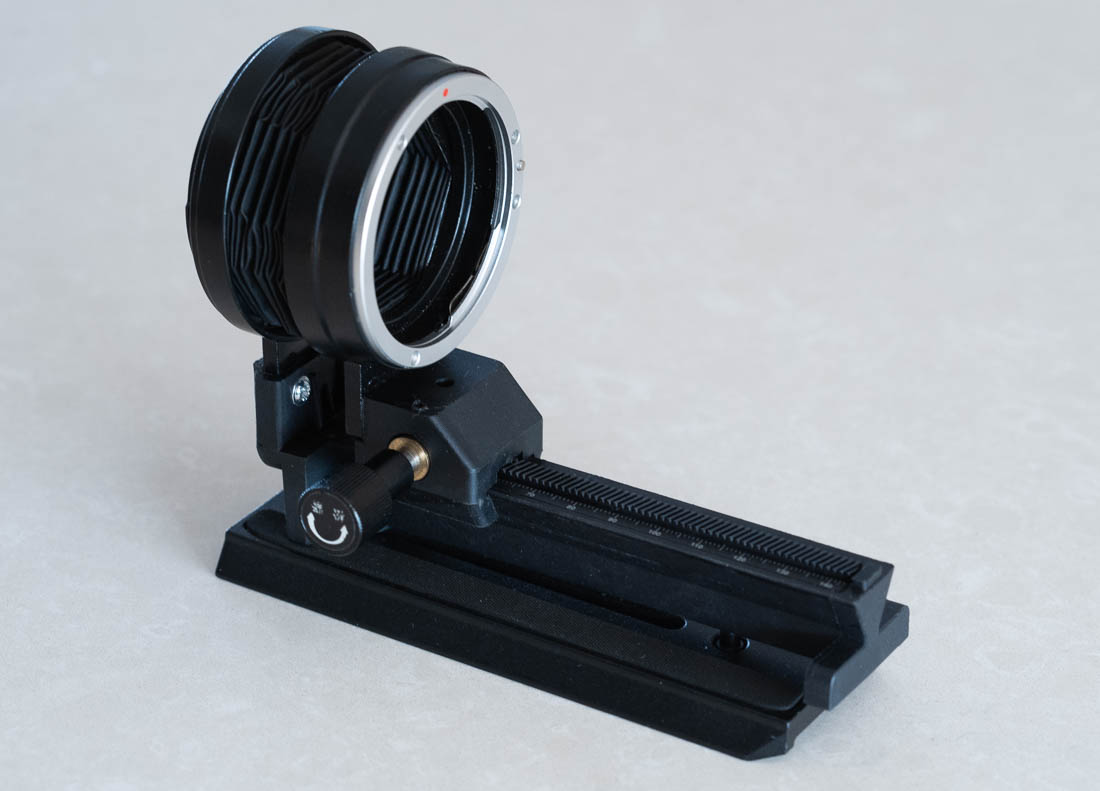
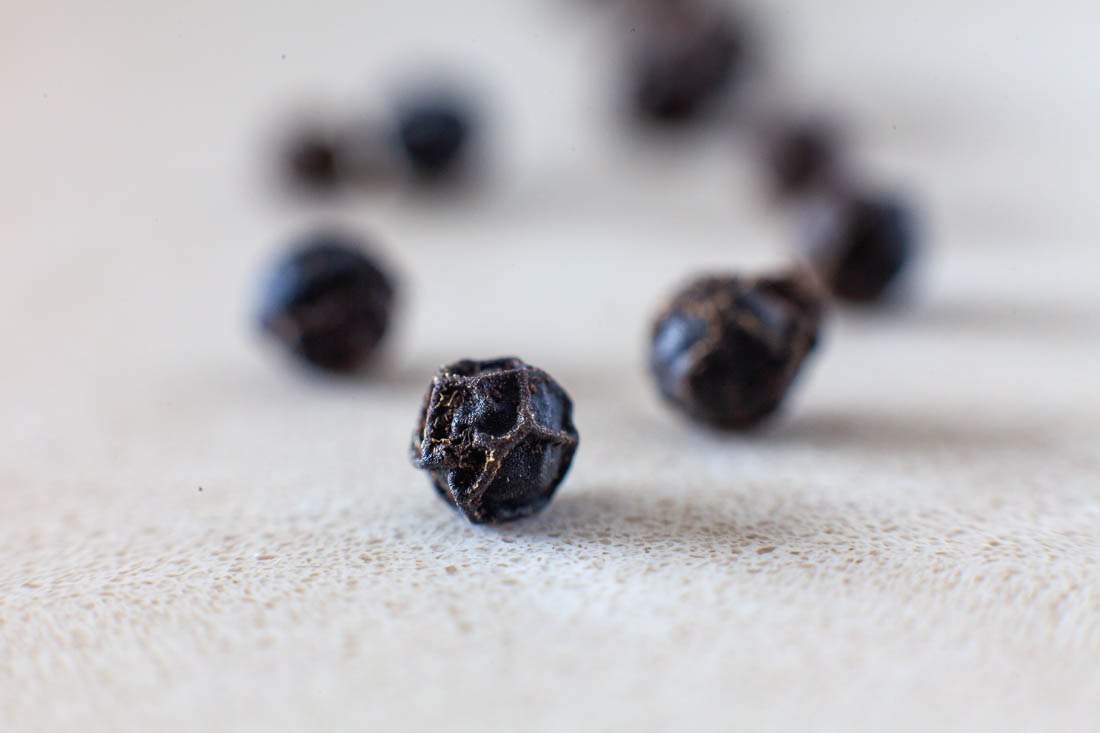
Review: Andoer Macro bellows
I picked up a cheap Bellows kit from Amazon, more in hope than expectation. The kit is listed at £19.99 and at that price is practically disposable. I chose this one over the others listed because the base looked more solid and had a tripod mount.
The build quality isn't great. What looks like cast iron or machined metal is actually a hard resin. Both the camera mount and lens mount are off the vertical. That said, with a bit of fettling I think I can bring them to true. The bellows is extended by twisting the knurled knob and the action is reasonably smooth. on the reverse side is another screw which locks the bellows into place. The bellows itself feels like paper — I wouldn't trust it outside of the studio, and even then, it needs to be treated gently.
The shots here show increasing magnification as the bellows extends. Even at f8, the depth of field is minimal. For a cheap piece of kit, it opens up new avenues, but for any shots outside a studio, I'd recommend extension tubes insted.
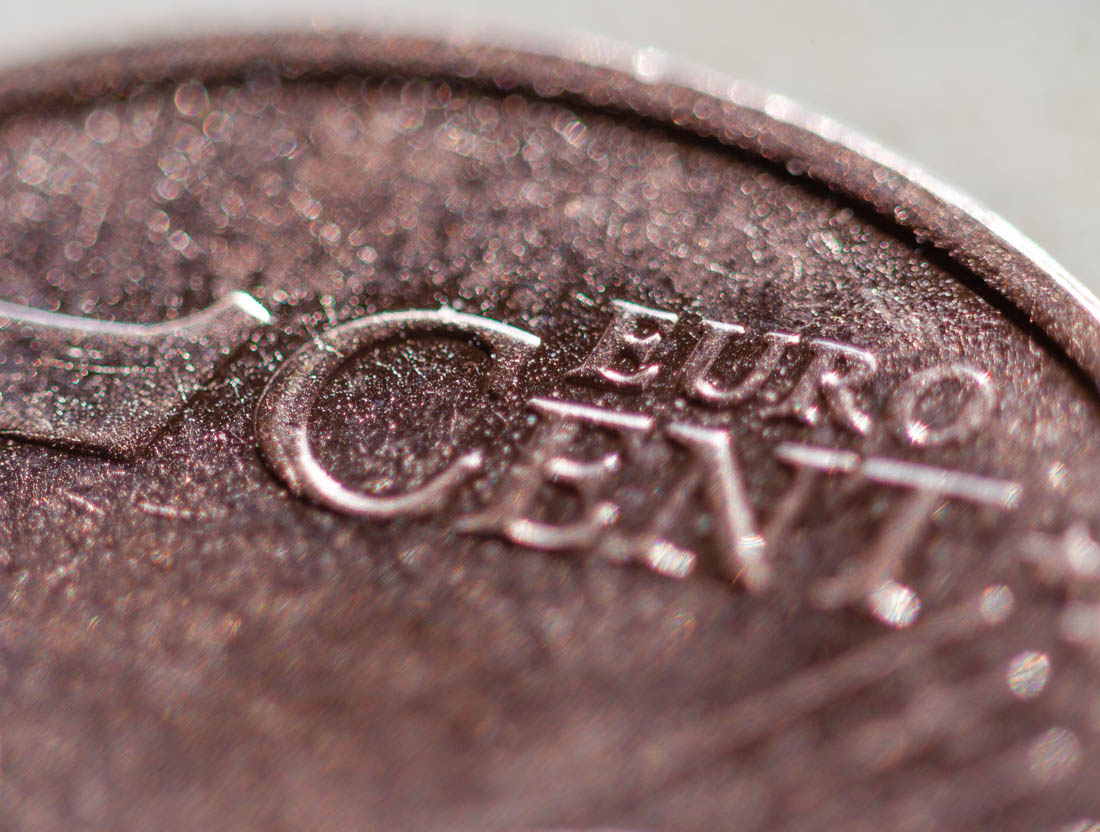
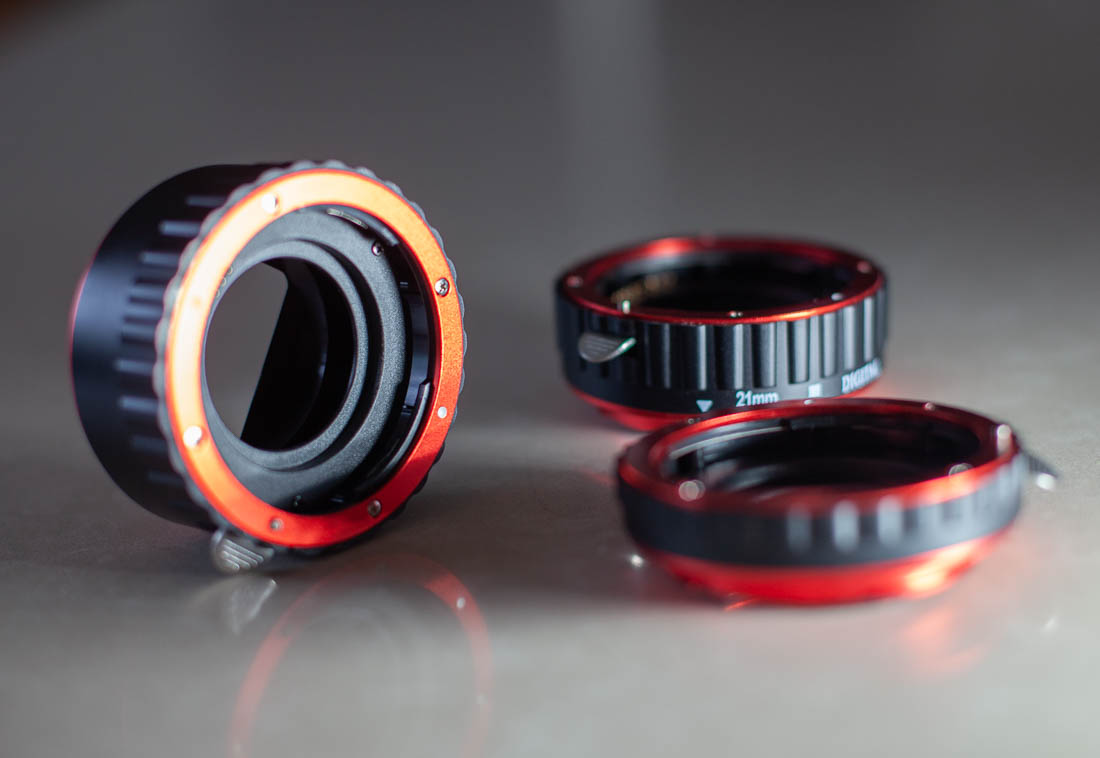
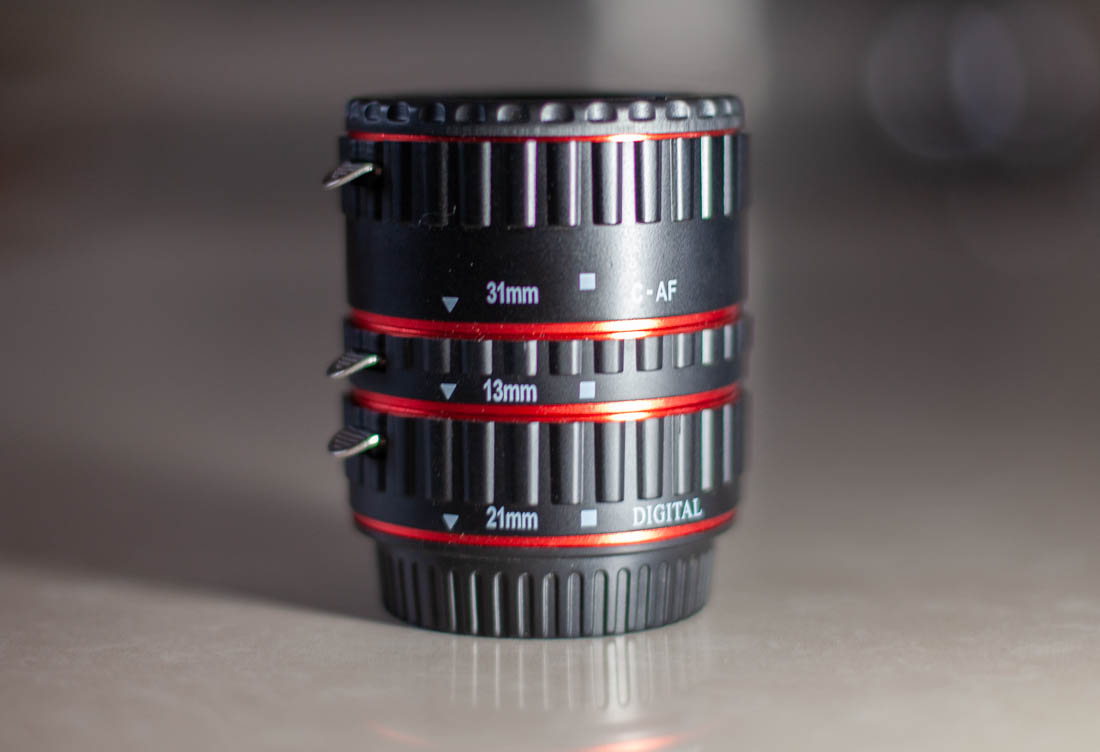
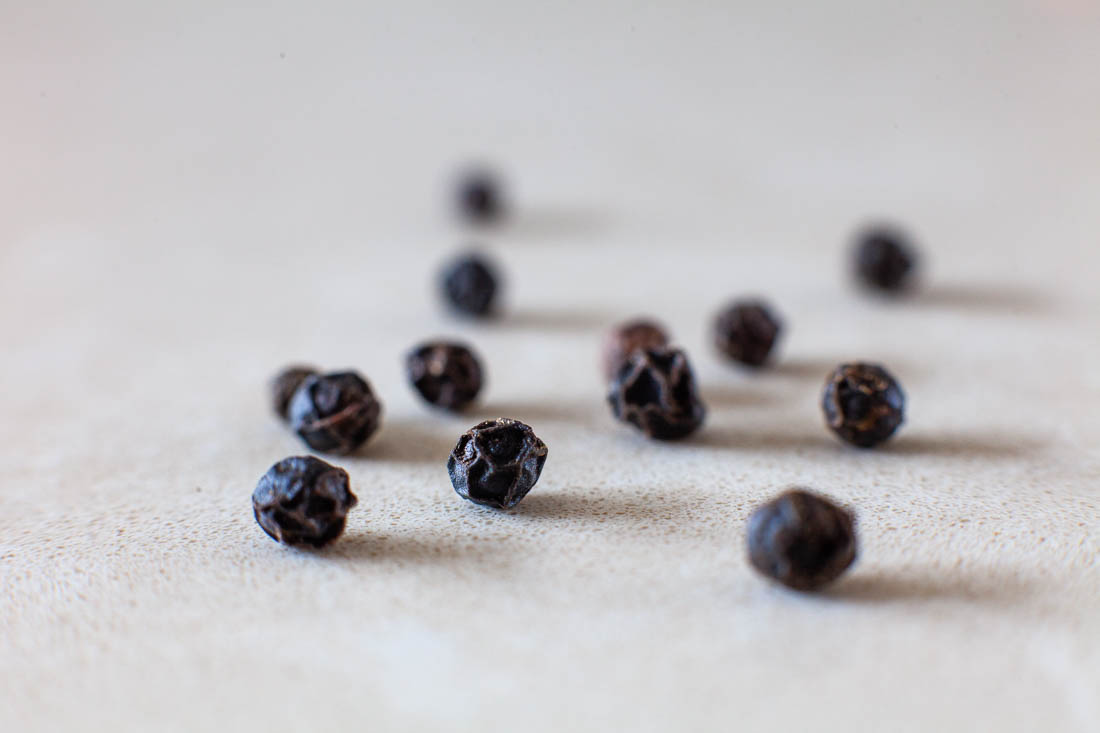
Review: Extension tubes
Like the bellows reviewed above, Macro extension tubes operate on the principle of increasing the distance between the lens and the sensor, thereby increasing the magnification. Extension tubes come in sets of three — 13mm, 21mm and 31mm are typical. These can be used singly or combined to increase the distance. The maximum extension is 55mm with all tubes combined. Take a look at the peppercorn in image 4 to get an idea of the magnification you can expect.
The macro effect won't be as pronounced as with the bellows, as it extends over twice that distance, but the tubes are more robust. The tubes and mounts are aluminium and the locks appear to be steel. They also feature gold coated electronic connections so autofocus and communication with the camera is maintained, unlike the Bellows.
This set is sold under a number of different brands on Amazon. As far as I can make out, they're all coming from the same factory, regardless of the name on the pack. They're not as solidly machined as the Canon version, but do exactly the same job for a fraction of the cost. I've had this set for a few years now with no issues.
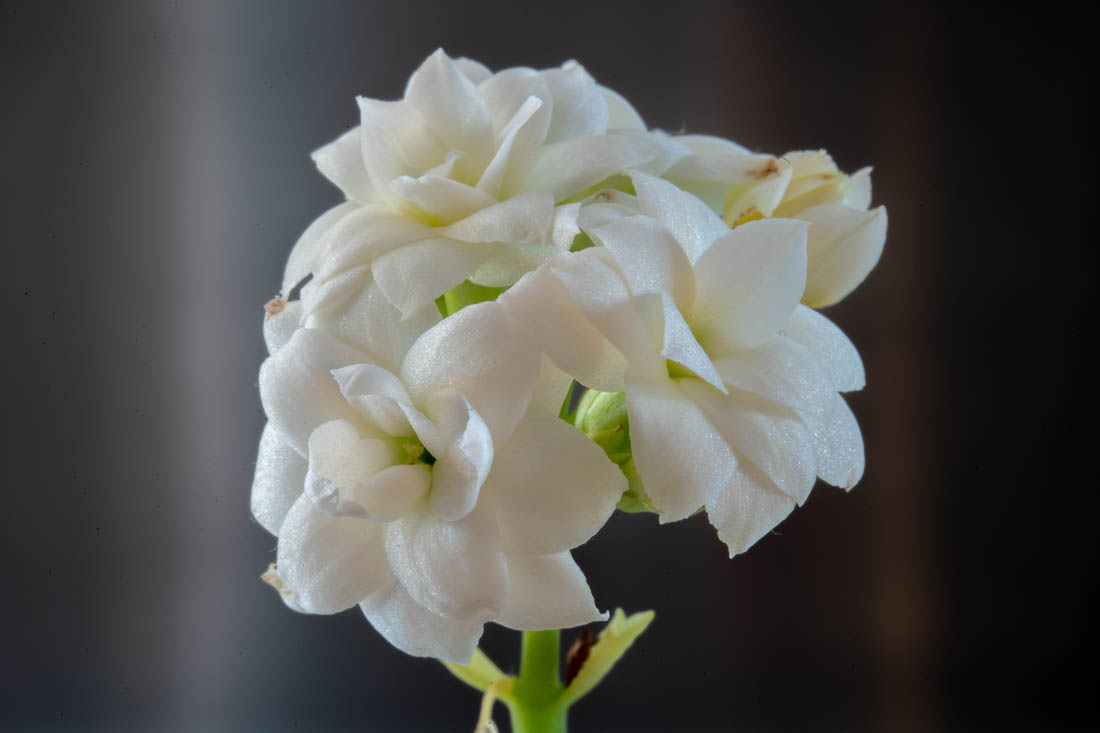
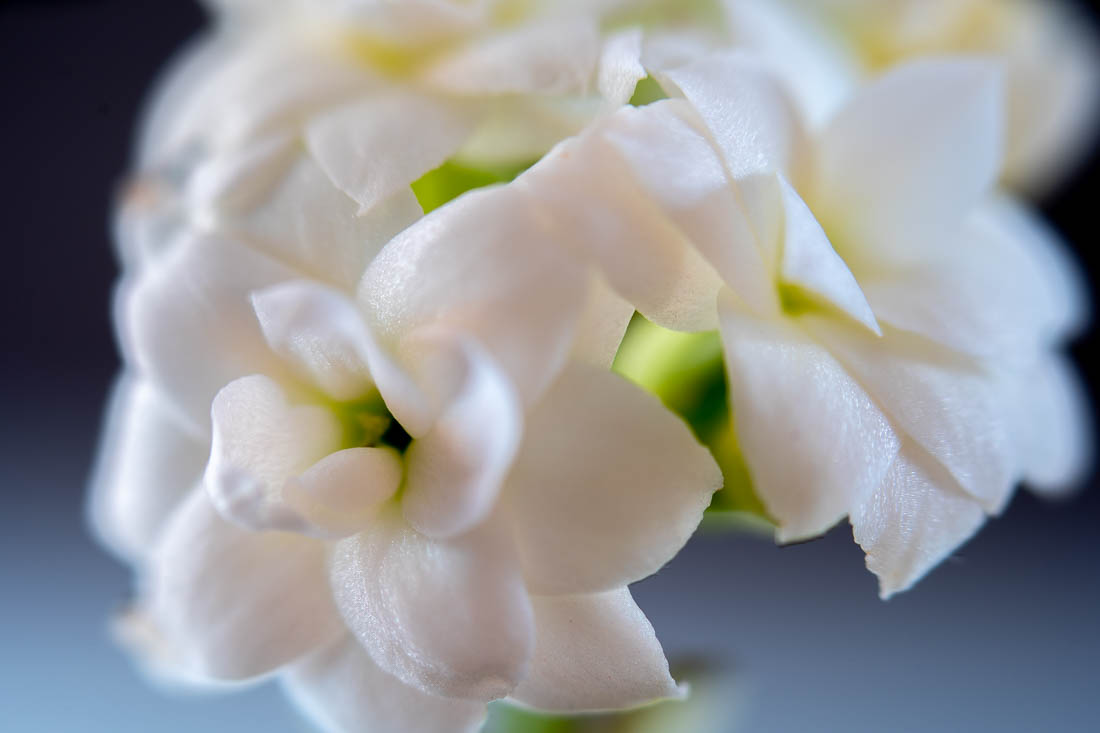
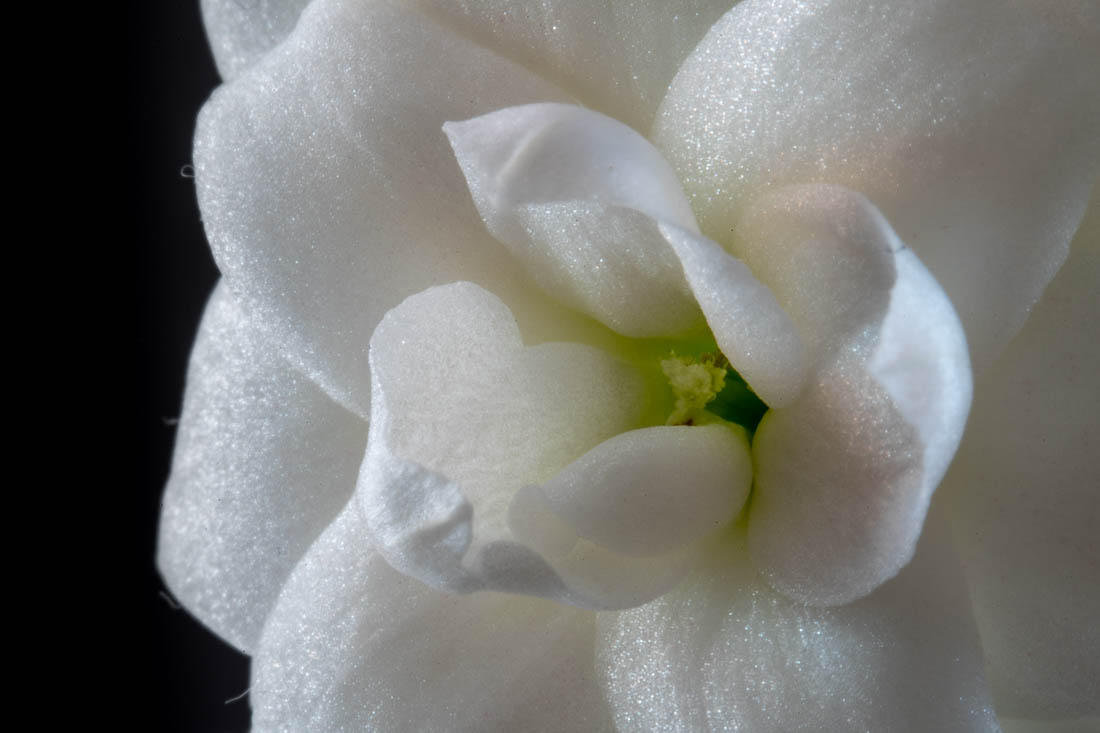
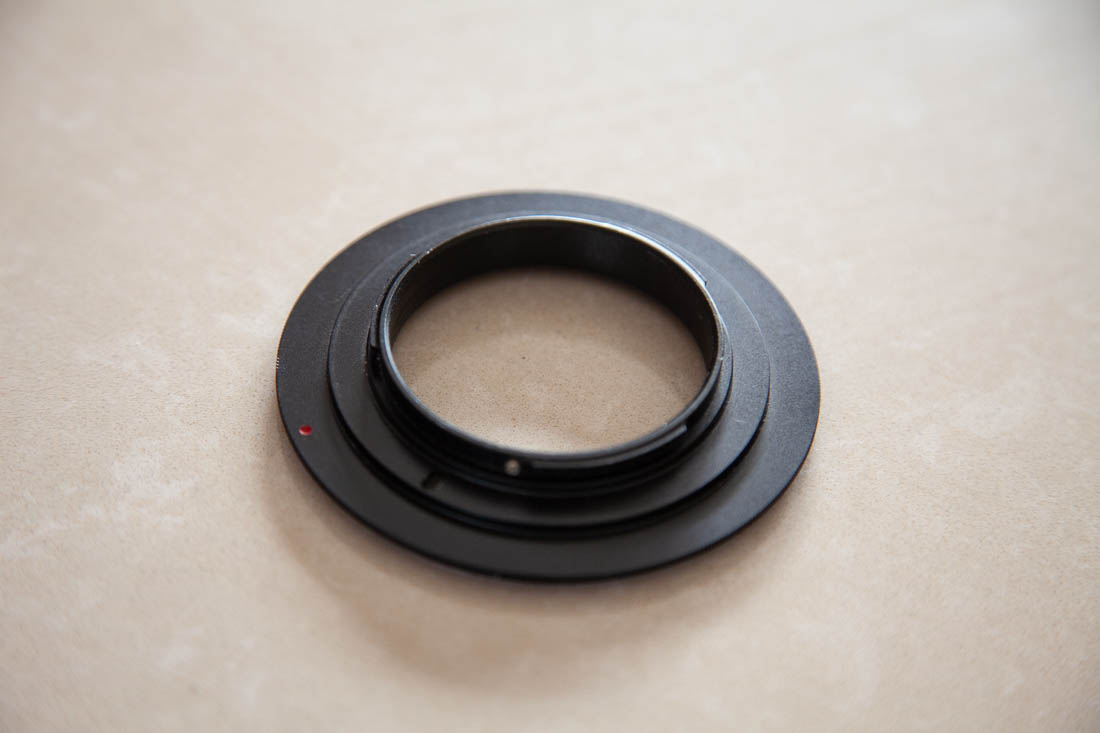
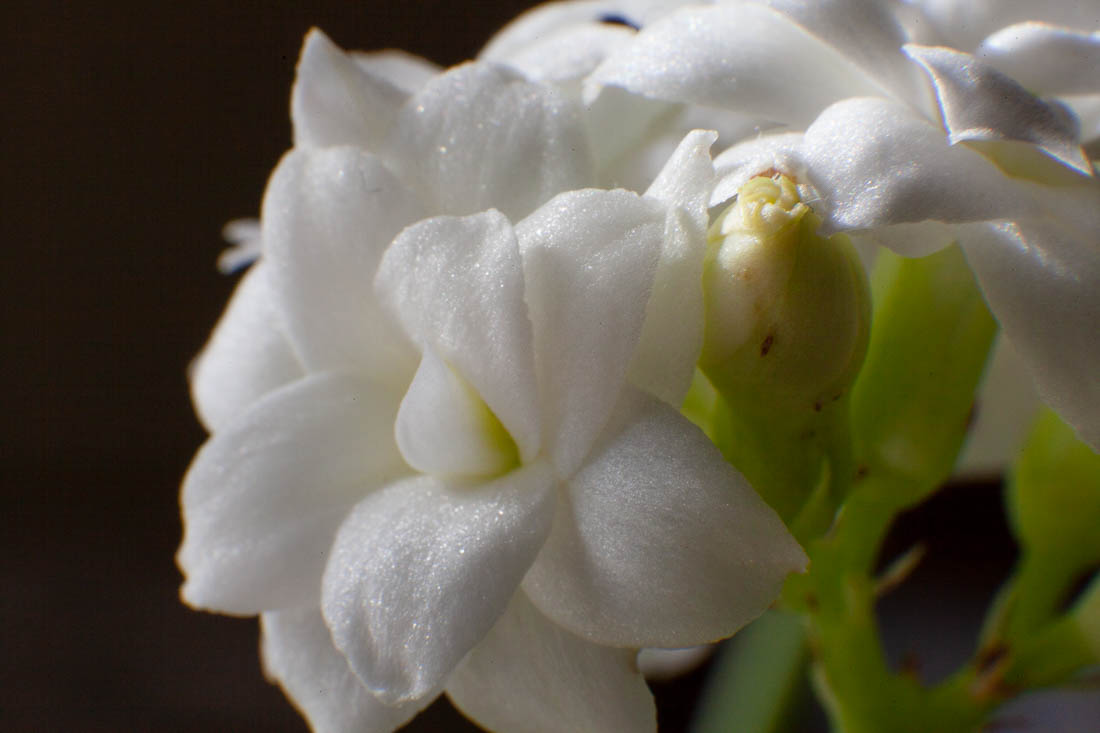
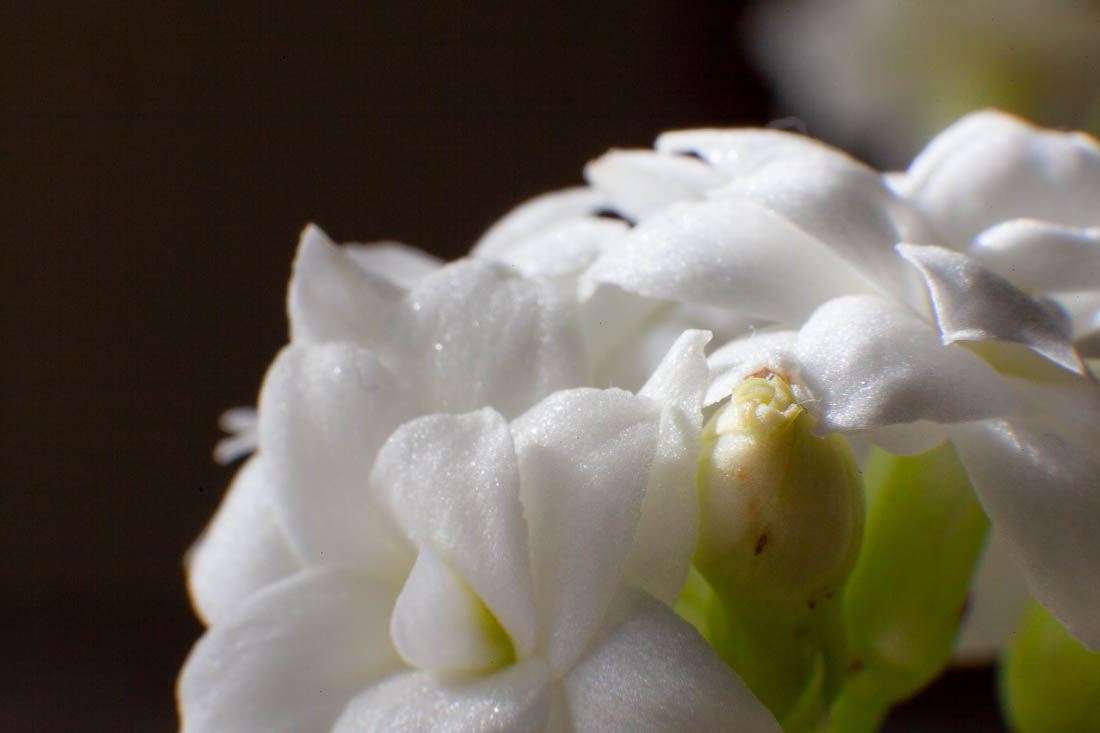
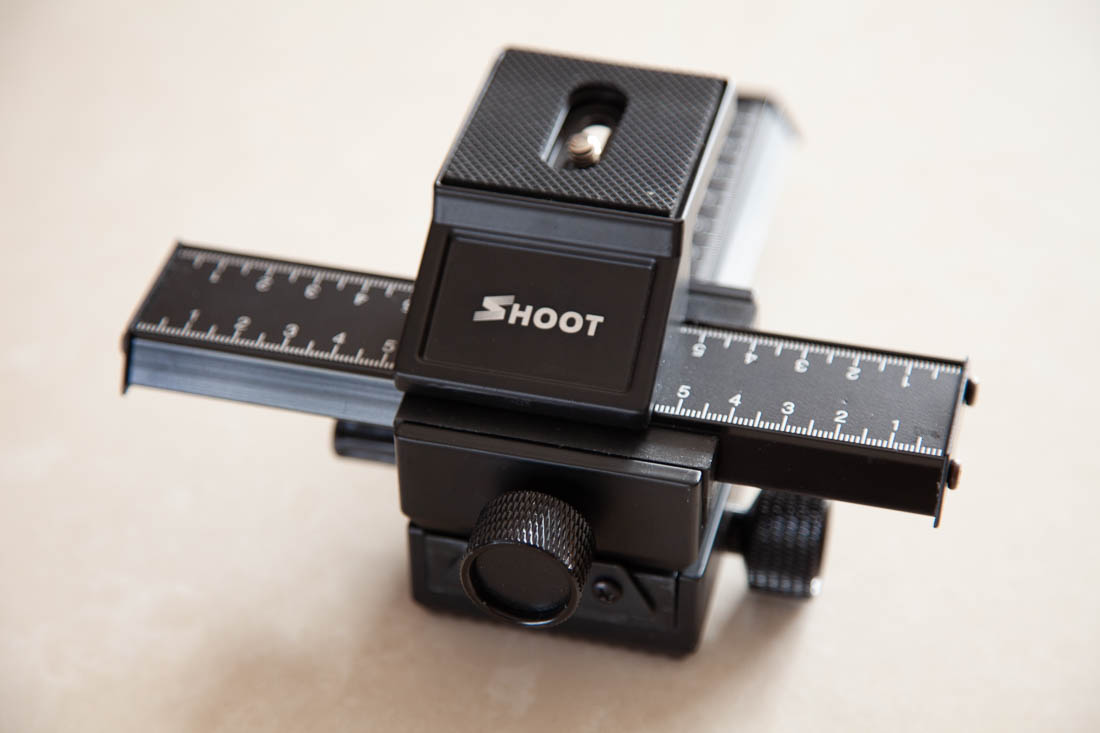
Review: Reversing ring and slider rail
A popular method of shooting true macro is by using a reversing ring. These mount to your camera and allow your lenses to be mounted back-to-front. Please note that these rings are not generic — you must use a ring with the correct mount for your camera and the correct diameter for your lens. The ring I use is 77mm which means I can use it with the 24-104mm, 70-200mm and 100-400mm lenses, which all share the same front element diameter.
While this method greatly increases magnification, it also completely disconnects the lens connection to the camera. Unless you are using a lens with a manual aperture, you will need to set the aperture with the lens connected directly to the camera, before using the reversing ring. Depth of field is extremely shallow — I recommend using an aperture of f16.
I made use of the focus slider rail seen in pic 5. This is a useful extra, as it allows you to move the camera incremnentally forwards and backwards, left and right. This is a much easier way to achieve focus.
I've also included a wider shot of the bowl of flowers to give an indication of scale. The macro shots are of the cluster second from the left.
Review: Moza Air 2
The Moza Air is a 3 axis gimbal (single handle). I bought it and a Ronin-M (dual handle) over the summer. I've done quite a bit of tripod mounted video, but felt restricted in a few areas. The gimbals will hopefully fill the gap.
Moza have done a good job with this gimbal — it's well machined and packaged. I also looked at the Ronin-S and Zhiyun Crane when researching gimbals. One of the Cranes motors obscures the cameras view screen which put it out of contention. The Air and Ronin share a similar design, leaving the cameras screen free. The Ronin is more expensive and the Air has a small screen offering some functionality directly from the gimbal — no need for an app to access controls and settings.
Getting the Air balanced was reasonably straightforward. It took about half-an-hour the first time, but less than 20 minutes the second. I suspect that as I get used to it, setup should take no longer than 10 minutes.
The Air can be used in three modes — normal, underslung and what Moza calls Inception. You can move easily between normal and underslung, making crane and tracking shots easy. Inception is a horizontal mode allowing 180 and 320 degree rotations. You can see an example in the video above.
You may ask why I bought two gimbals. Well, I see them as having different functions. The Ronin is carbon fibre and dual handled. I should be able to use it longer without getting tired. It is bulky however, even when packed (and doesn't have a nifty case like the Air). The compact packaging of the Air allows it to be taken anywhere. It's also less conspicuous than the Ronin.
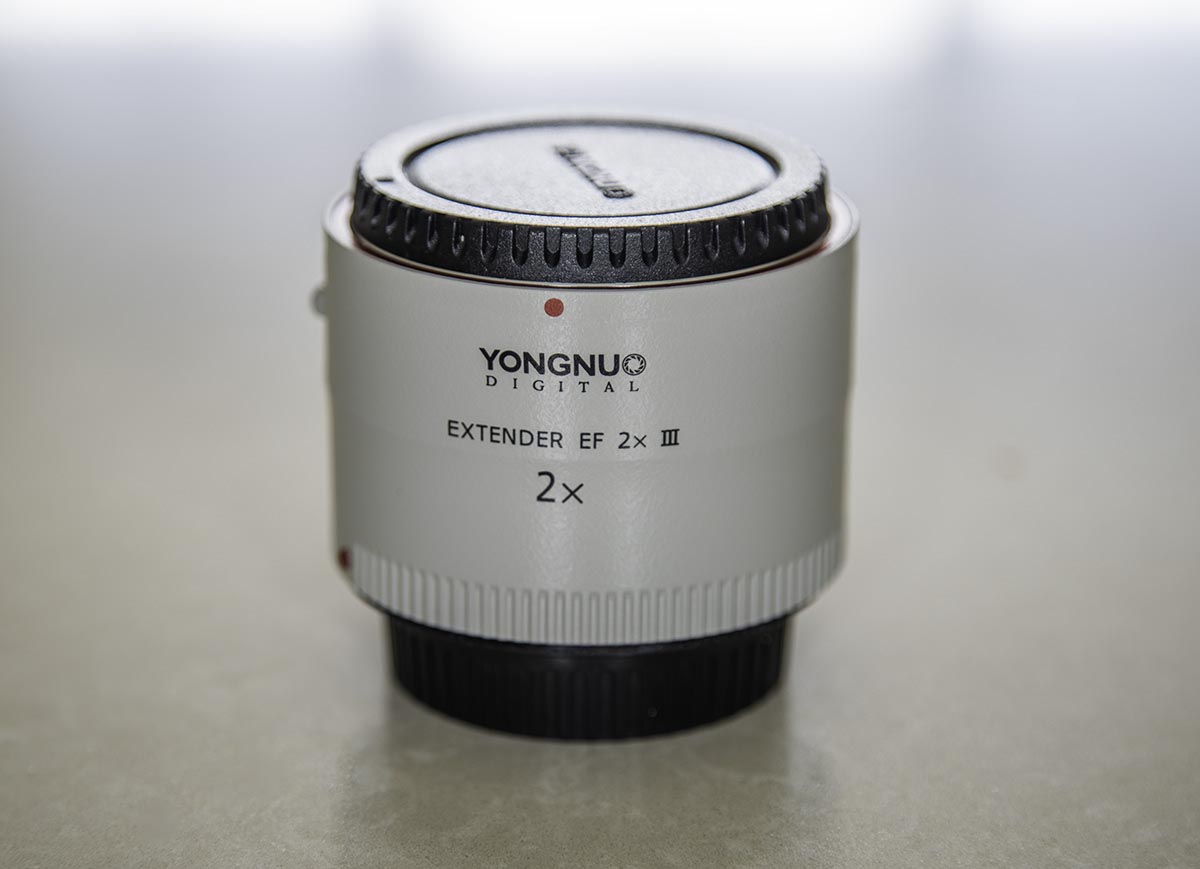
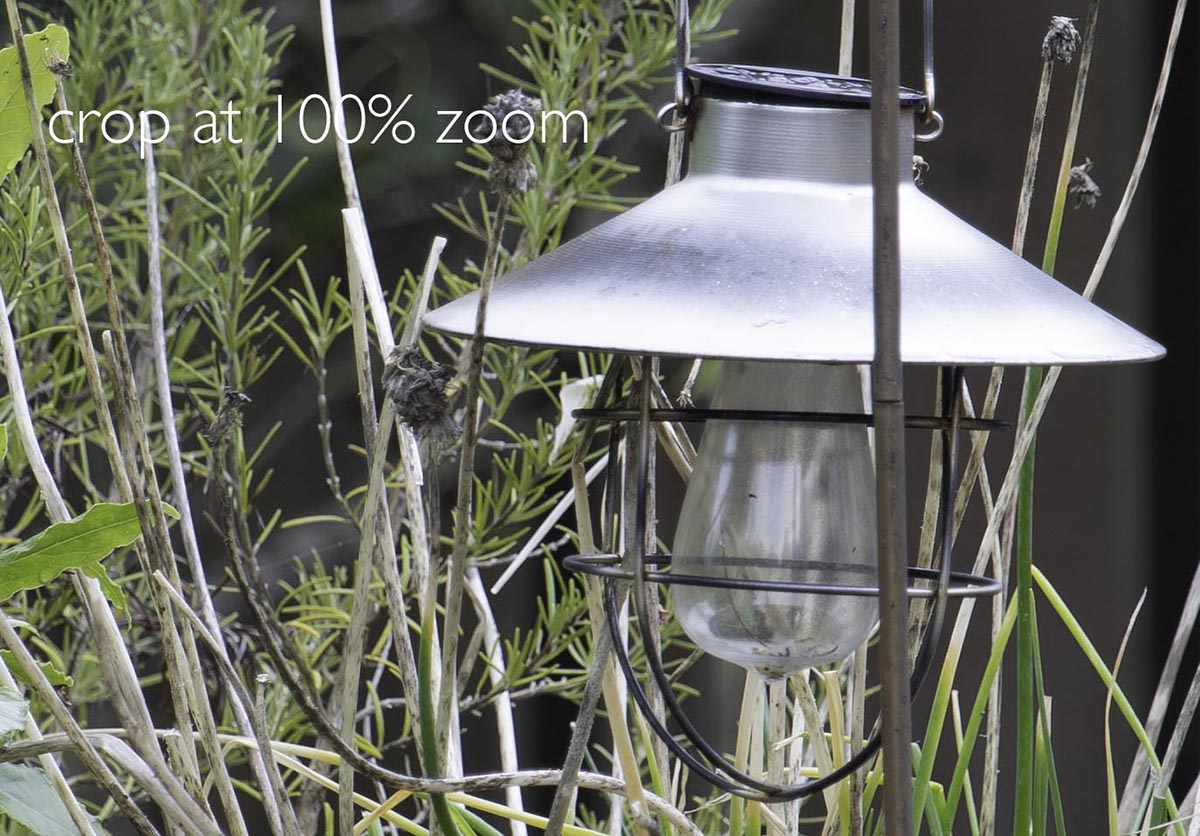
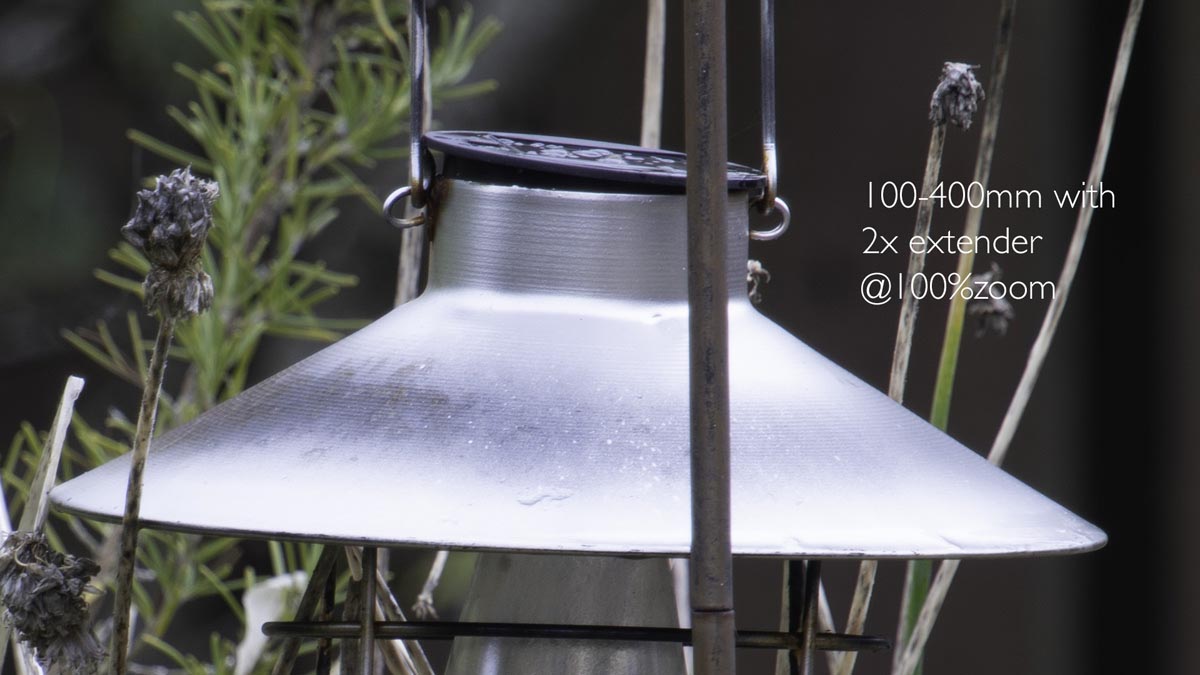
Review: Yongnuo EF 2x extender III
Yongnuo are a Chinese manufacturer of mainly Canon compatible equipment. They became well known for their affordable clones of the Canon speedlight range. I have both the Canon 580EX II and the Yongnuo YN568EX II and apart from the interface, they offer the same function. The company has more recently moved into lenses and accessories for full frame Canon cameras. I have their 35mm f2, and their 50mm 1.8 lenses are popular with my students.
At half the price of the Canon extender on which it is based, this is good value. The build quality is good and it mounts very solidly to both the camera and lenses. The colour of the body is a close, but not exact match for Canon's L series lenses.
In common with all extenders, you will lose 2 stops of light, so don't expect to be able to use it for sports or wildlife shooting. I'll be using it for landscapes, city capes and moon photography, so fast focus will not be an issue. Autofocus is patchy, depending a lot on having a fast lens and the camera body used, but in my experience this is true of all extenders. You will definitelt need to use a sturdy tripod with this extender.
Optical quality seems pretty good. There is a slight drop in sharpness and some CA is introduced (see the close-up of the light hood in the 2nd image below.), but this is easily eliminated in post. It doesn't appear to impact colour rendition.
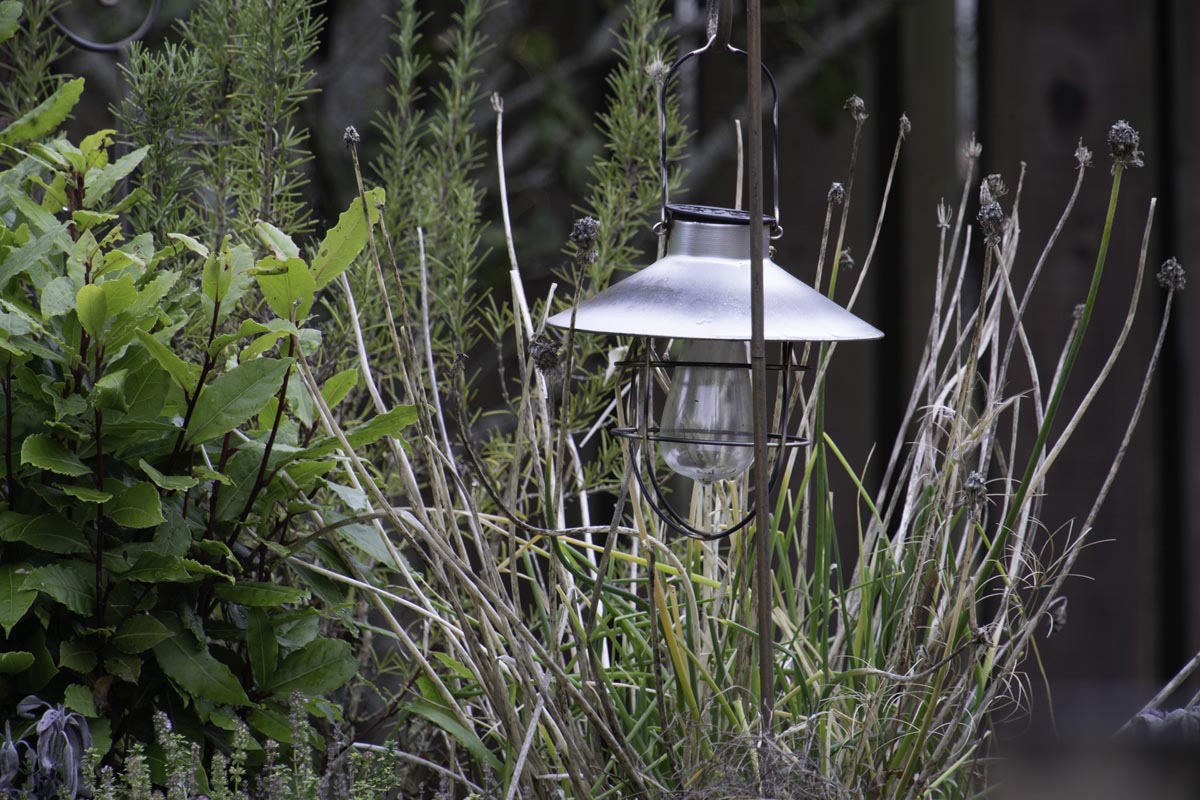
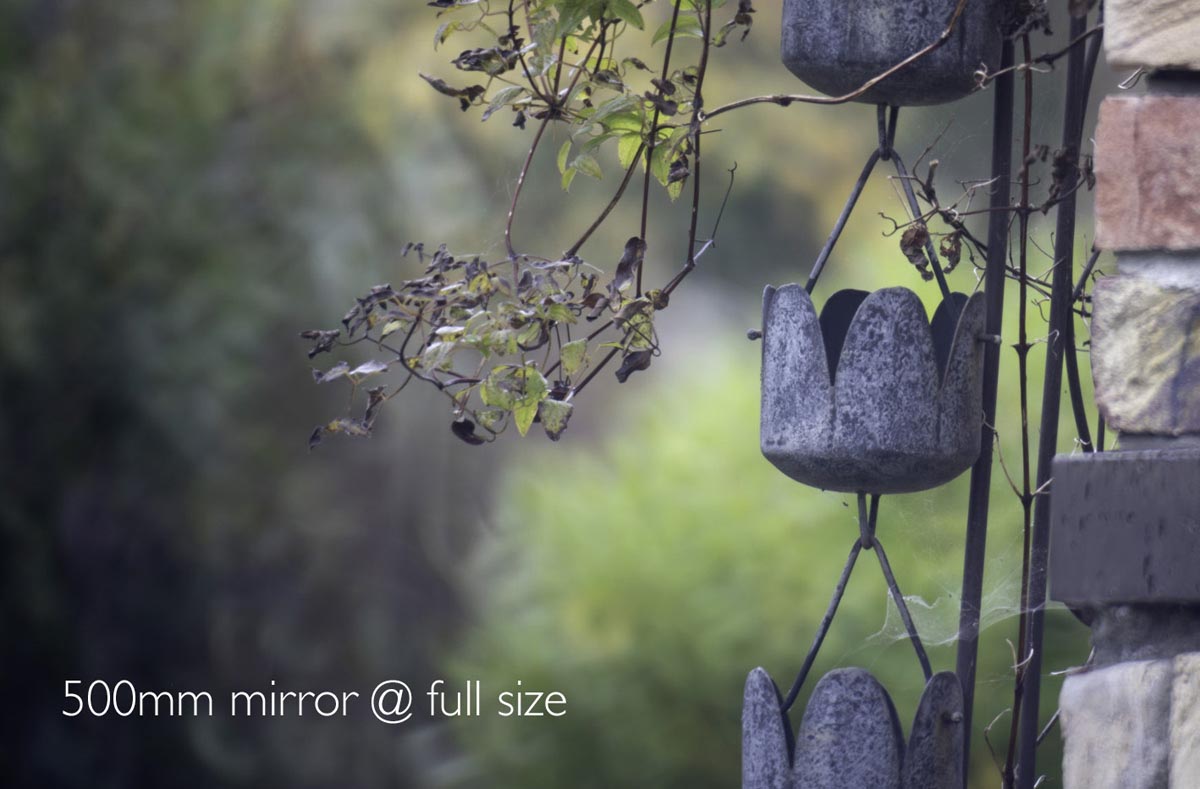
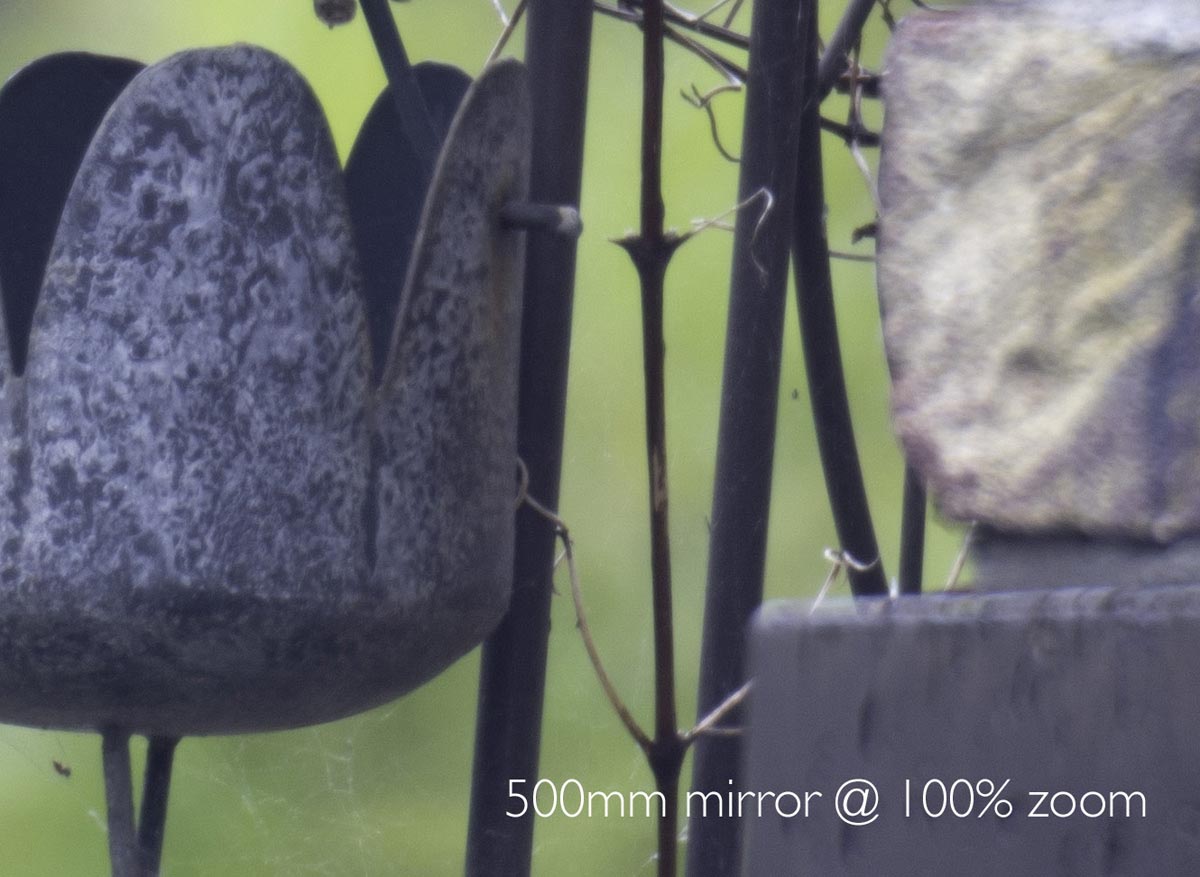
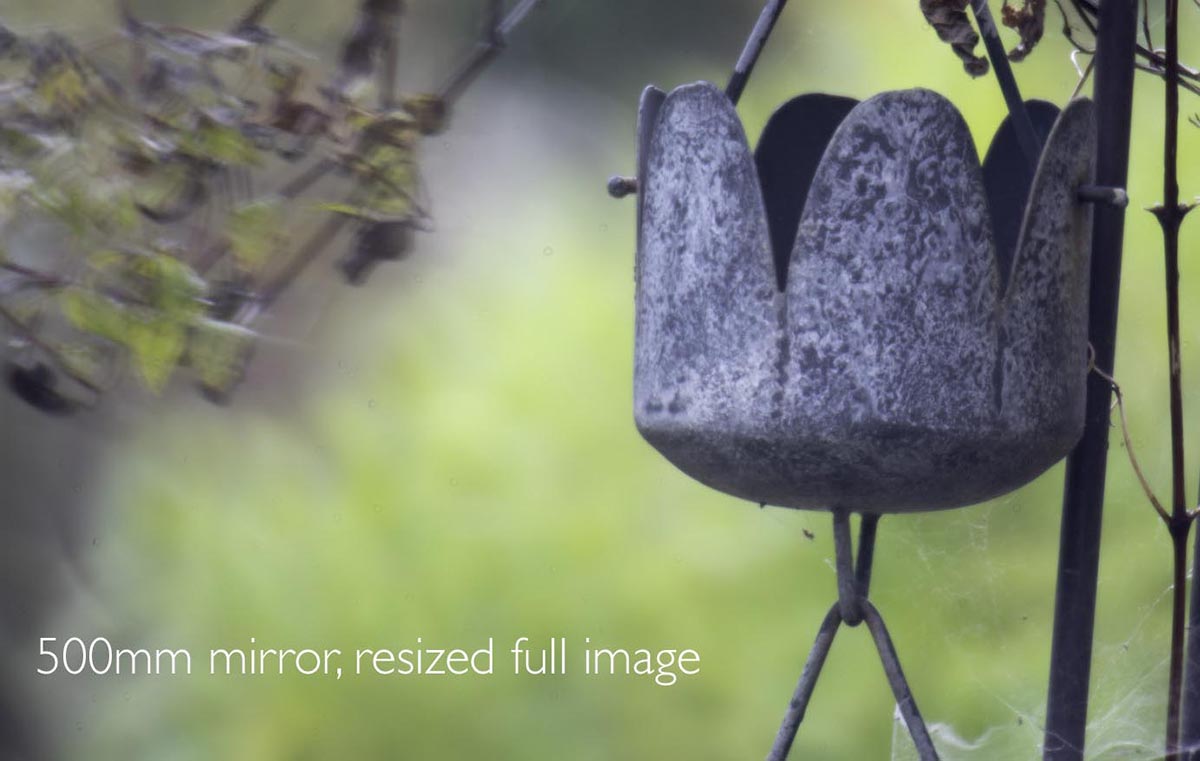
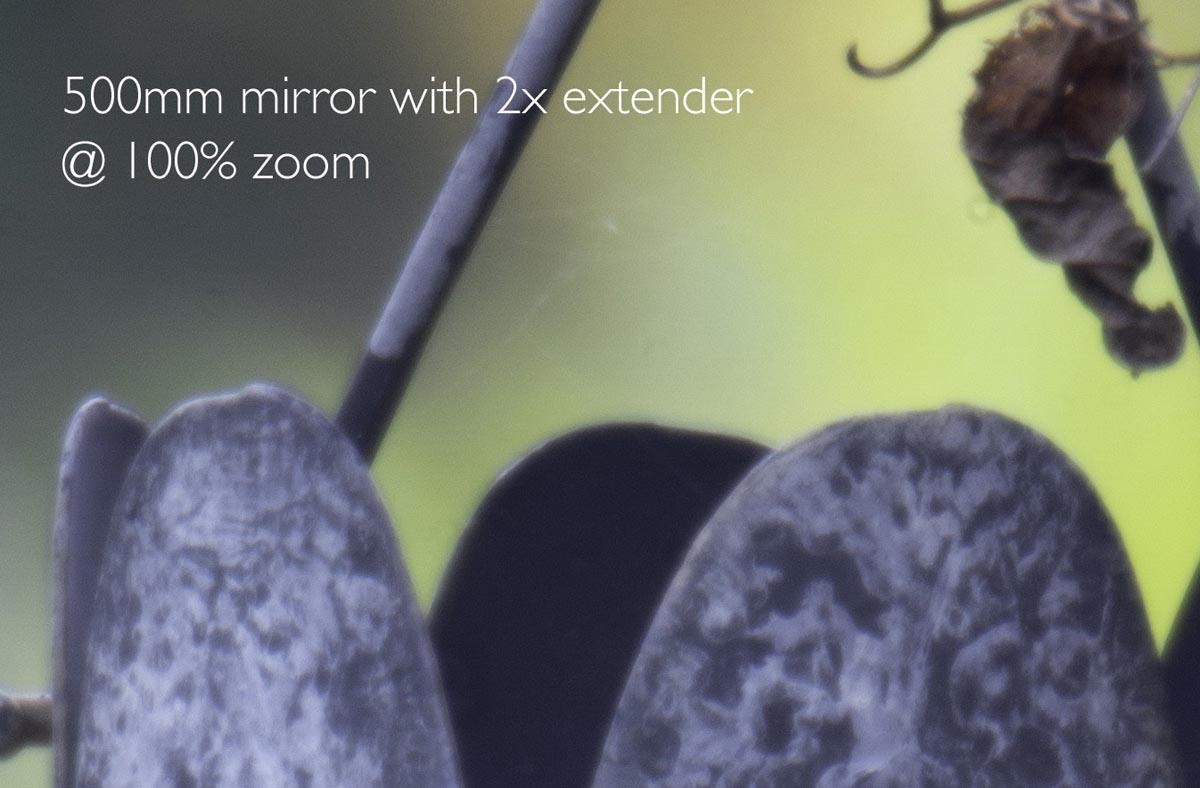
These samples were all shot from the same position with a Canon L 100-400mm and an old Vivitar 500mm mirror lens. The first 4 are from the Canon, the first two are without the extender and the second two with. The optical quality of the Canon lens is excellent and the extender doesn't significantly impact this apart from the CA, as mentioned above.
The Vivitar is another matter. The latter four images show the same sequence with it. Its optical quality is soft and the softness in these images is down to the lens rather than the extender. Being a fixed f8 lens also makes it hard to focus.
Review: Desview R7 field monitor
The Desview R7 is a 7in field monitor with touchscreen controls.
It has focus peaking, zebras, waveforms, histograms and vectorscopes among other features. I got this to replace a Desview S7 which I have had for a year or two. These are both budget monitors, but the R7 is a big improvement over its older sibling. The touchscreen makes it far easier to use with all functions easily accessible.
I don't have it long enough to comment on its build quality — the body is plastic, but seems sturdy enough.
The unit runs on DC (don't think I'll ever use this option) or on NP-F batteries.
I tested it using a Sony A7III and the 4K signal came through cleanly. The display is bright (a claimed 1000 nits) which is good as it does not come with a hood, unlike the older S7.
Review: Tolifo LED panel
This 7in LED panel is powerful and easy to use. The build quality seems good too — the body is extruded aluminium with plastic sides. I have some Sokani LED panels which I use quite a bit, but unlike the them, the Tolifo doesn't use an add-on filter to change the temperature, instead the temp is variable between 32k and 56k using the controls on the rear.
Although this unit is geared towards on-camera use with its included cold shoe mount, I will most likely use it off camera — it has a threaded mount so it can be used on c-stands. One thing I particularly like is the inclusion of an NP-F style battery and a charger, something a lot of these accessories don't come with these days.
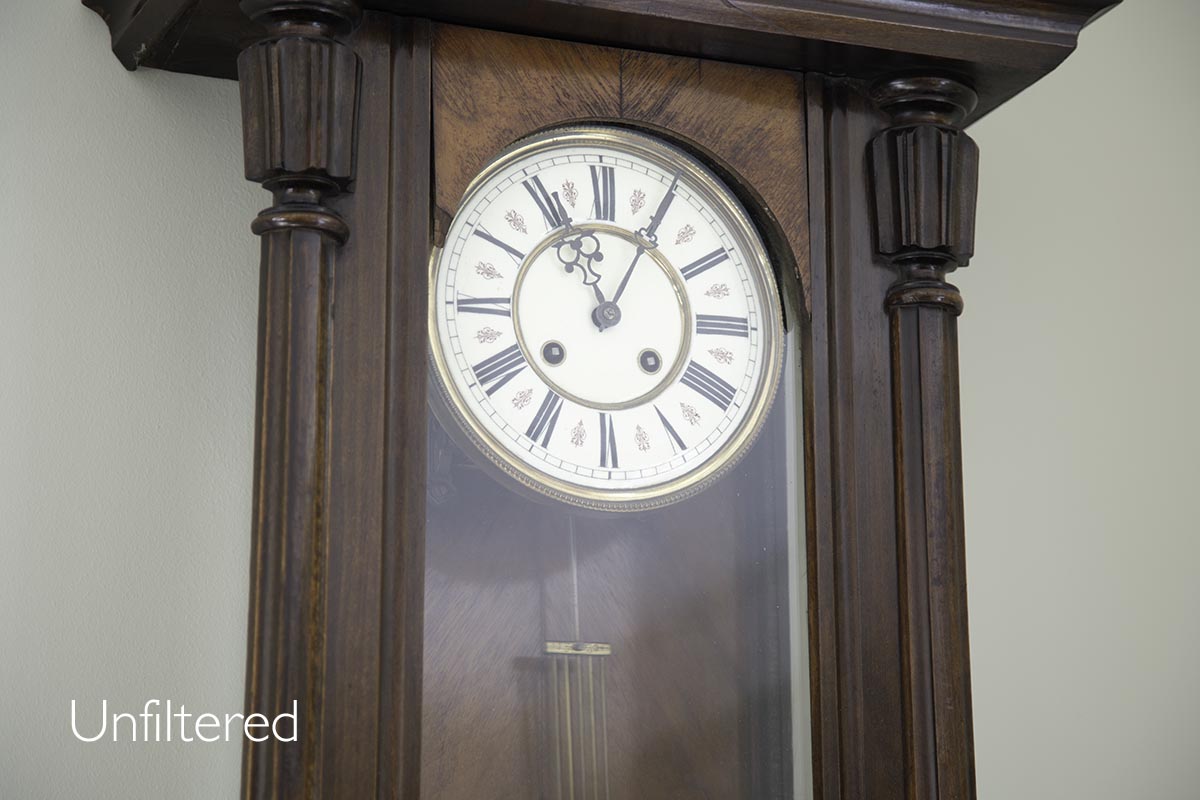
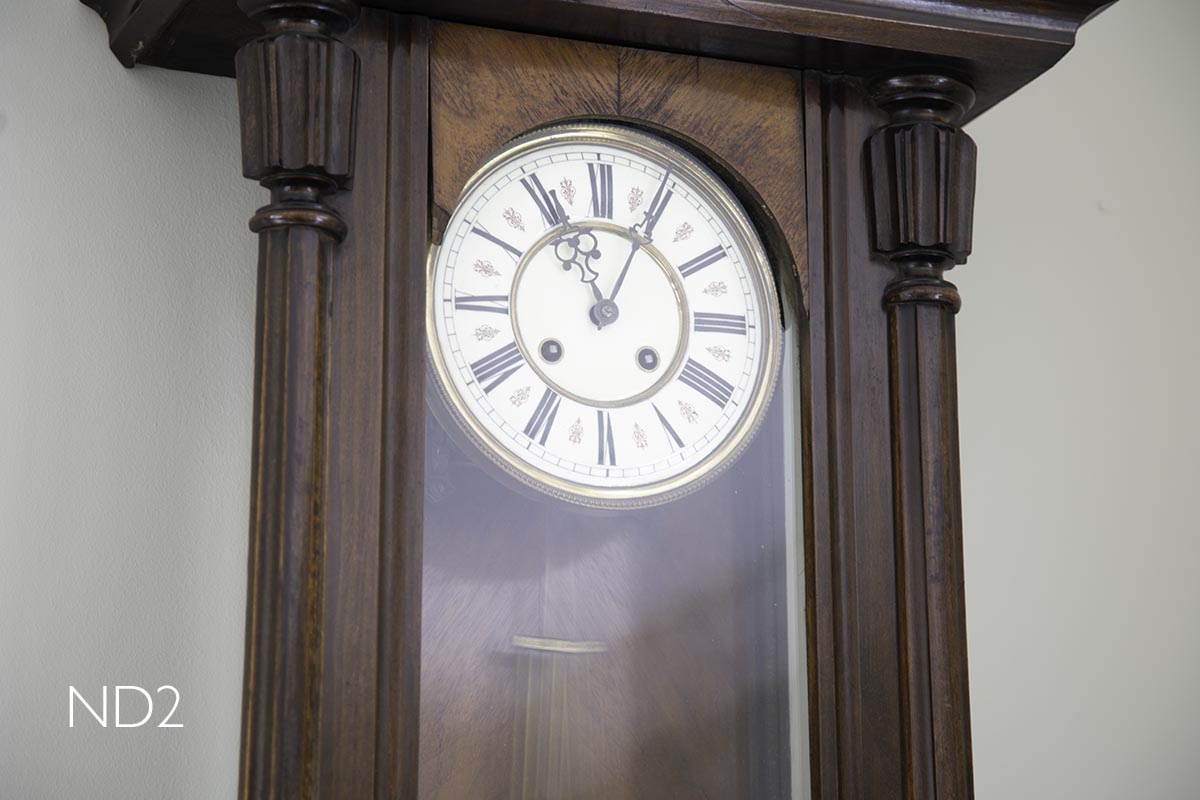
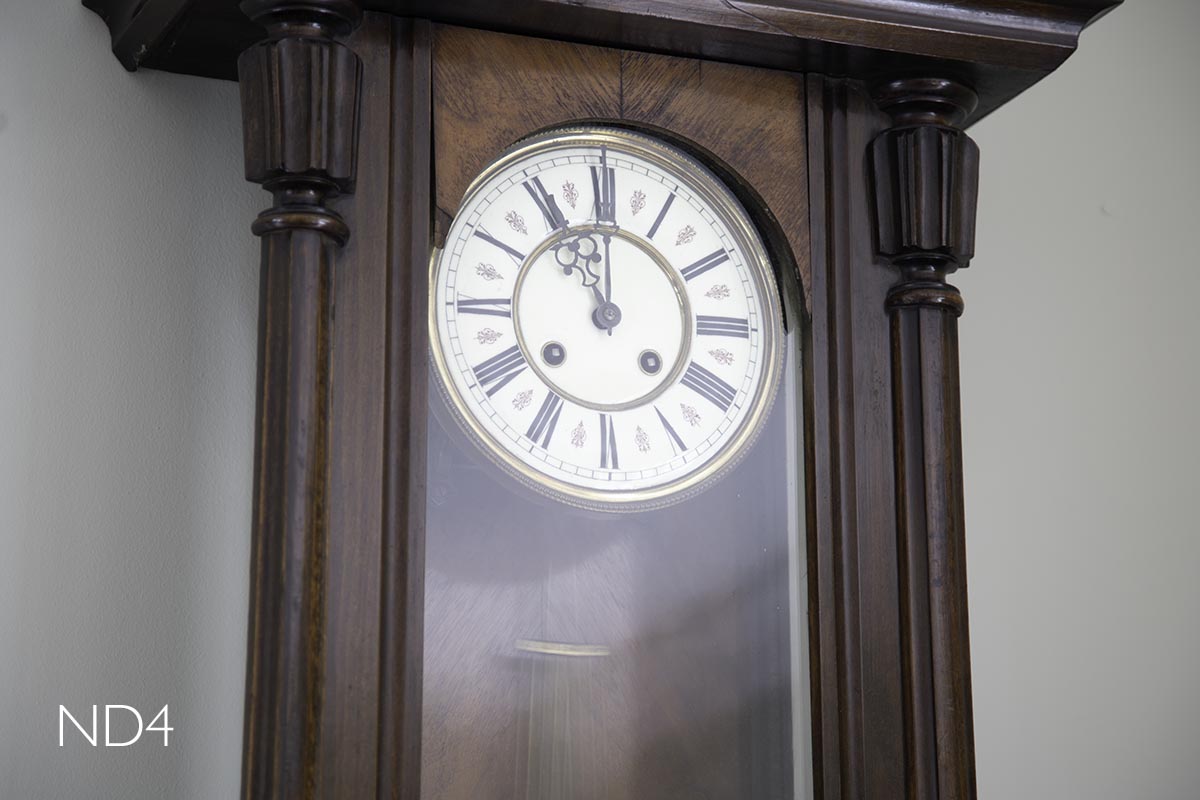
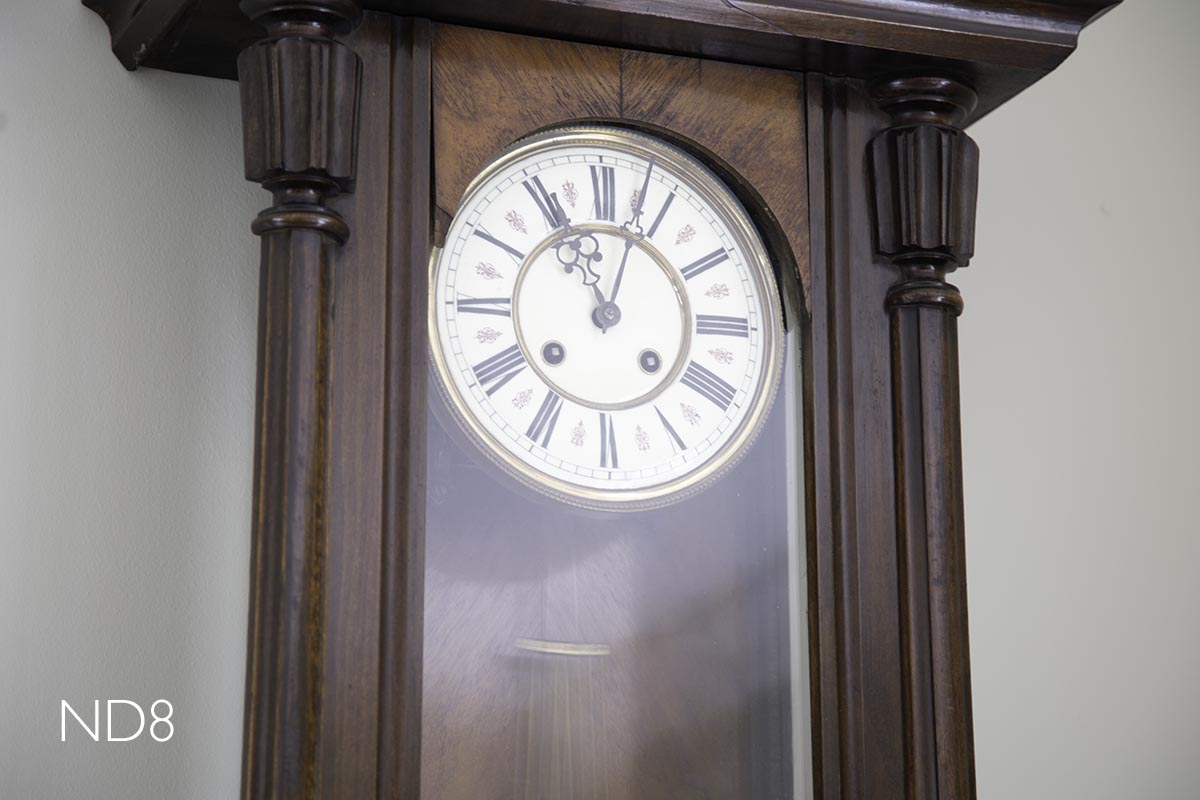
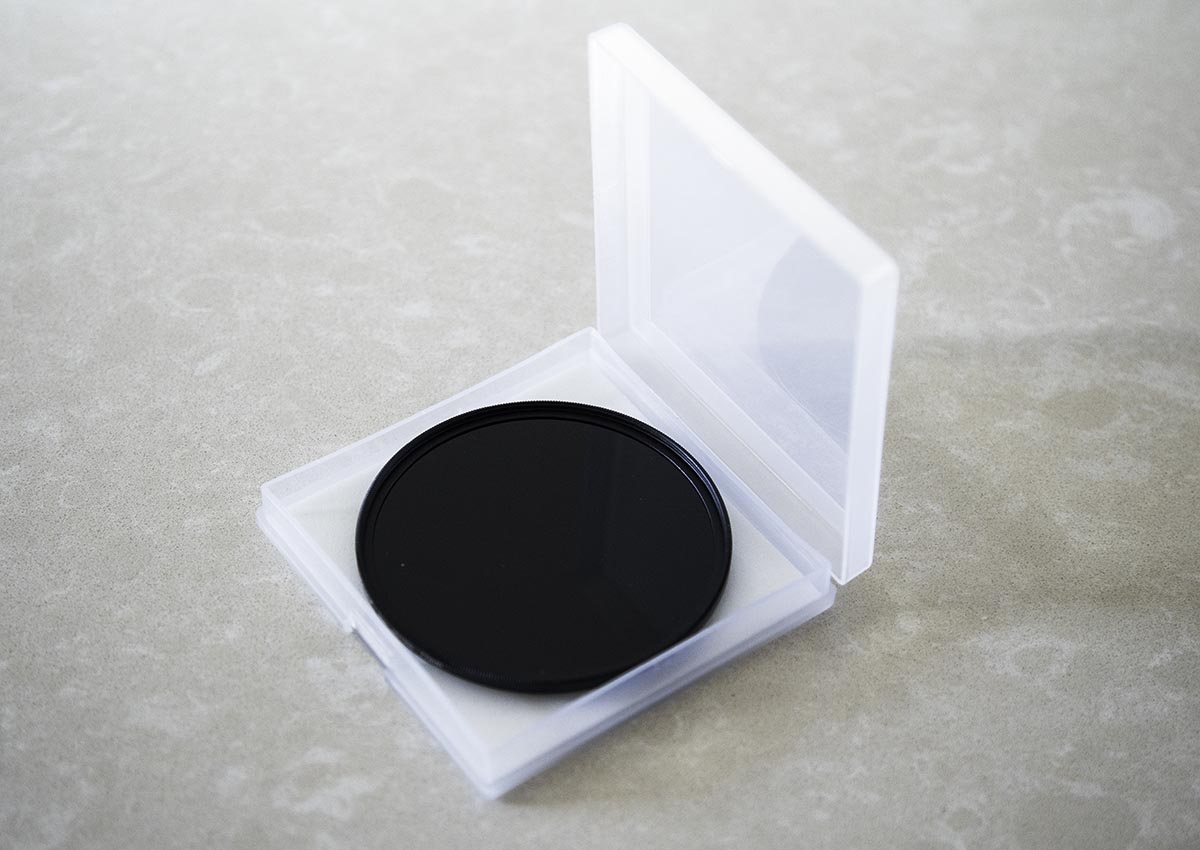
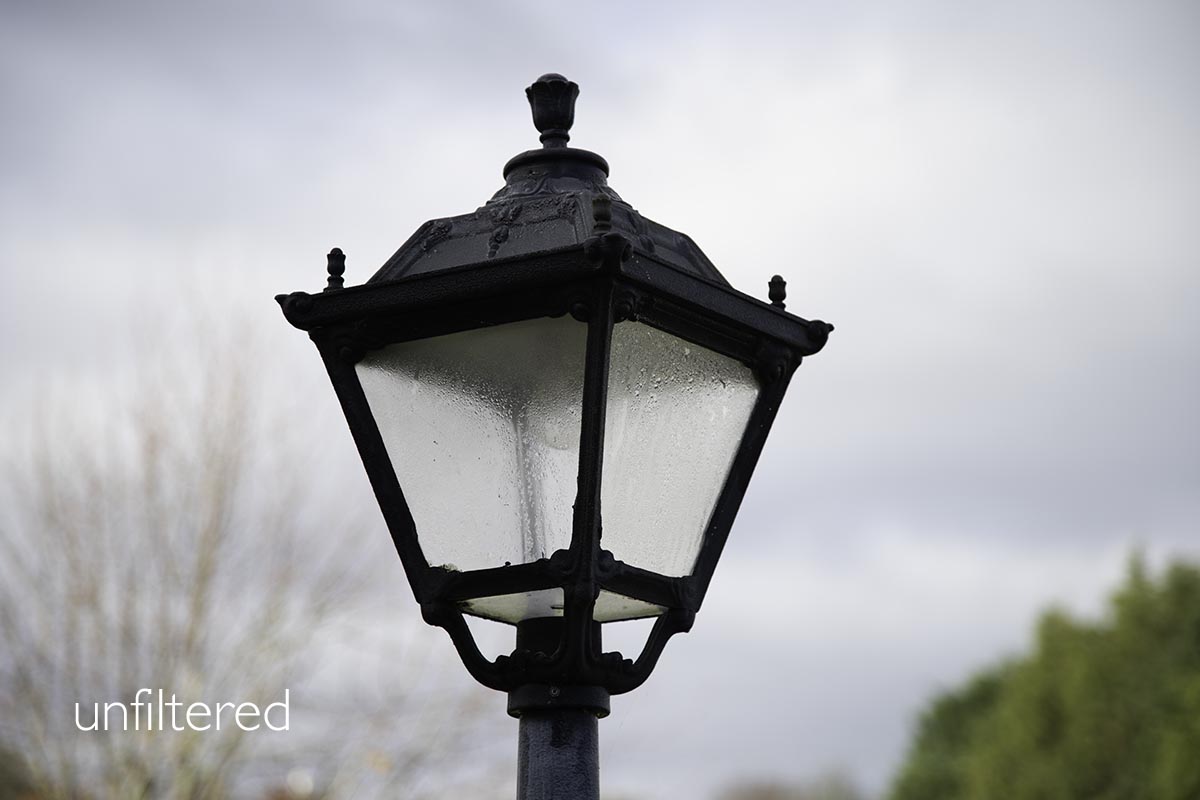
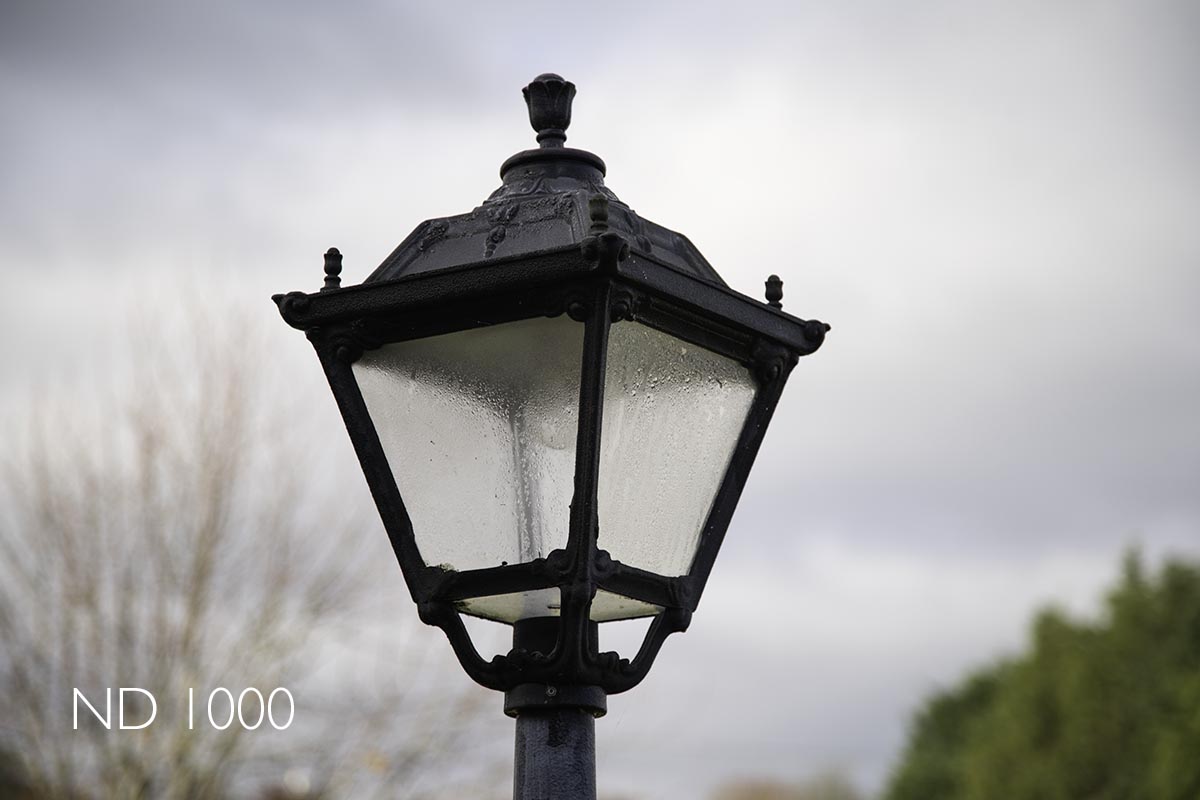
Review: Neewer ND filters
Neutral Density (ND) filters are a vital addition to the photographers toolset. They allow you to continue shooting in very bright conditions with fast apertures, but also open up opportunities in slow and ultra slow shutter speed photography. Typical examples of this would include light painting, waterfalls and seascapes, any application really where blurred motion is creatively desired.
ND filters come in two main forms & square filters for use with Cokin type lens filter attachments, or screw on filters. The square filters are versatile, coming with a series of step down rings allowing them to be attached to a wide range of lenses. Most however, are made from resin and are easily scratched. The filters reviewed here are glass screw on filters with a diameter of 77mm. Three of my lenses (24-105mm, 70-200mm and 100-400mm) all have this diameter, but you should of course check your own lens diameters and choose accordingly.
This review covers a kit of ND2, ND4 and ND8 filters which come in a nice carry pouch (£12.99 from Amazon) and a Neewer ND1000 or 10-stop filter bought separately for £9.99, also from Amazon. These are great value when you consider that a single B+H ND filter will sell for around £40.
Value is one thing, but optical quality is another. Cheaper filters often come with a cost in colour fidelity, causing a colour shift towards blue or magenta, typically. These Neewer filters are no exception, with a slight shift towards blue. You can see in the clock examples above that the ND2, 4 and 8 are noticably cooler than the unfiltered version. The ND1000 is more neutral though, giving a slightly warmer value than the unfiltered shot. All of this is, of course very easy to fix in post.
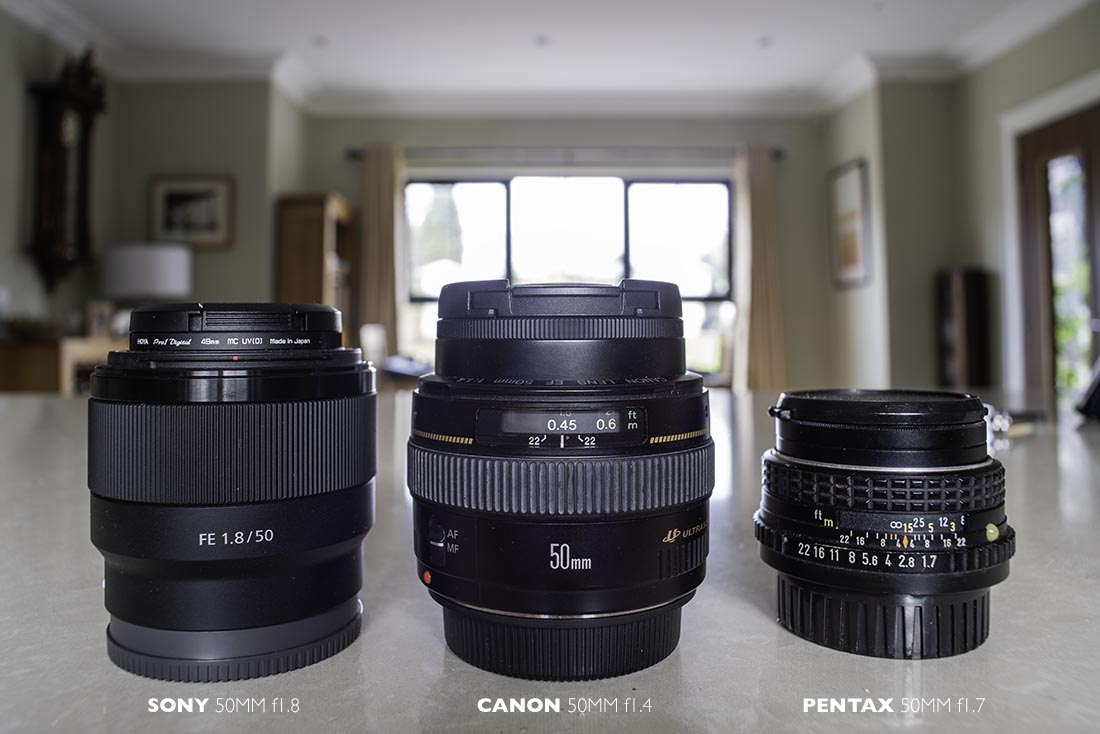
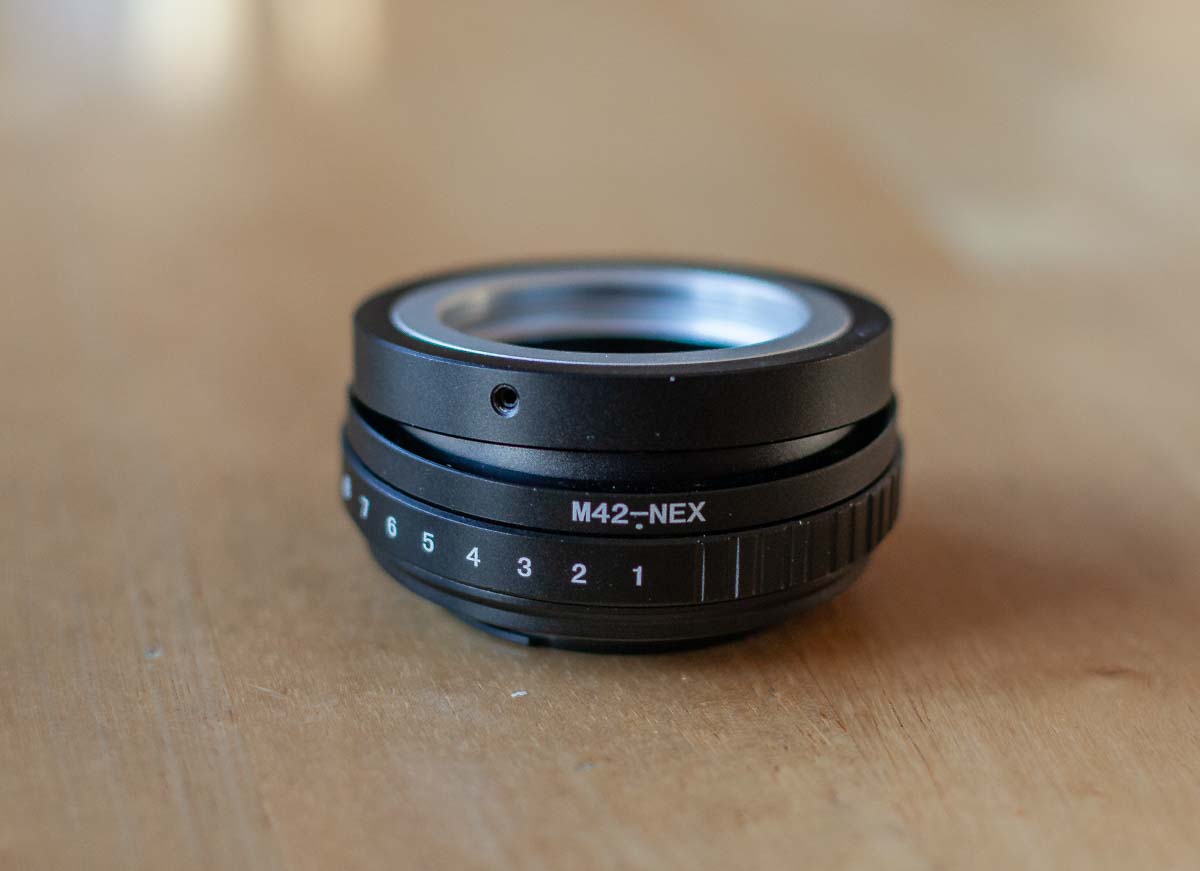
Vintage lenses and adapters
One of the big advantages of mirrorless cameras over DSLRs (Canons in particular) is the availability of various adapters allowing a huge range of lenses of various mount types to be used.
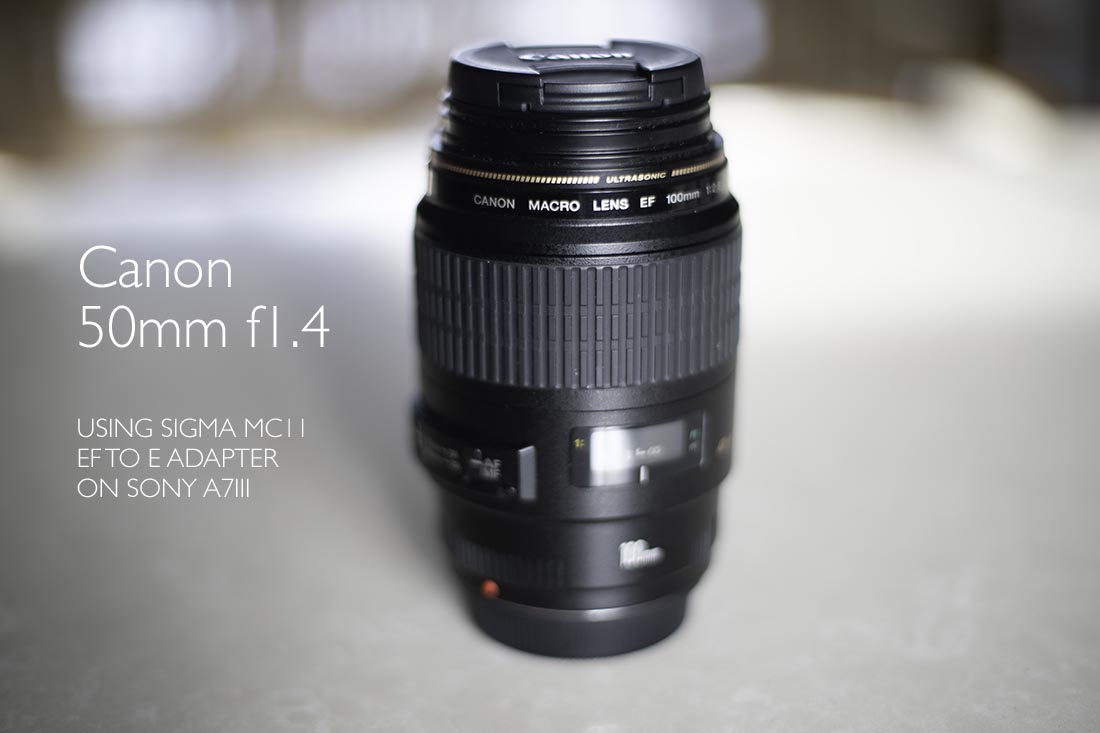
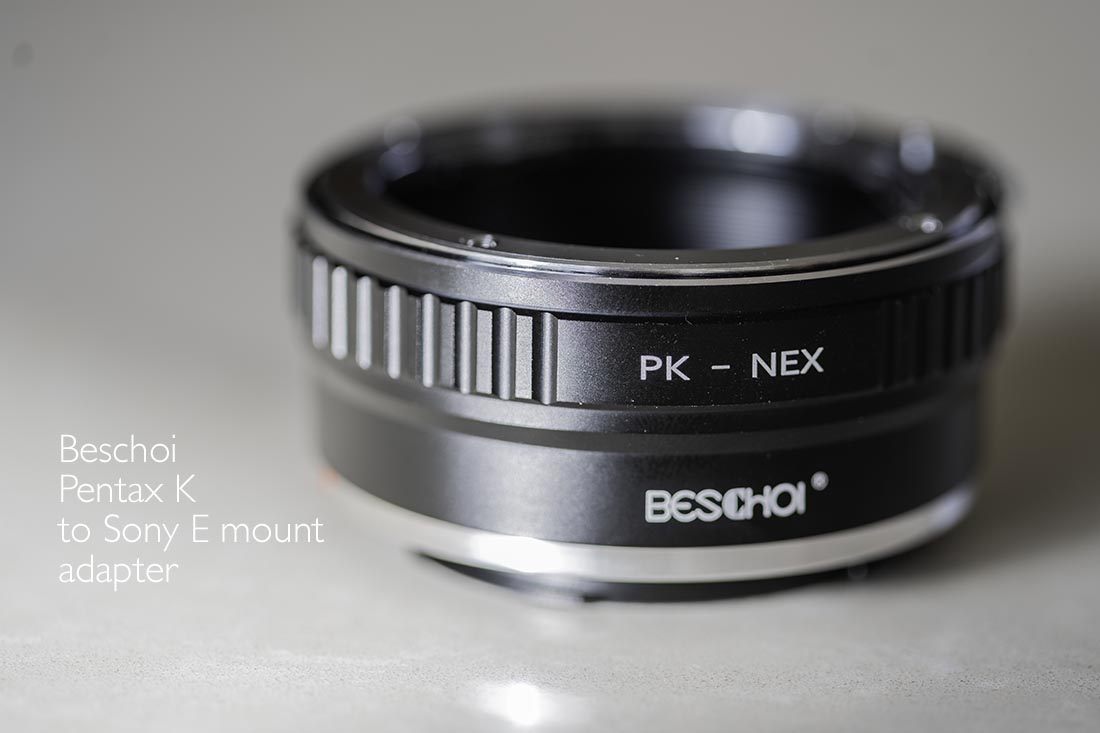
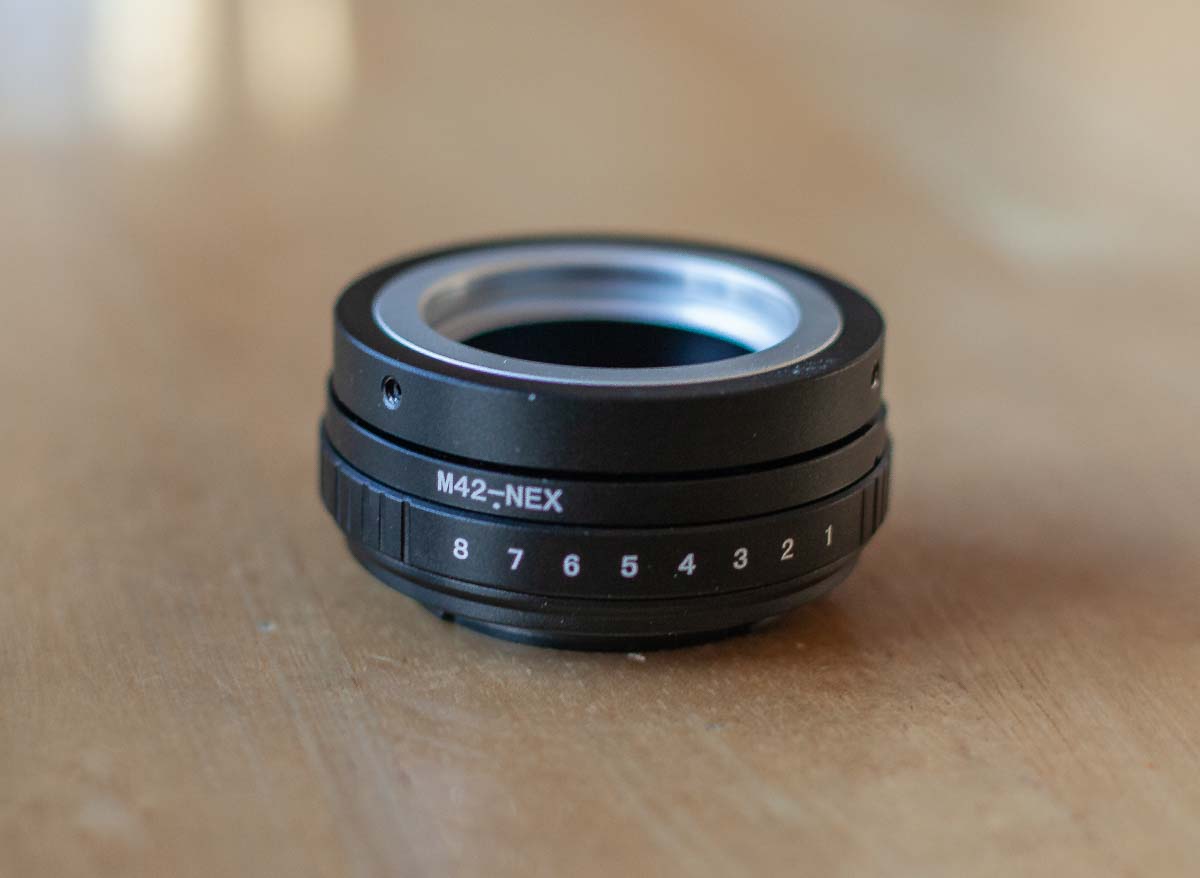
These adapters range from the expensive, like Metabones Speedboosters or Sigma's MC11 (which I use to adapt my range of Canon lenses to Sony bodies) to the cheap, like the Beschoi PK to Sony E mount adapter shown here. I picked this up for around €20 on Amazon.
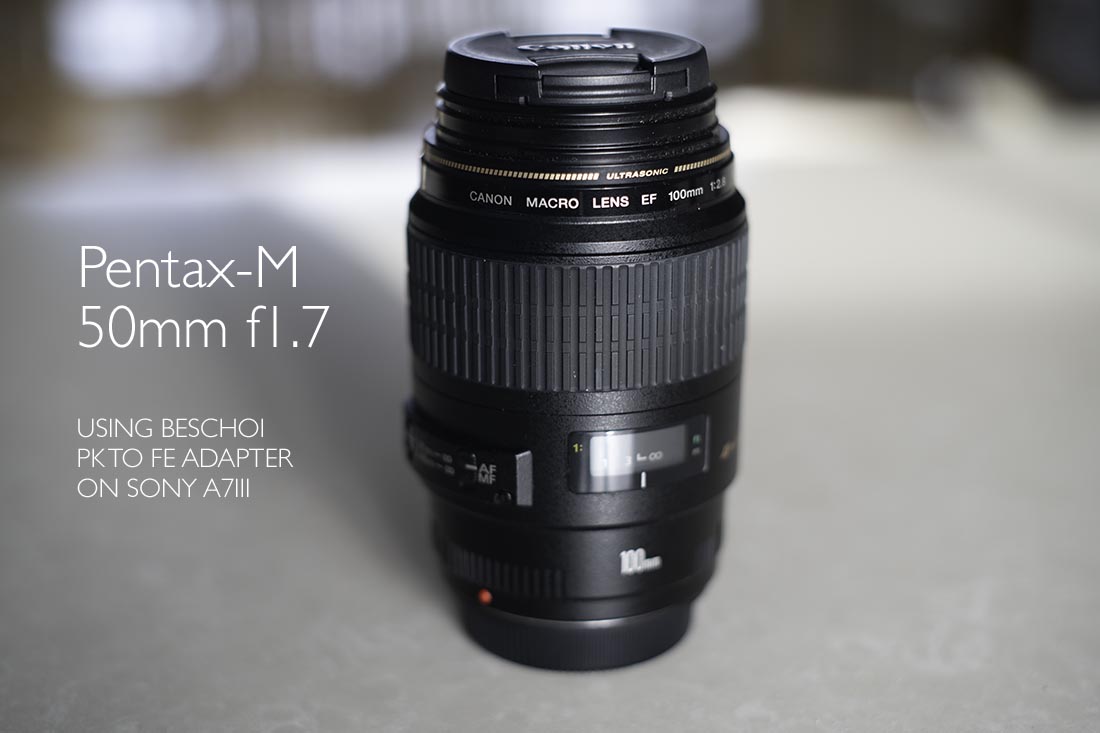
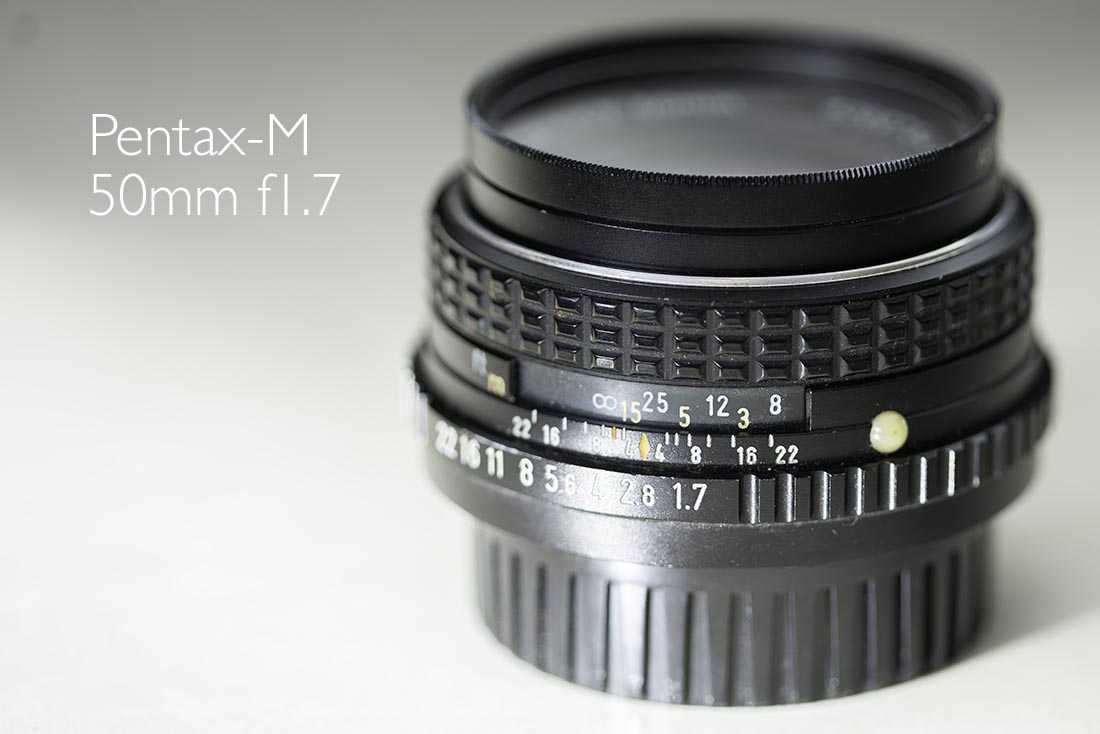
When I started in photography, I used Pentax and Ricoh bodies, both of which use the Pentax K mount (PK). Sadly, I sold my best lenses, an 85mm f1.8 portrait and a 135mm f2.8, but I still have a 50mm, 24mm and a crappy Vivitar 400mm mirror lens.
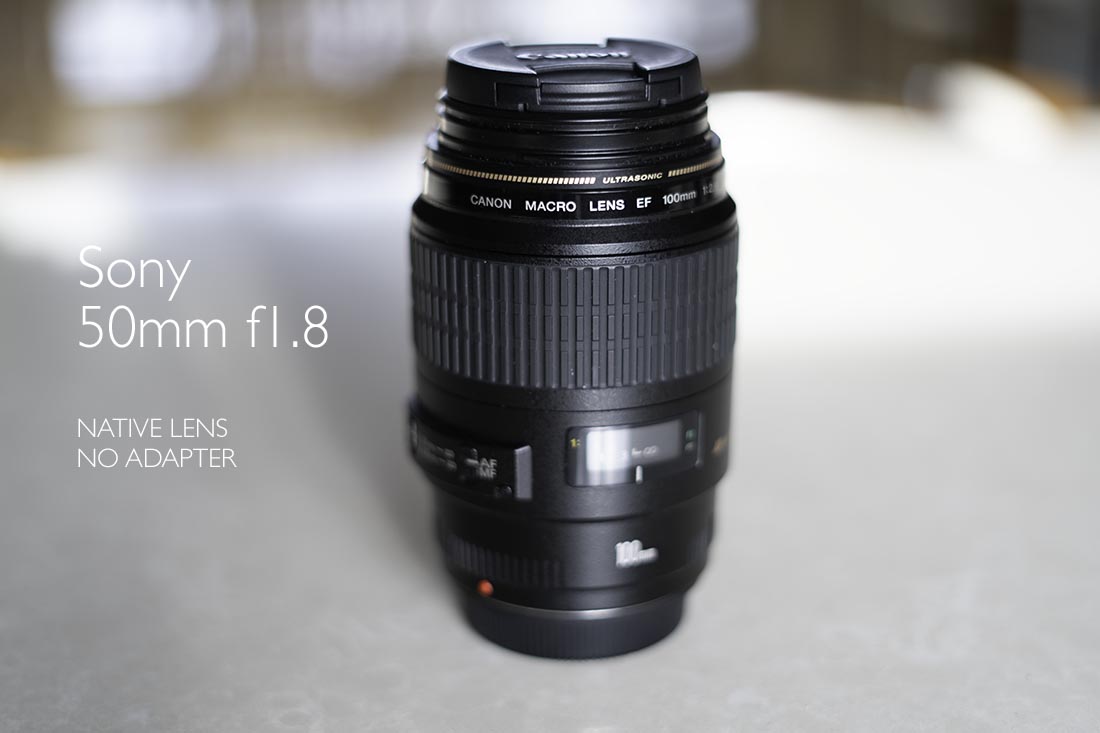
Out of curiosity more than anything else, I got the adapter so I could compare the three "nifty-fifties" I have — the Canon f1.4 which has been my main for over a decade; with the Sony f1.8 I got for the A7III and the old Pentax-M f1.7. You can see the results above. To my surprise, the Pentax is slightly sharper than the Canon. It's also tiny by comparison to the other two.
As a point of interest, the shot of the three lenses above was taken with a Sigma 24mm f2.8 also using the adapter. It displays good sharpness too, and is considerably brighter that the 24-105mm f4 which I normally use.
These adapters are "dumb", meaning they are fully manual — no autofocus and aperture control is on the lens, not the camera. I don't mind this as I usually shoot manual anyway, but the lack of an electronic connection between lens and body means that you do lose lens and aperture metadata.
Given the affordability of these adapters and the availability of vintage lenses, this is a small price to pay. Be aware that many photographers are hunting out the best of the old lenses and prices are rising.
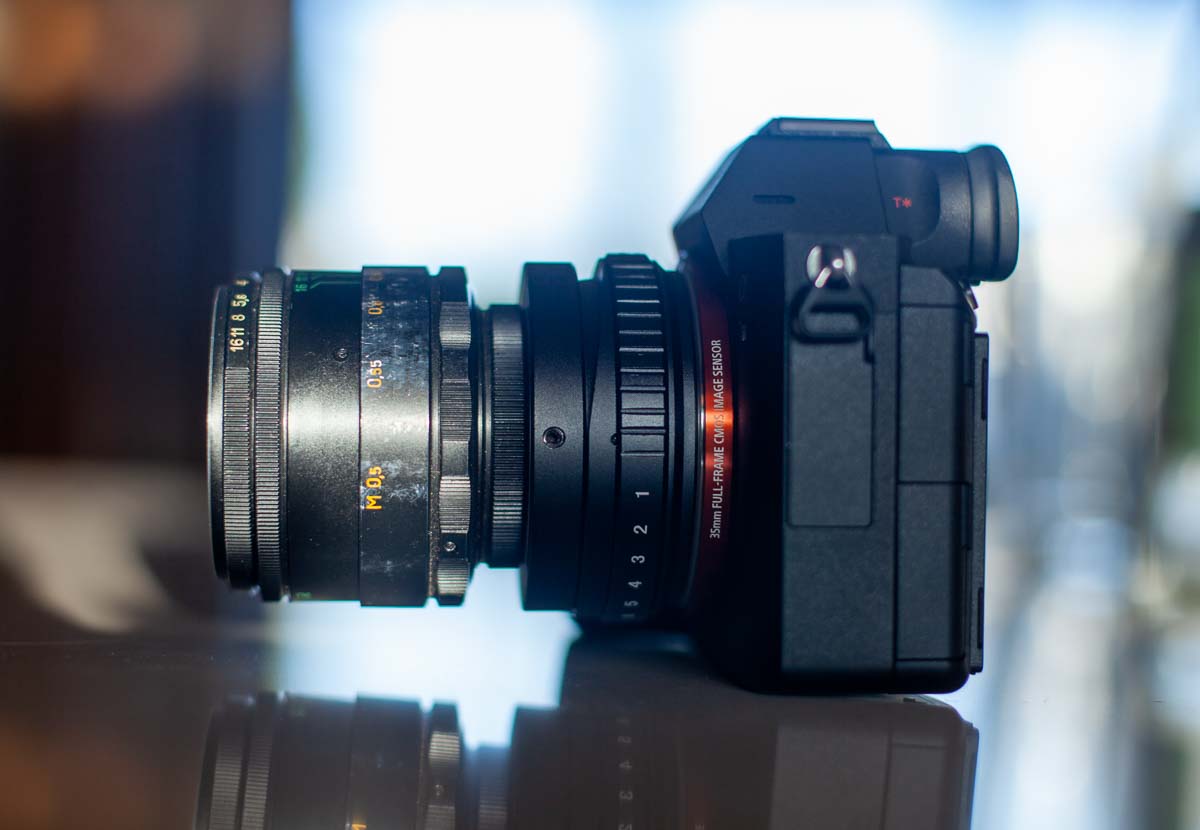
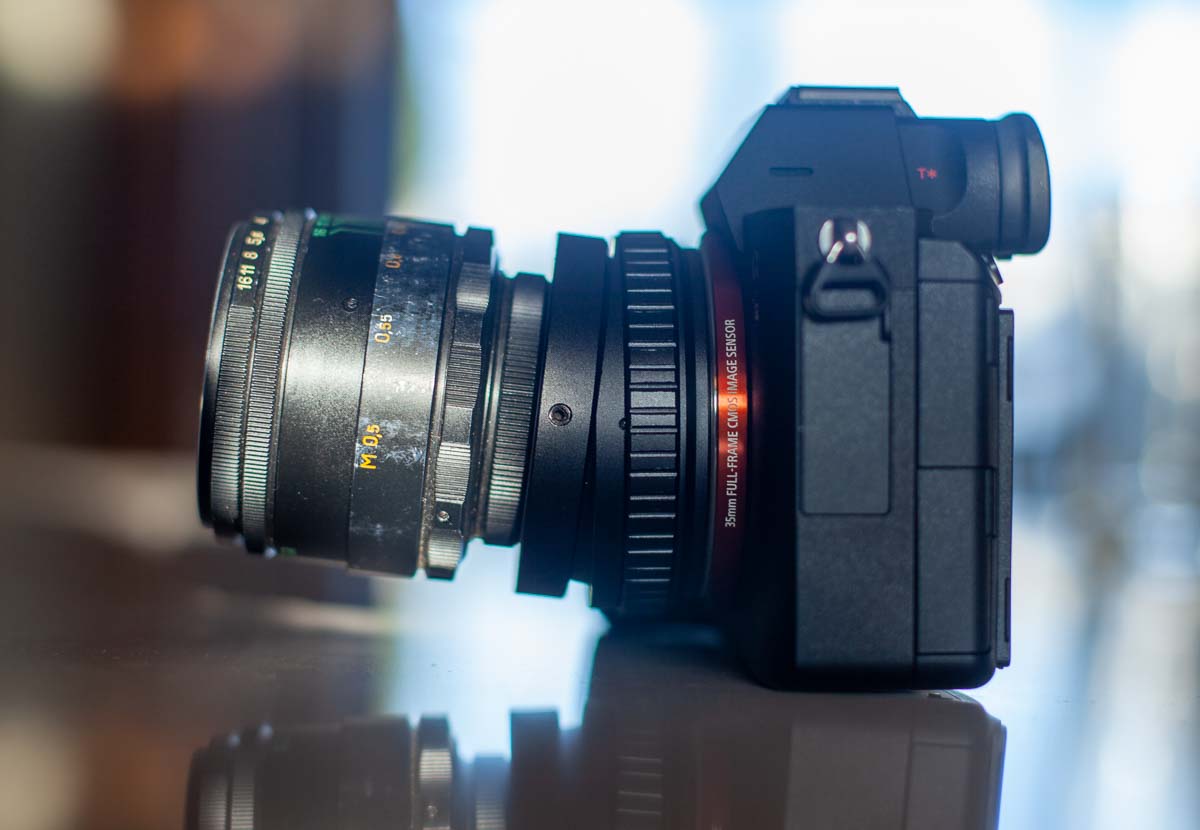
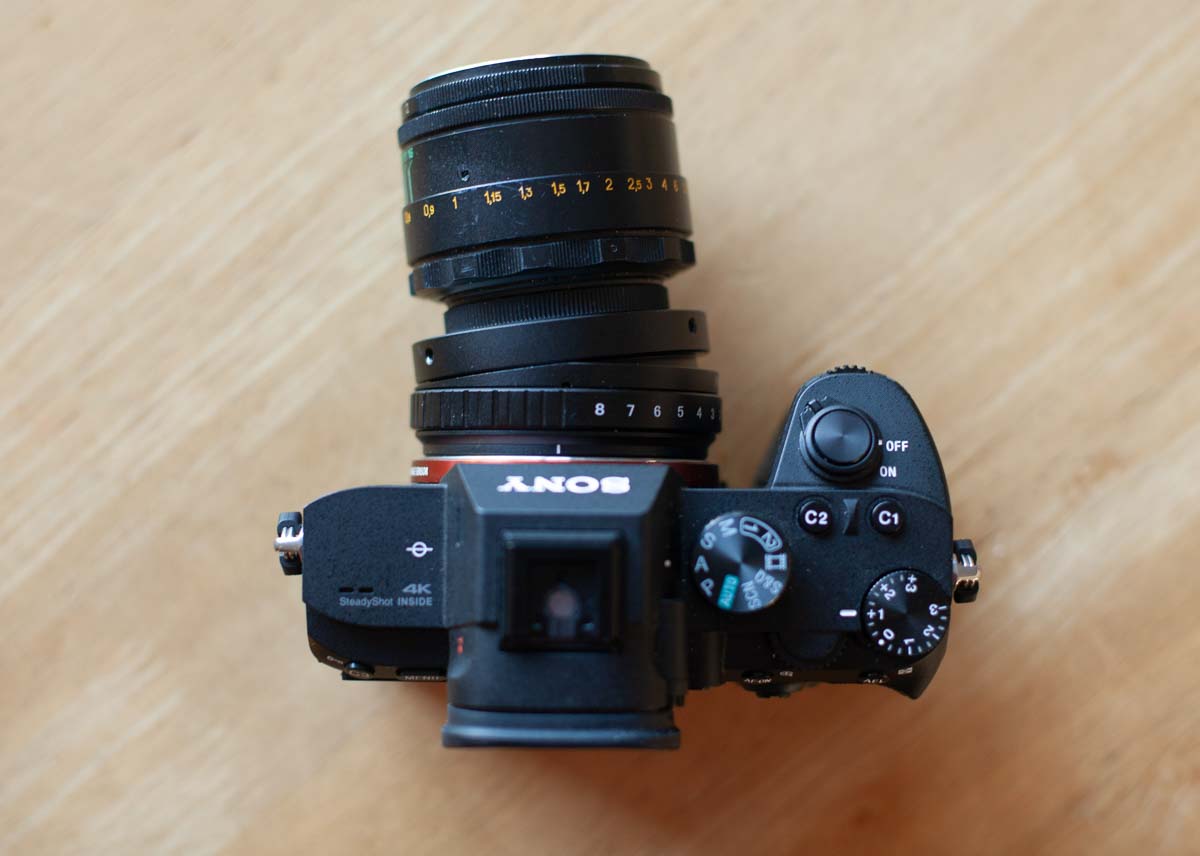
Tilt Adapter: M42 to Sony E mount
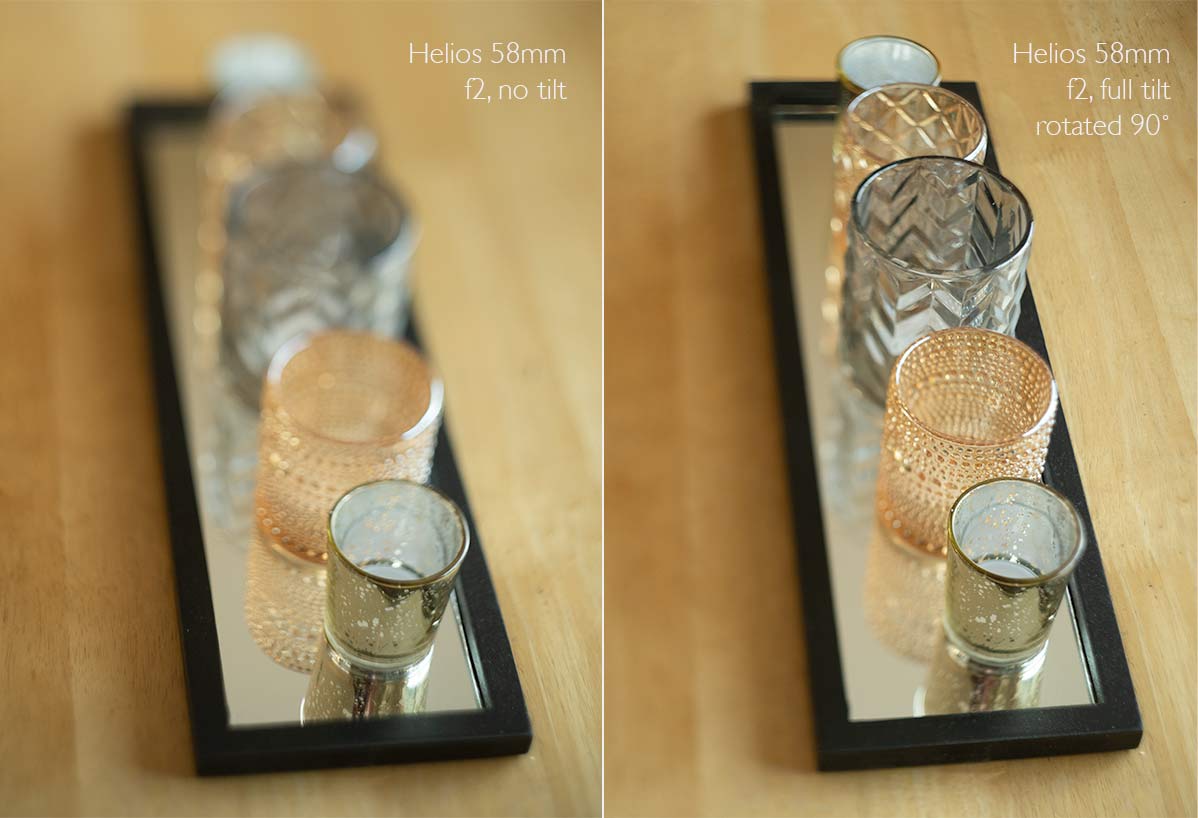
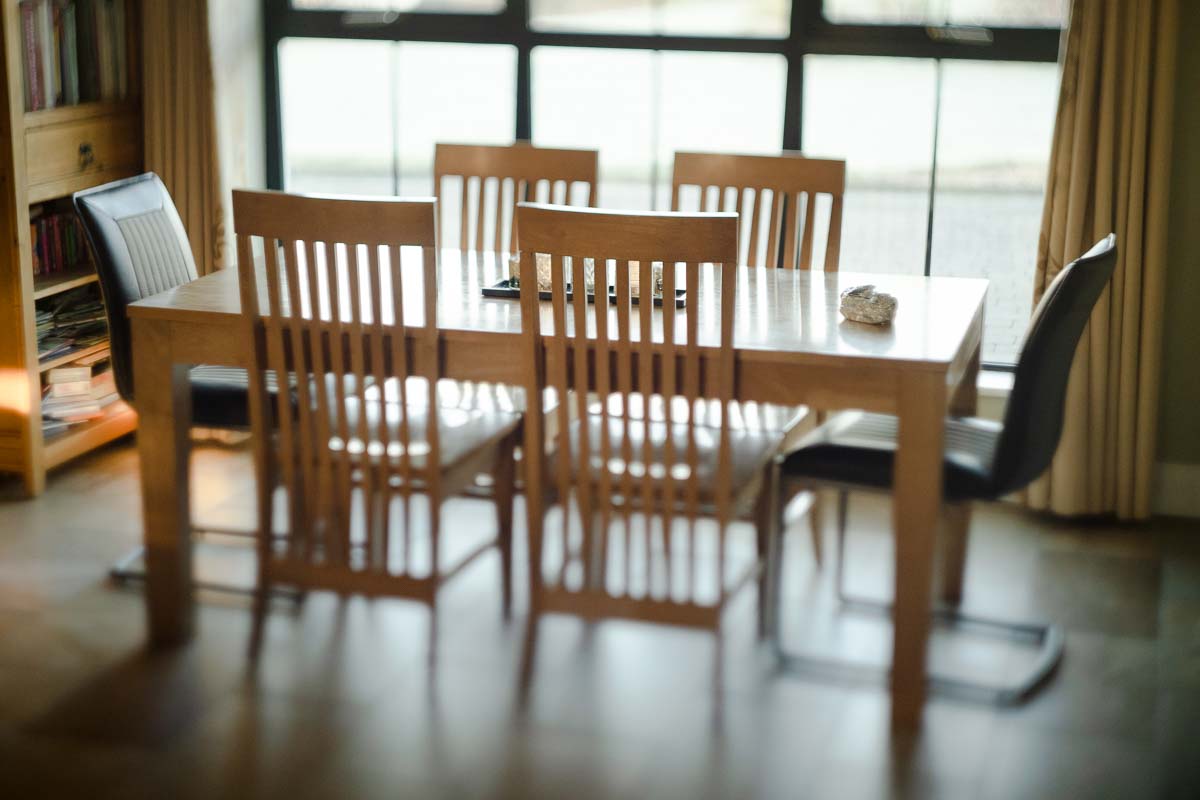
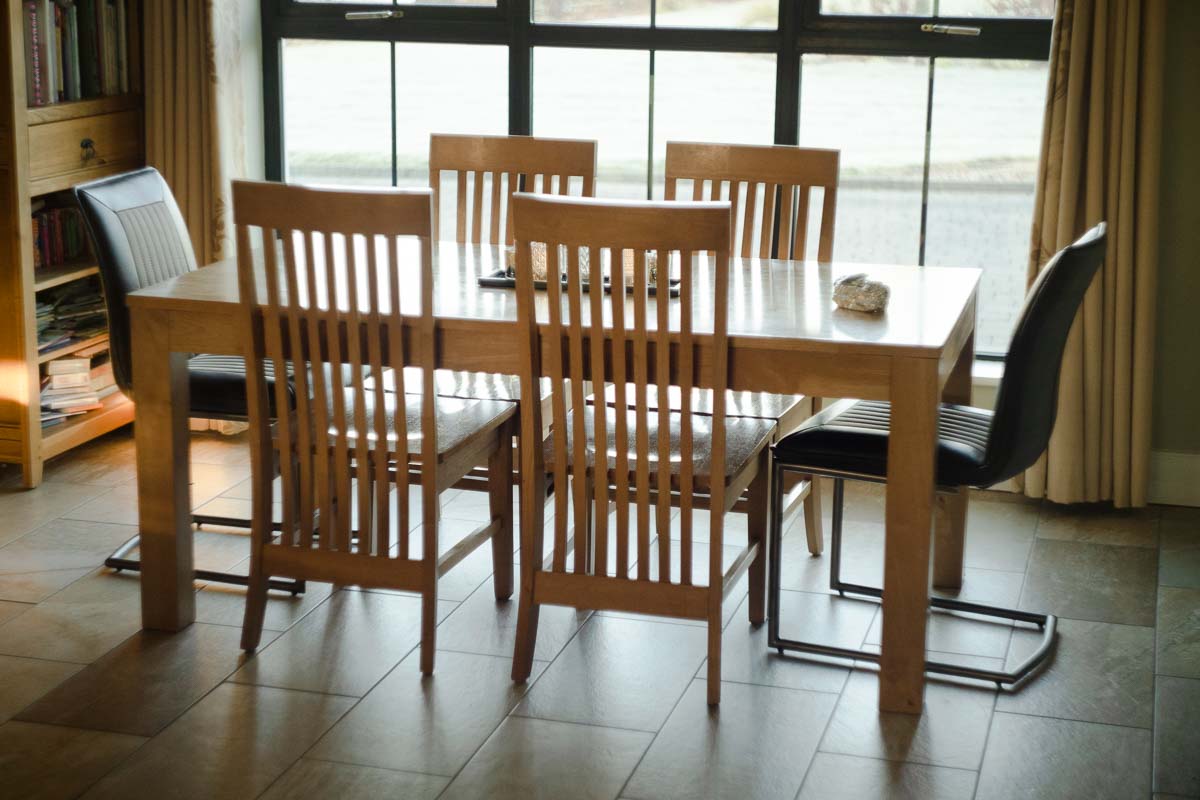
I wrote in the previous post about the various adapters available for using vintage lenses on mirrorless cameras. I stumbled across this one on ebay. This adapter allows the lens to be tilted by up to 8° relative to the focal plane. It can also be rotated 360°. This allows for some unusual results.
Tilt-shift lenses are most known for their miniaturisation effect and the web is awash with shift miniatures, or more often than not, fakes. Tilt shift lenses are horrendously expensive. I've used the Canon 24mm TS in the past, more for its shift capabilities than its tilt. It retails for around €1500. Samyang have a version which sells at around €600, but the optics are reportedly very soft.
Although this adapter is advertised as tilt-shift, it is in fact tilt only. In a way, this is a good thing. Shift lenses require a much larger image circle than normal to allow for the shifting image on the sensor. Vintage lenses have an image circle just large enough to cover the sensor. If they were shifted, the image circle would be seen as a vignette at the edges.
Back to this adapter. As well as the miniature effect, it can also be used to control depth of field while keeping the aperture open. In the first image above, both shots were taken at f2. By tilting and rotating the adapter, it was possible to keep all of the candle holders in focus.
At around €20, this is pretty good value. It's all metal, connects well to both camera and lens. The movement does feel a bit sloppy and loose, but doesn't interfere with the function. There are Canon EF to Sony E versions for about €45.
One final note: Fotodiox do make an adapter for Canon to Sony which has both Shift and Tilt (€250), but I wouldn't recommend it because of the image circle reasons mentioned above. It is possible to get tilt shift adapters for medium format to mirrorless cameras. These lenses have a much bigger image circle and would work well, but are very expensive. I think these are only an option if you already own some.