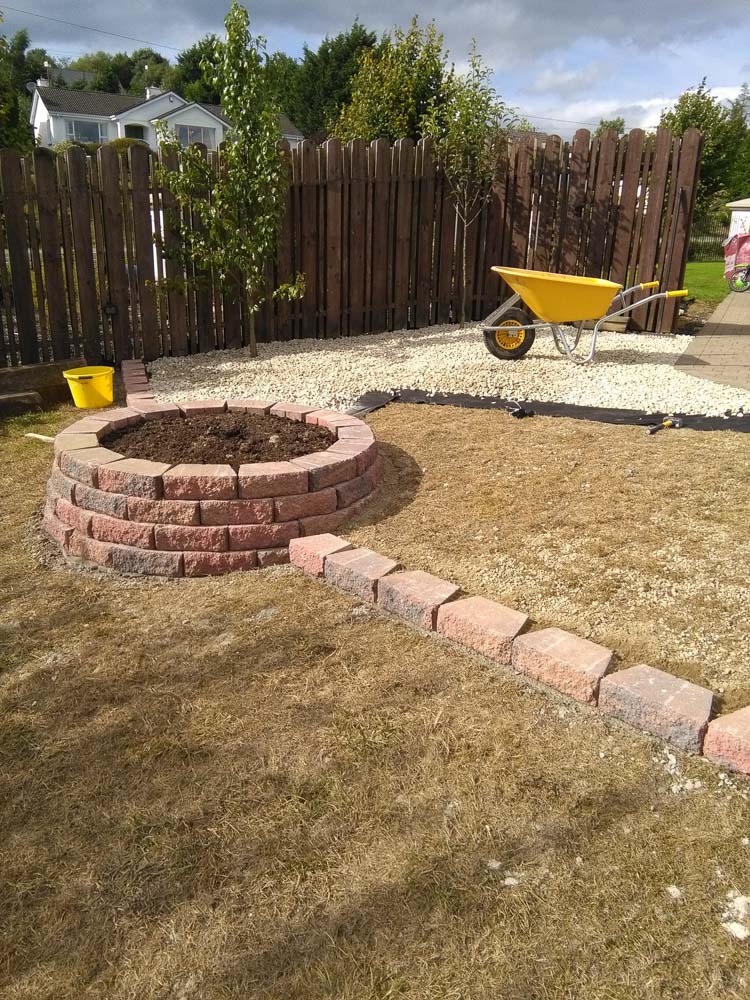
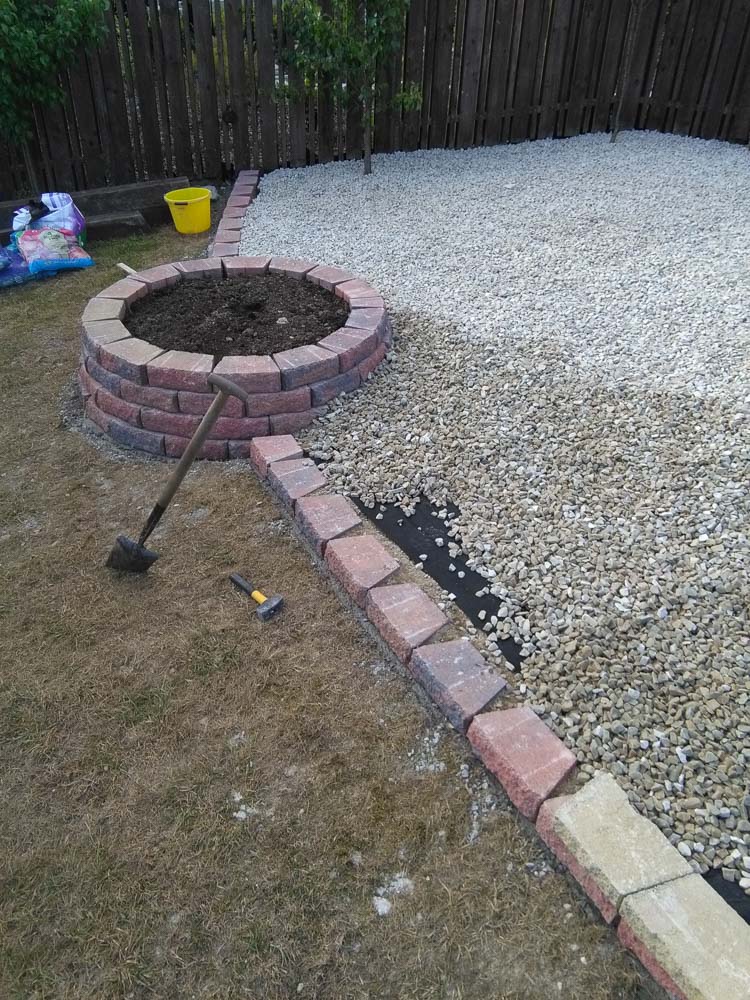
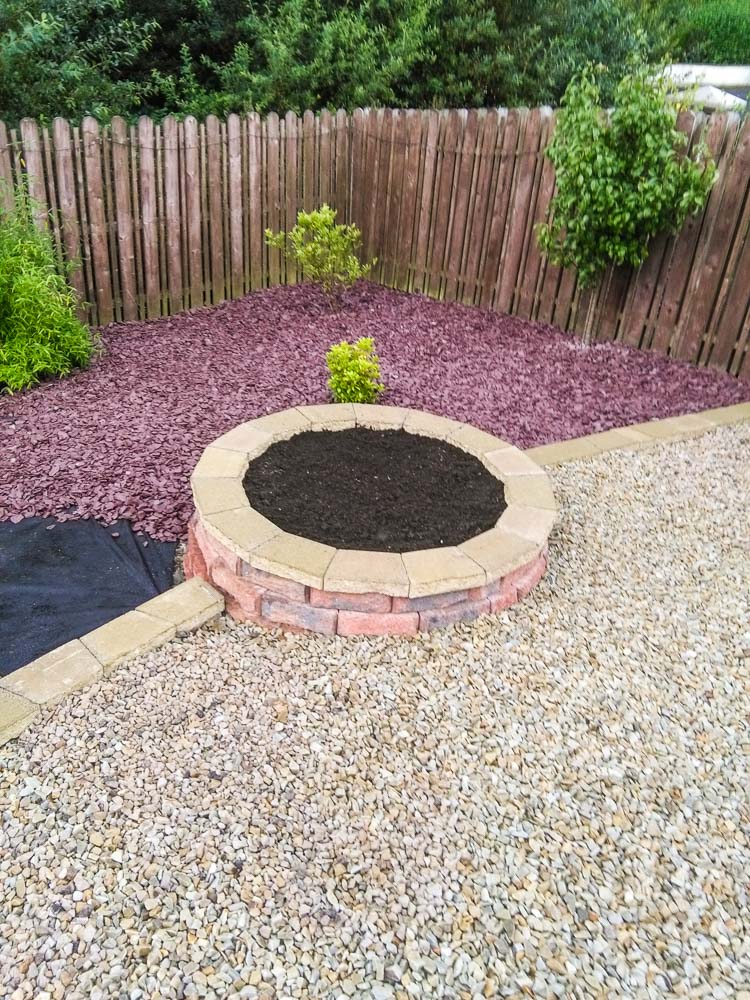
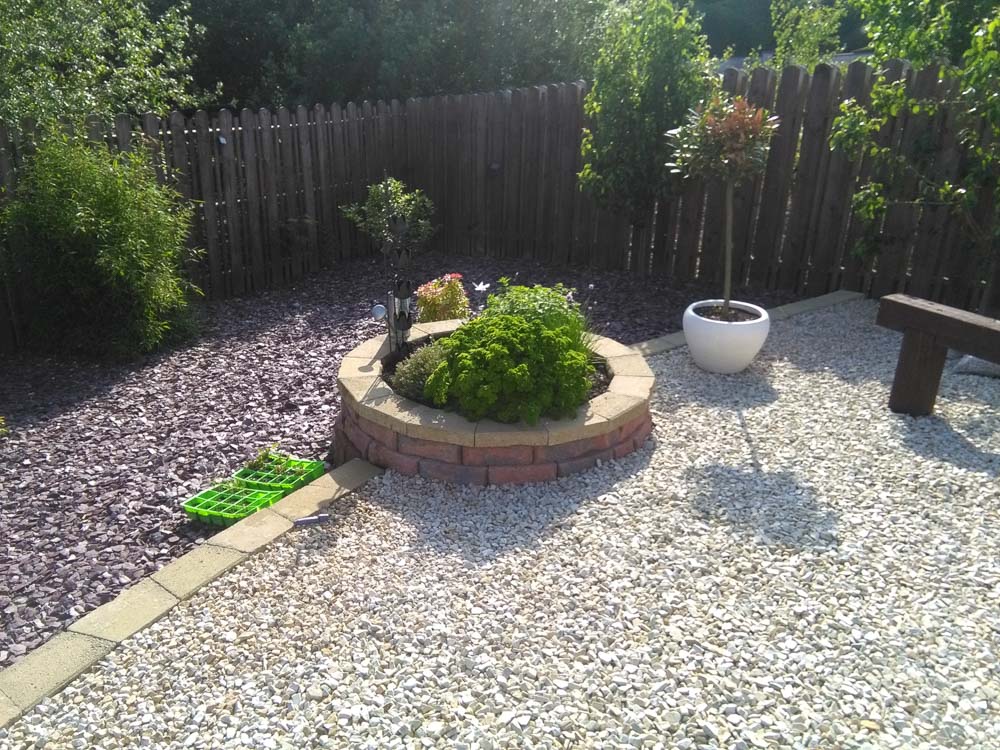
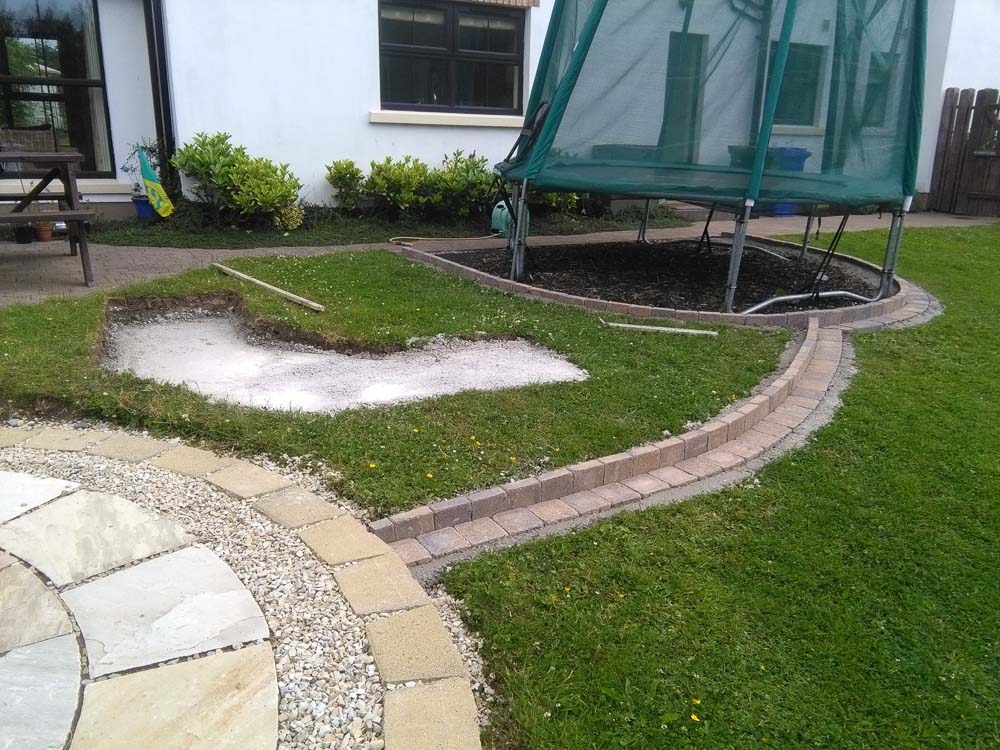
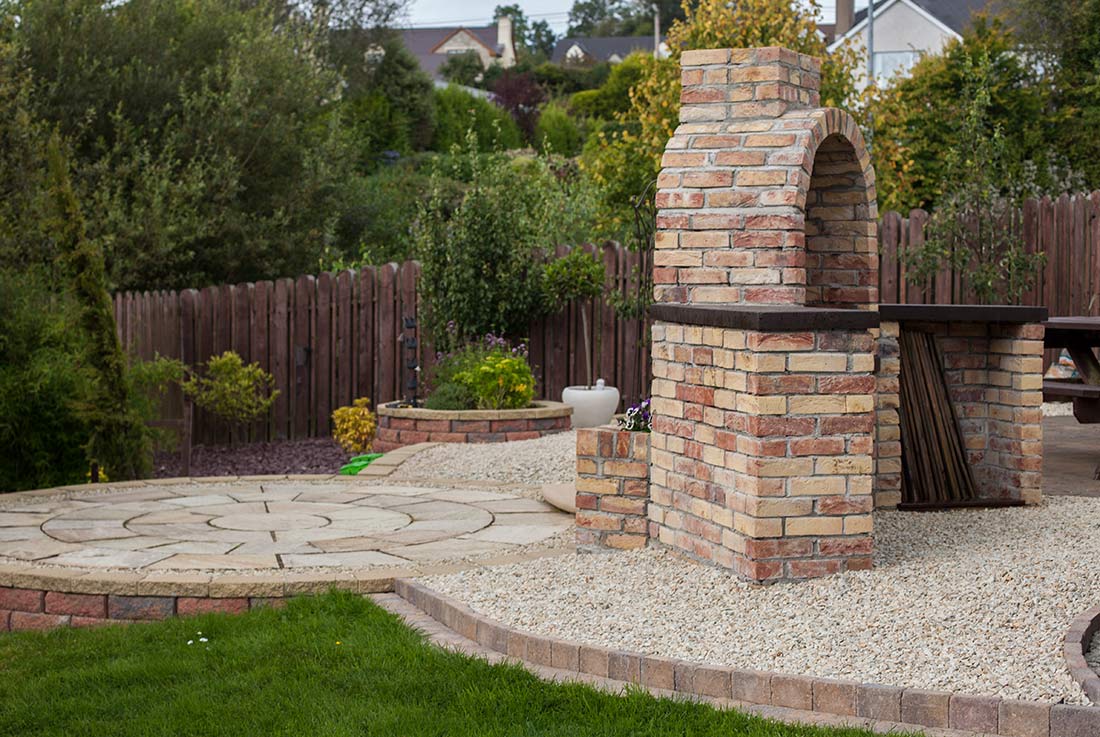
Inkwell Media, formerly Inkwell Design

Stuff & nonsense

As the title says, this page is for random things which take my interest. There's some landscaping, construction, wood work and stone carving. I generally document these kind of projects with a cameraphone, so please don't judge my photography on the quality of these shots!

Click the thumbnails below for expanded galleries.

Ramelton Mall 01 Patio image Patio image Patio image Patio image Patio image Patio image Patio image

Patio build

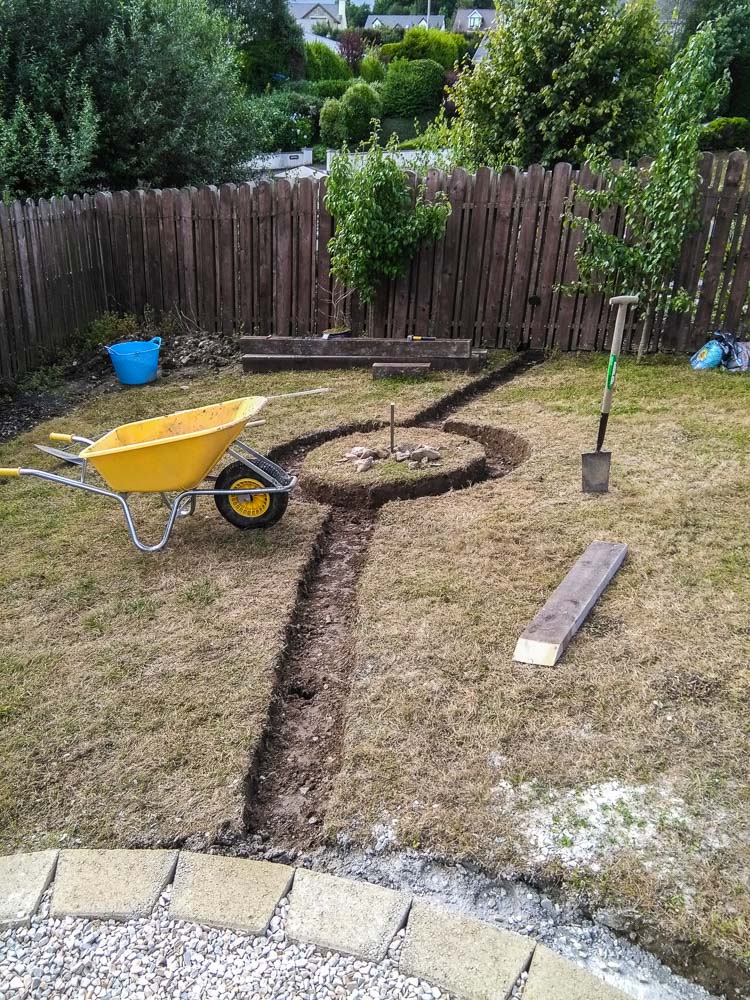
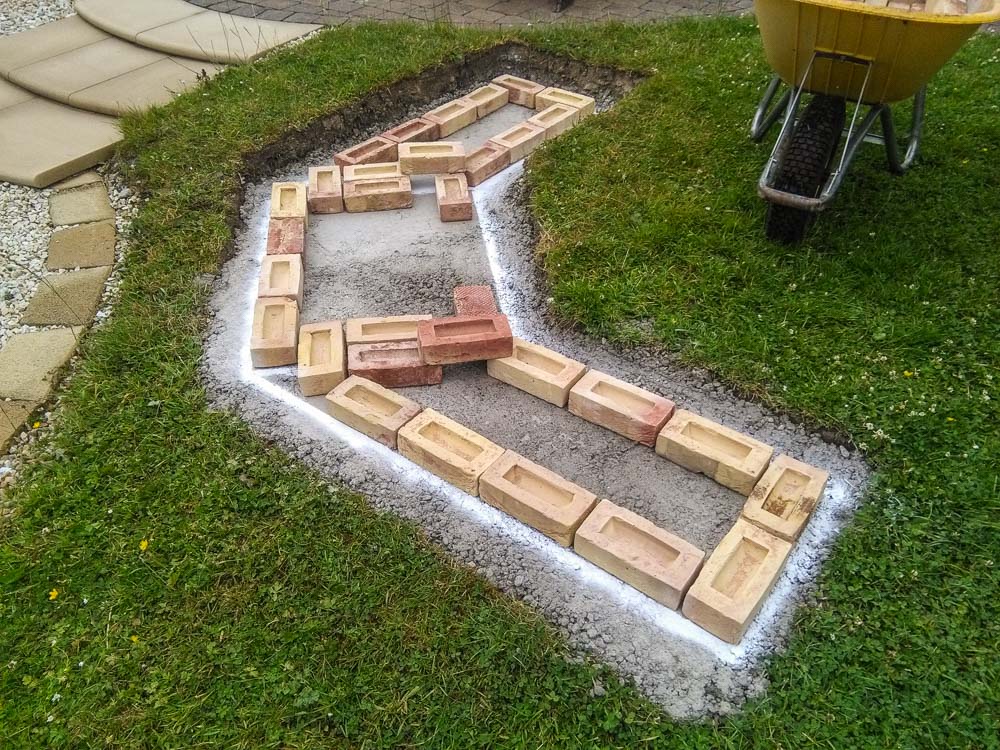
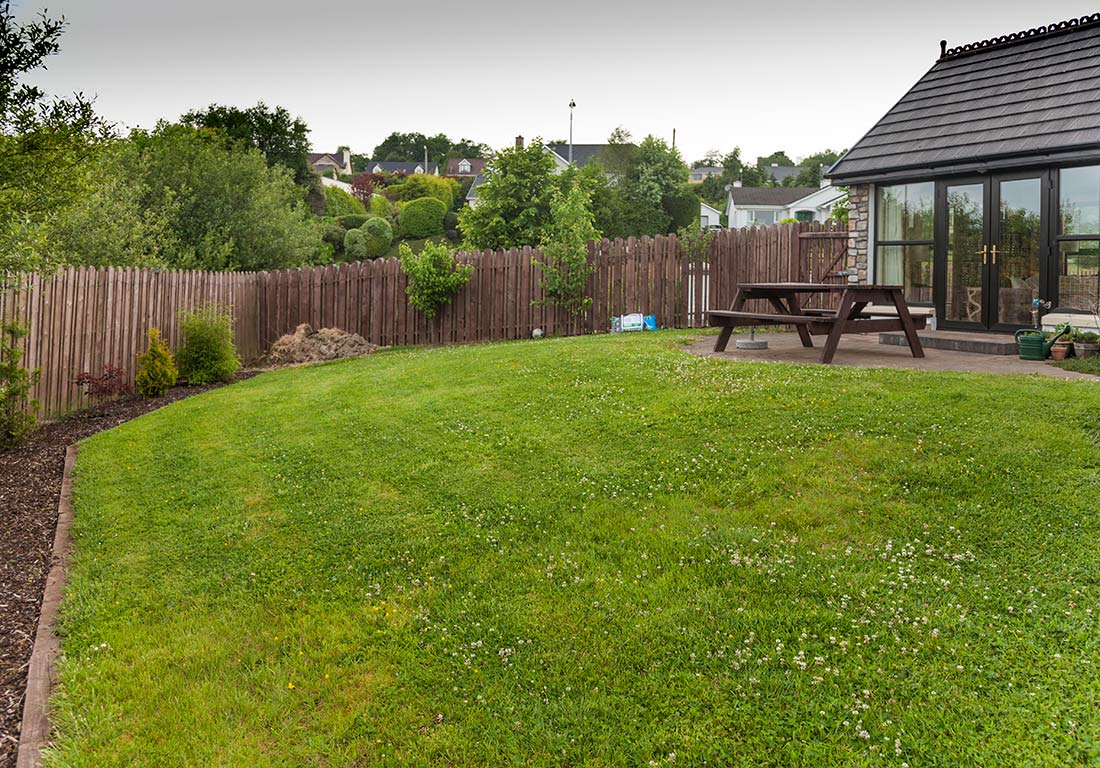
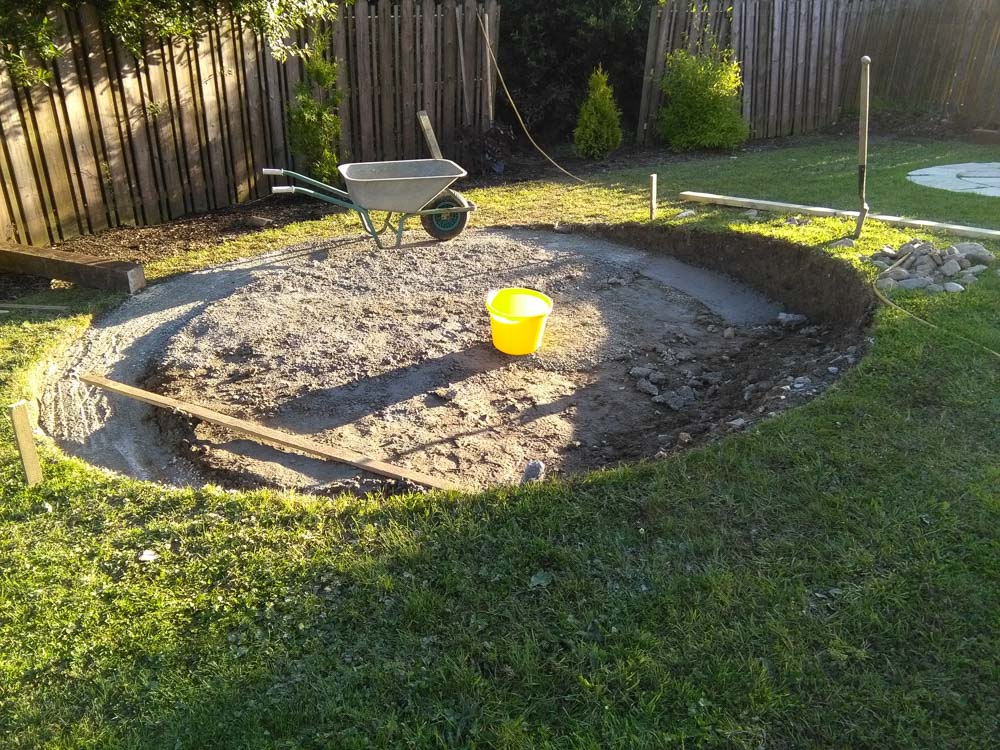
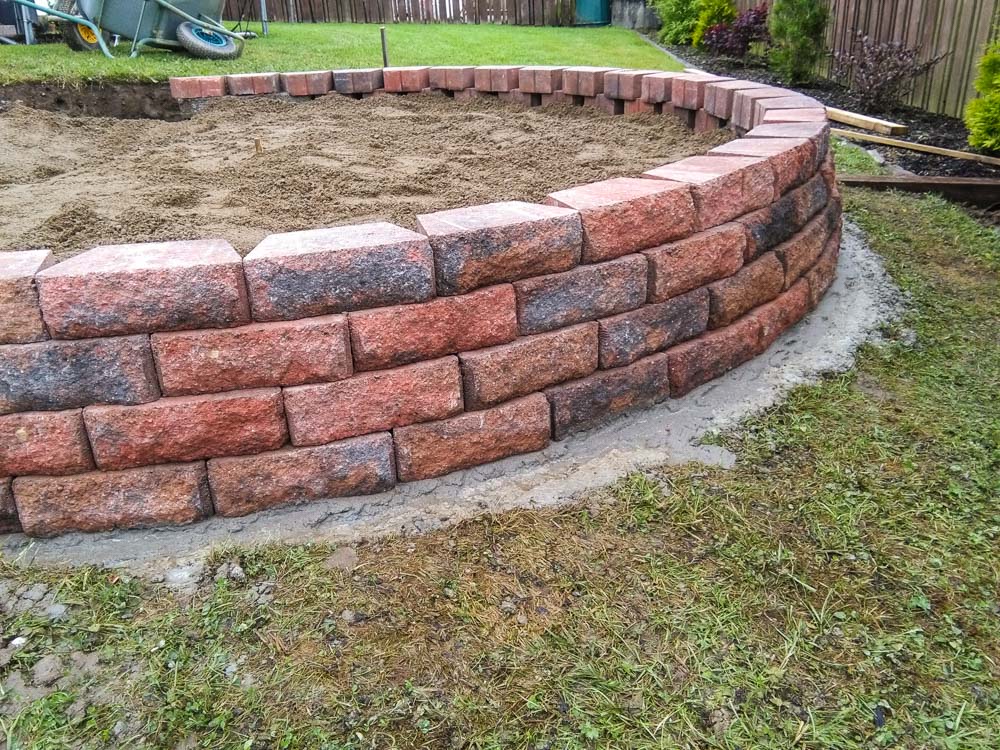
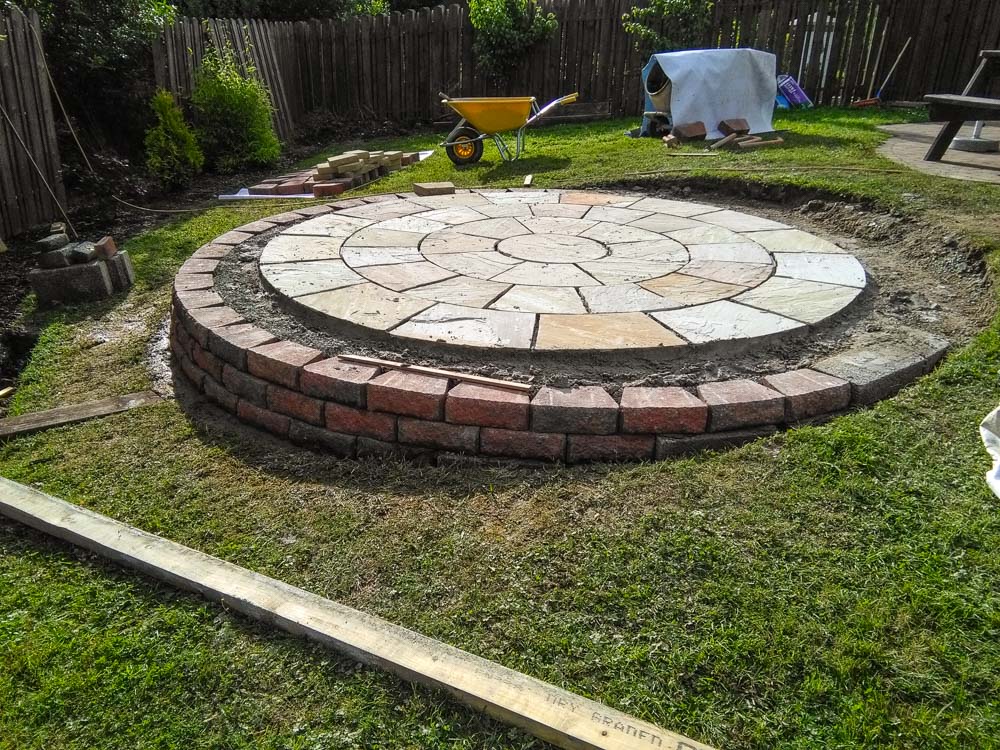
My back garden is on a significant slope, so it needed to be terraced to create an effective patio. This turned out to be a pretty big project. I needed to excavate down about three feet to lay foundations, a lot of it through rocks and hardcore. Thankfully Tommy, my father-in-law, is pretty handy in construction and carpentry among other things, and was able to help me out with the tools and knowhow to get the job done.

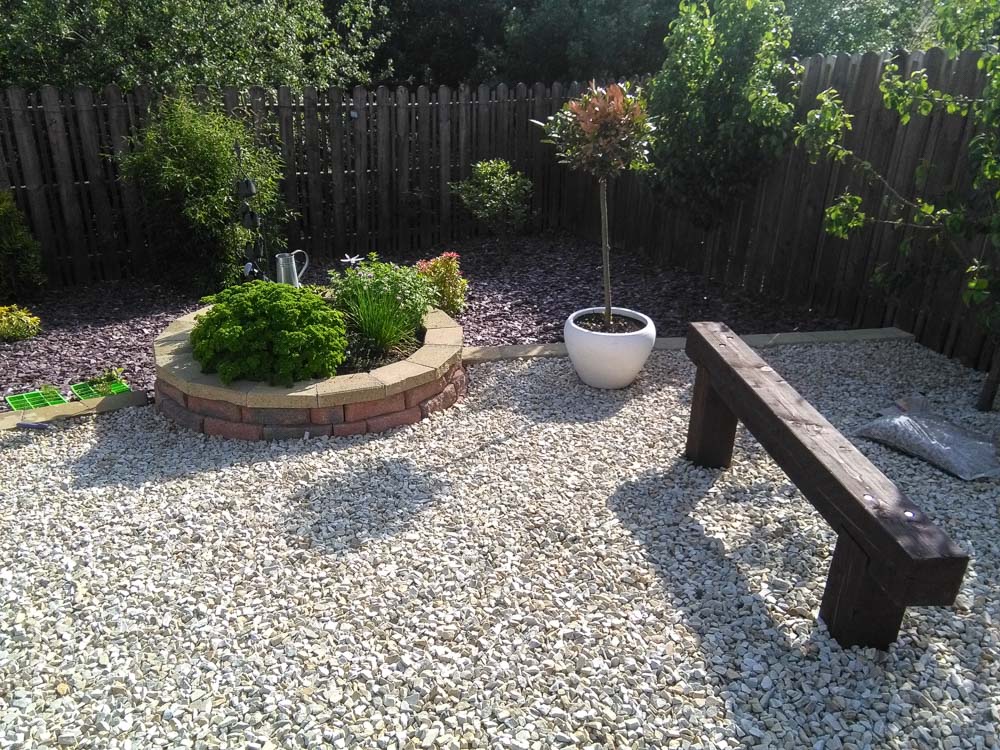
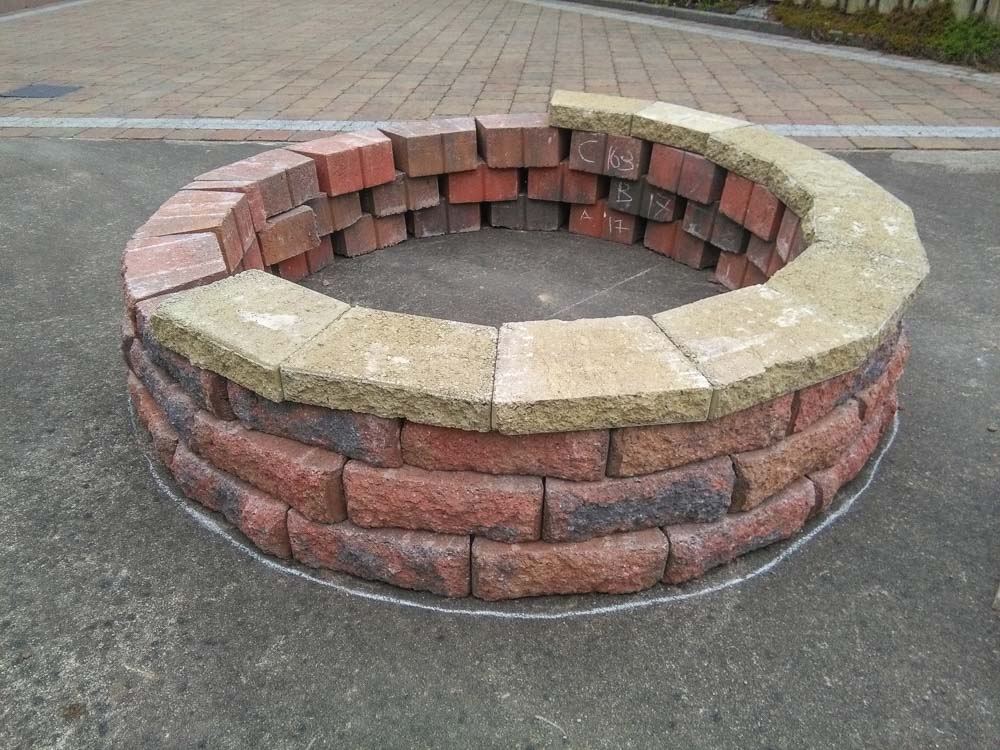
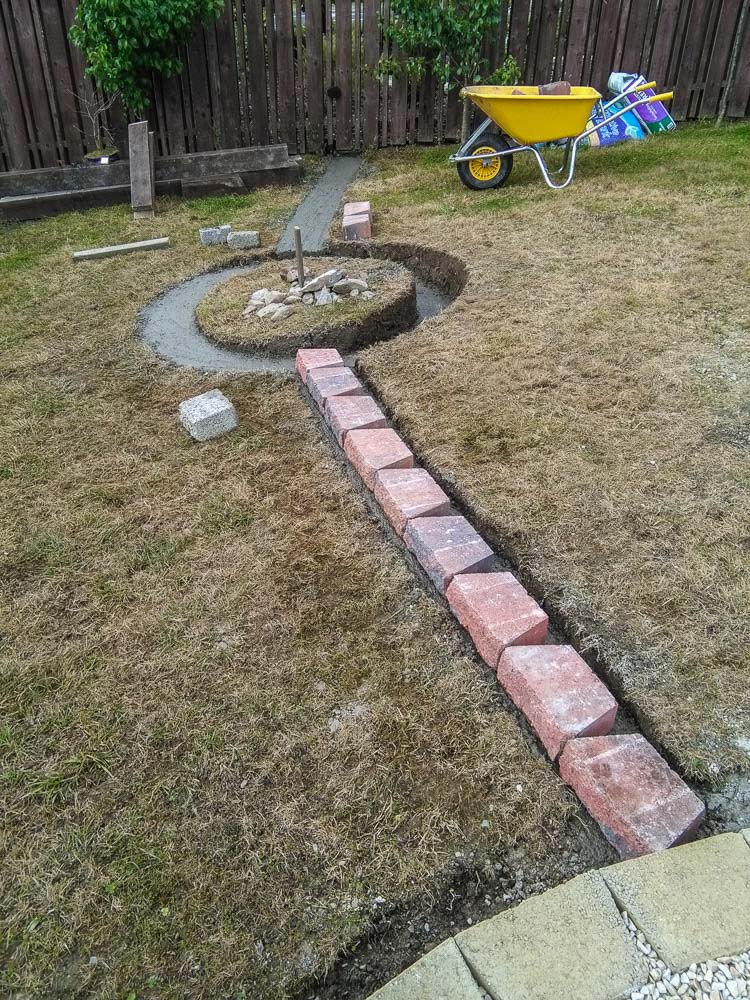
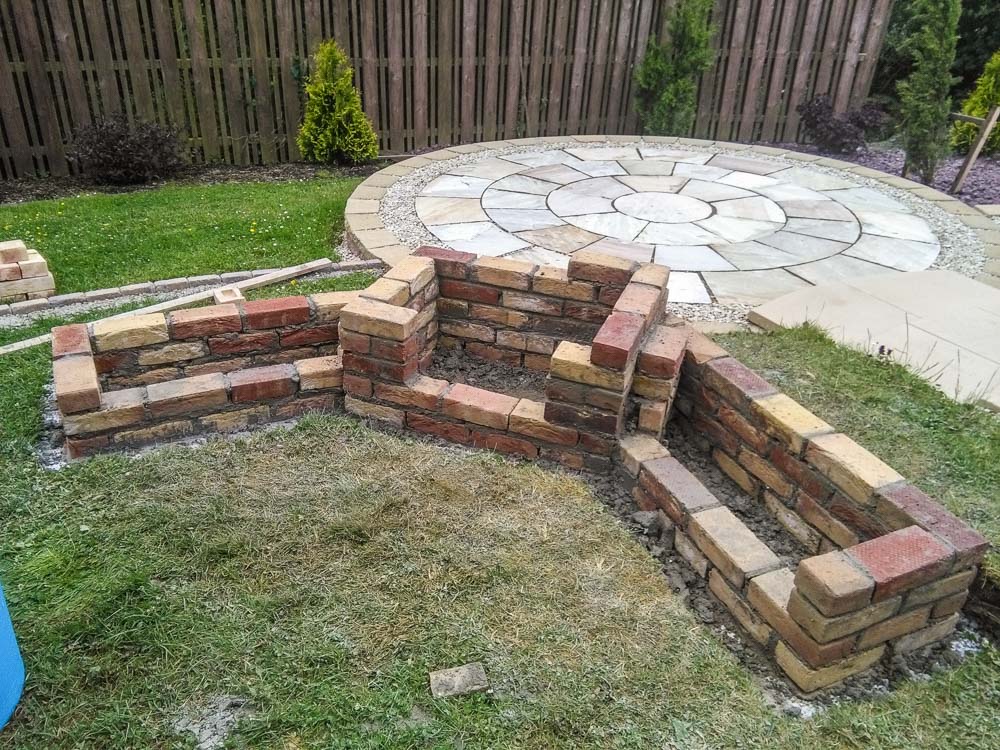
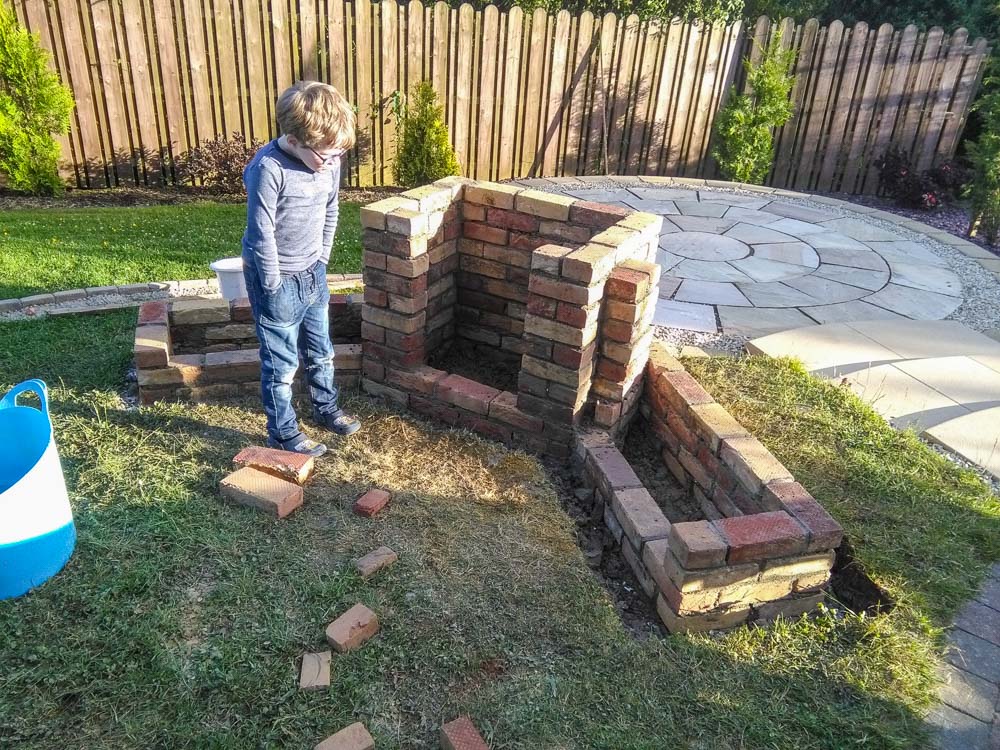
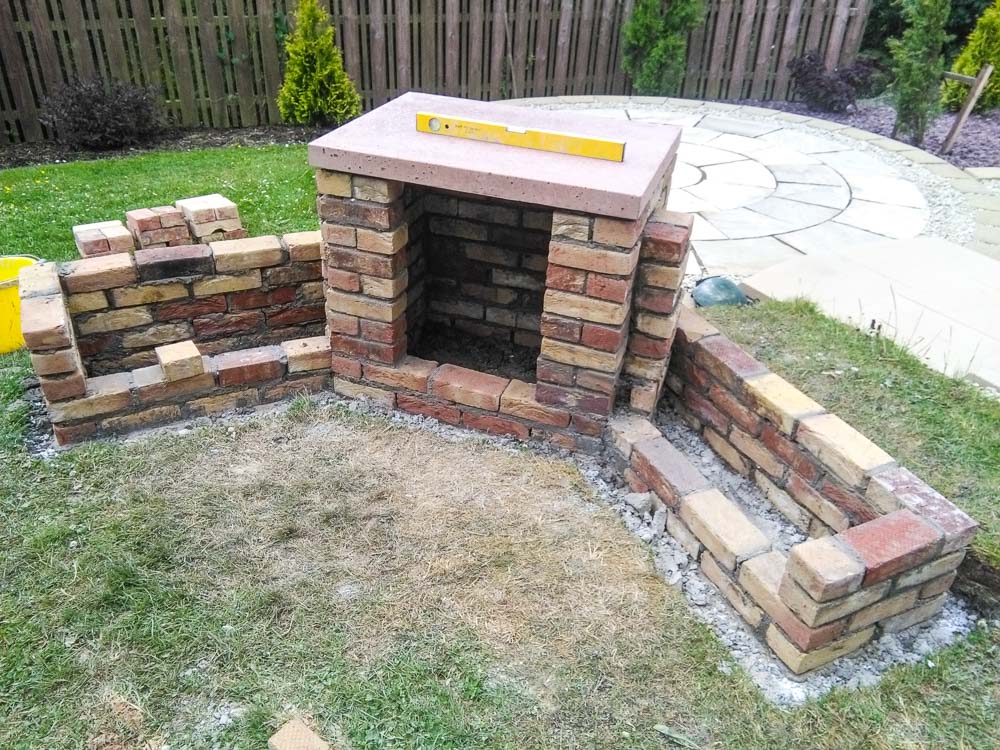
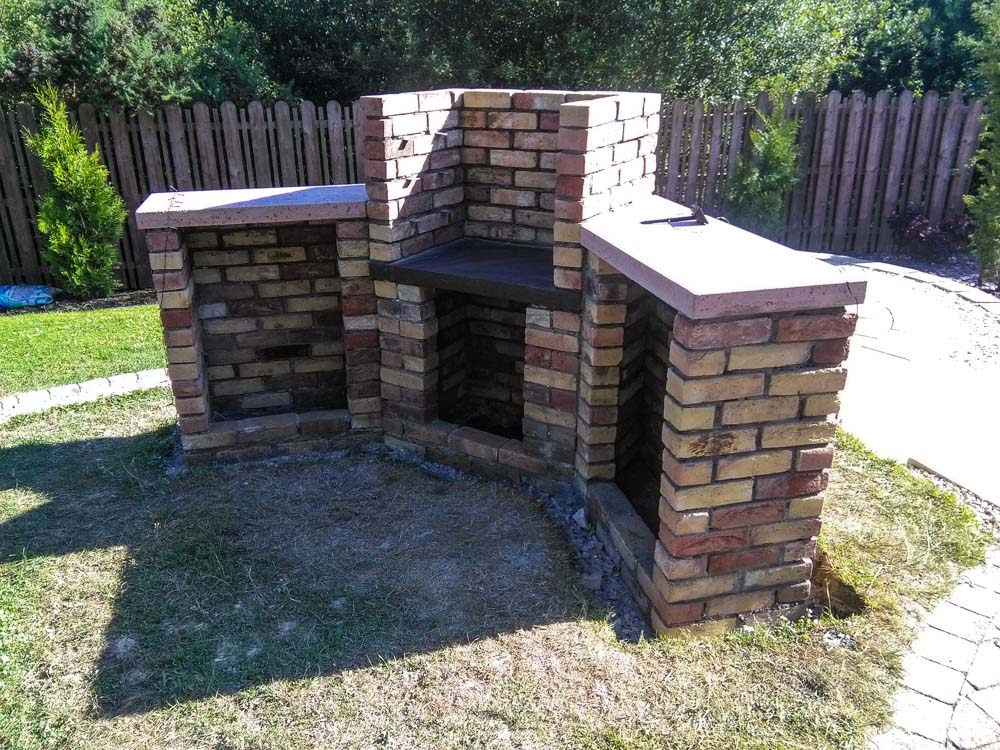
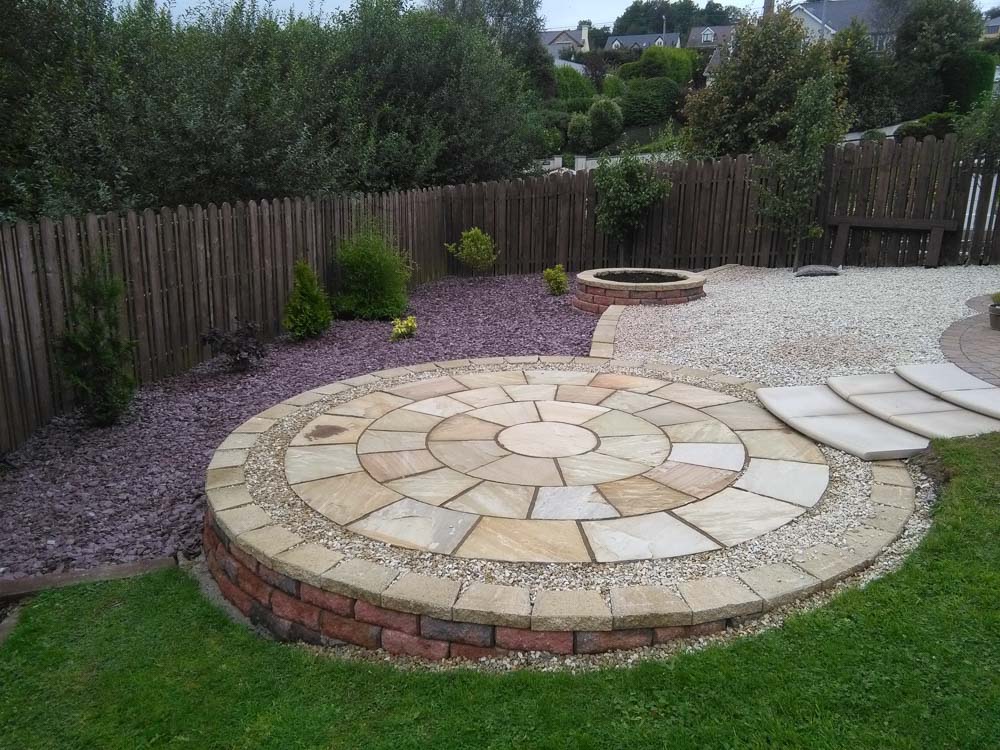
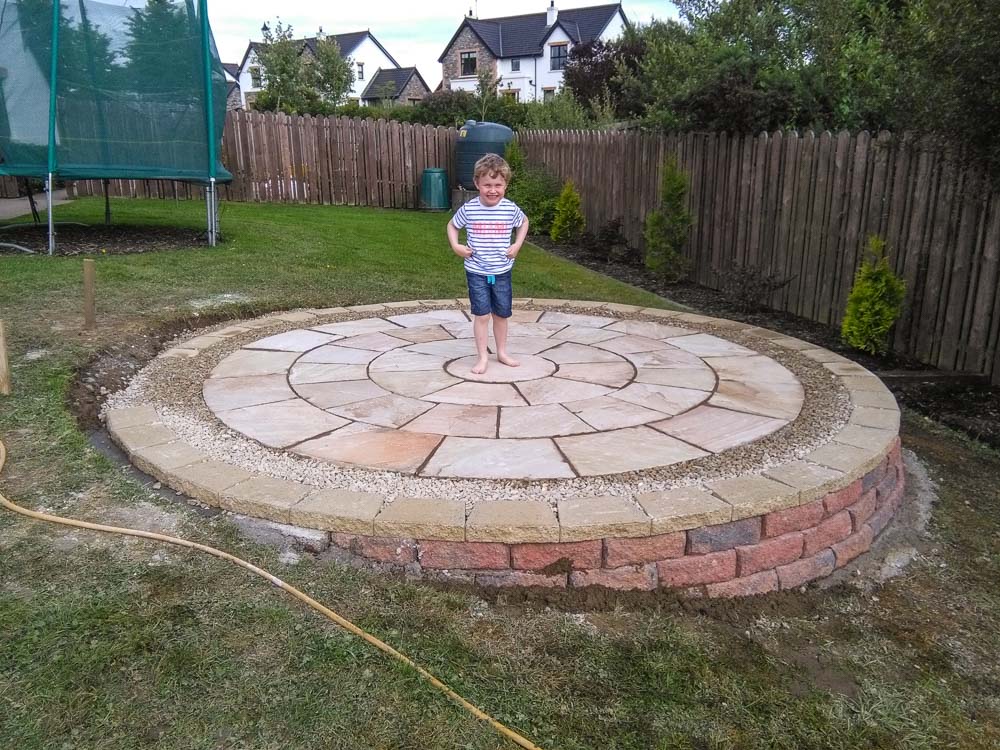
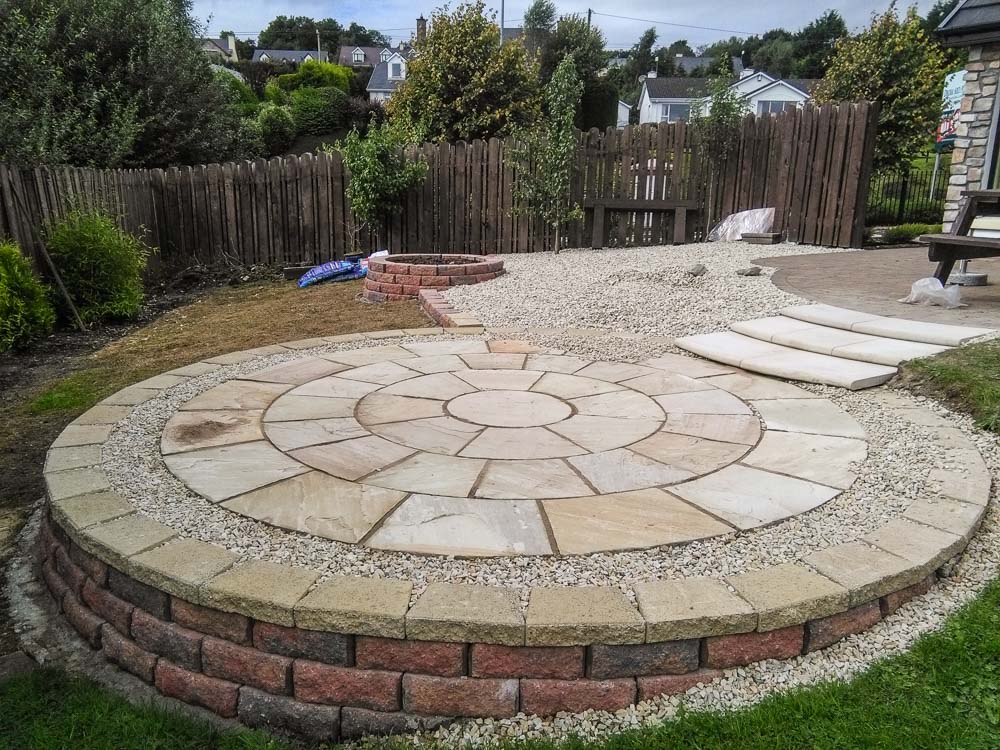
Once the excavating was done and the foundations were set, the rest was relatively easy. The circular stone paving slabs are sandstone, provided by a local quarry, and the brickwork is a morterless system, intended for low retaining walls.

planter planter image planter image planter image planter image planter image planter image planter image planter image

Herb planter build

I overestimated the amount of bricks needed for the patio (quantity surveying is not my strong point) and had enough left to create a herb planter. The project was very similar to the patio, but on a much smaller scale, thankfully. The patio was back-breaking work.

I also had enough to make a single long step, to help with the terracing. The upper section is covered with local quartz gravel, while the lower is covered in plum slate (at my wife's suggestion). I think the contrast worked out really well, especially with some planting. The uneven pavers in the last image come from the same quarry as the patio stones.

bbq image bbq image bbq image bbq image bbq image bbq image bbq image bbq image bbq image bbq image bbq image bbq image bbq image bbq image bbq image bbq image

Barbeque build

This build and some minor landscaping around it, has more or less brought the landscaping at the rear of the house to a finish. You can see the plans (and some errors I made) in the thumbnails. The images also show the process for pouring the reinforced concete slabs. These worked out well, although I didn't use nearly enough concrete dye and ended up painting the slabs in the end.

The arch and chimney were built around a wooden form, sadly, I've lost the images of that. The door and shelf are made from pressure treated fencing, with a walnut all weather stain to finish. The hinges and latch are black cast iron, courtesy of Amazon. The side facing the patio felt very tall and imposing, so I added a small planter for a clematic and some bedding flowers.

rose rose image rose image rose rose rose image rose image

Sandstone Rose

Local sculptor Redmond Herrity began teaching a stone carving course at LYIT. It was something I hadn't tried before and I found it both addictive and theraputic. Our first project was to carve this stone rose.

This form is a good introduction to carving as it combines sharp edges, curves, bowls and overhangs. Sandstone is quite soft and a good stone to begin with. All the work was carried out with a single small carbide chisel and a riffler and finished with sandpaper. The riffler is a sort of curved rasp, shaped somewhat like a spoon. It's invaluable in shaping and smoothing the bowls and curves.

The eight of us who took the class finished with an exhibition at An Grianán Theater, Letterkenny. It was opened by Patsaí Dan, the King of Tory.

rose workshop image workshop image workshop rose workshop image workshop image

Workshop Build

Tommy had given me this old school work bench a while back (on the right). The vices were really handy, but the work surface was a bit low. I raised it about four inches — high enough to be comfortable and also to act as a feed table for the table saw. At the same time I built the second bench on the left. Combined, they give me a good work surface and plenty of room underneath to store tools.

The cabinet is made from birch ply, a nice material to work with. It's very stable, has no voids and finishes well. The next project in here will be to get the shop vac properly plumbed in.

shelving shelving image shelving image shelving

Camera shelving unit

Some people know I collect old cameras. I particularly like the old rangefinders. I don't have anything too fancy — a twin lens Rolleiflex is probably the best of the collection. The lot range from 35mm slrs, through disk cameras, Brownies, rangefinders, polaroid to bellows medium format cameras.

In short, the place was getting cluttered with cameras. So I built this shelving unit to house some of them and get them out of the way. It's built from the same birch ply used in the workshop, stained black to match all the Ikea stuff in my office and finished with Polyurethane. The finished piece is 3 feet in diameter.

Walnut disk Walnut disk Walnut disk Walnut disk Walnut disk Walnut disk Walnut disk Walnut disk Walnut disk Walnut disk Walnut disk Walnut disk Walnut disk Walnut disk Walnut disk

Walnut Disk "Art"

This project was conceived mainly to use up some scrap birch ply left over from a previous project which was constantly getting in the way in the workshop. I used a router on a jig to make a perfect circle, then marked out a grid. The exterior circle marking was to set a boundary for drilling — any grid poins falling outside the boundary were not drilled.

A second jig helped ensure that the holes were drilled vertically. The disk was then sanded to 300 grit, multiple stains of Black Walnut and finished with Danish Oil. I made a final jig for cutting the dowels. These got gradually longer as they approach the centre of the disk. I tried a couple of test finishes on these — both Tung Oil and Danish Oil yellowed the dowels too much. I wanted to keep the high contrast between the pale dowels and the dark walnut. I eventually settled on polyurethane which hasn't yellowed as much.

Oak cabinet construction Oak Cabinet construction Oak Cabinet Drawer Oak Cabinet in situ Oak side Cabinet drawer insert Oak Cabinet construction Oak Cabinet construction Oak Cabinet construction Oak side Cabinet Oak side Cabinet

Oak Photographic cabinet

I built this to accomodate a growing collection of tripods, c-stands and general photographic equipment which was cluttering the office. It's a beast of a thing, almost 6 feet tall and 3 feet deep. The 9 cubbyholes take all the tripods, sliders and stands, with room for a few more. The larger sections are filled with general gear and equipment boxes.

It's built from Oak veneered mdf. I routered dadoes for all the shelf structures and glued it all together. The whole thing was sanded (gently) to 300 grit and finished with Tung oil. This is by far my favourite finish as it really makes the grain pop and gives a slightly translucent feel to the wood. It's a very slow process though, oiling, slow drying time, sanding and oiling again. I added the drawers and side shelves at a later date and finished these with Danish rather than Tung, as it has a much faster curing time.

There was just enough material left over to make the small cabinet in the last few pictures.